Getting Started Web Service
Install and configure Pritunl Zero to secure internal web services
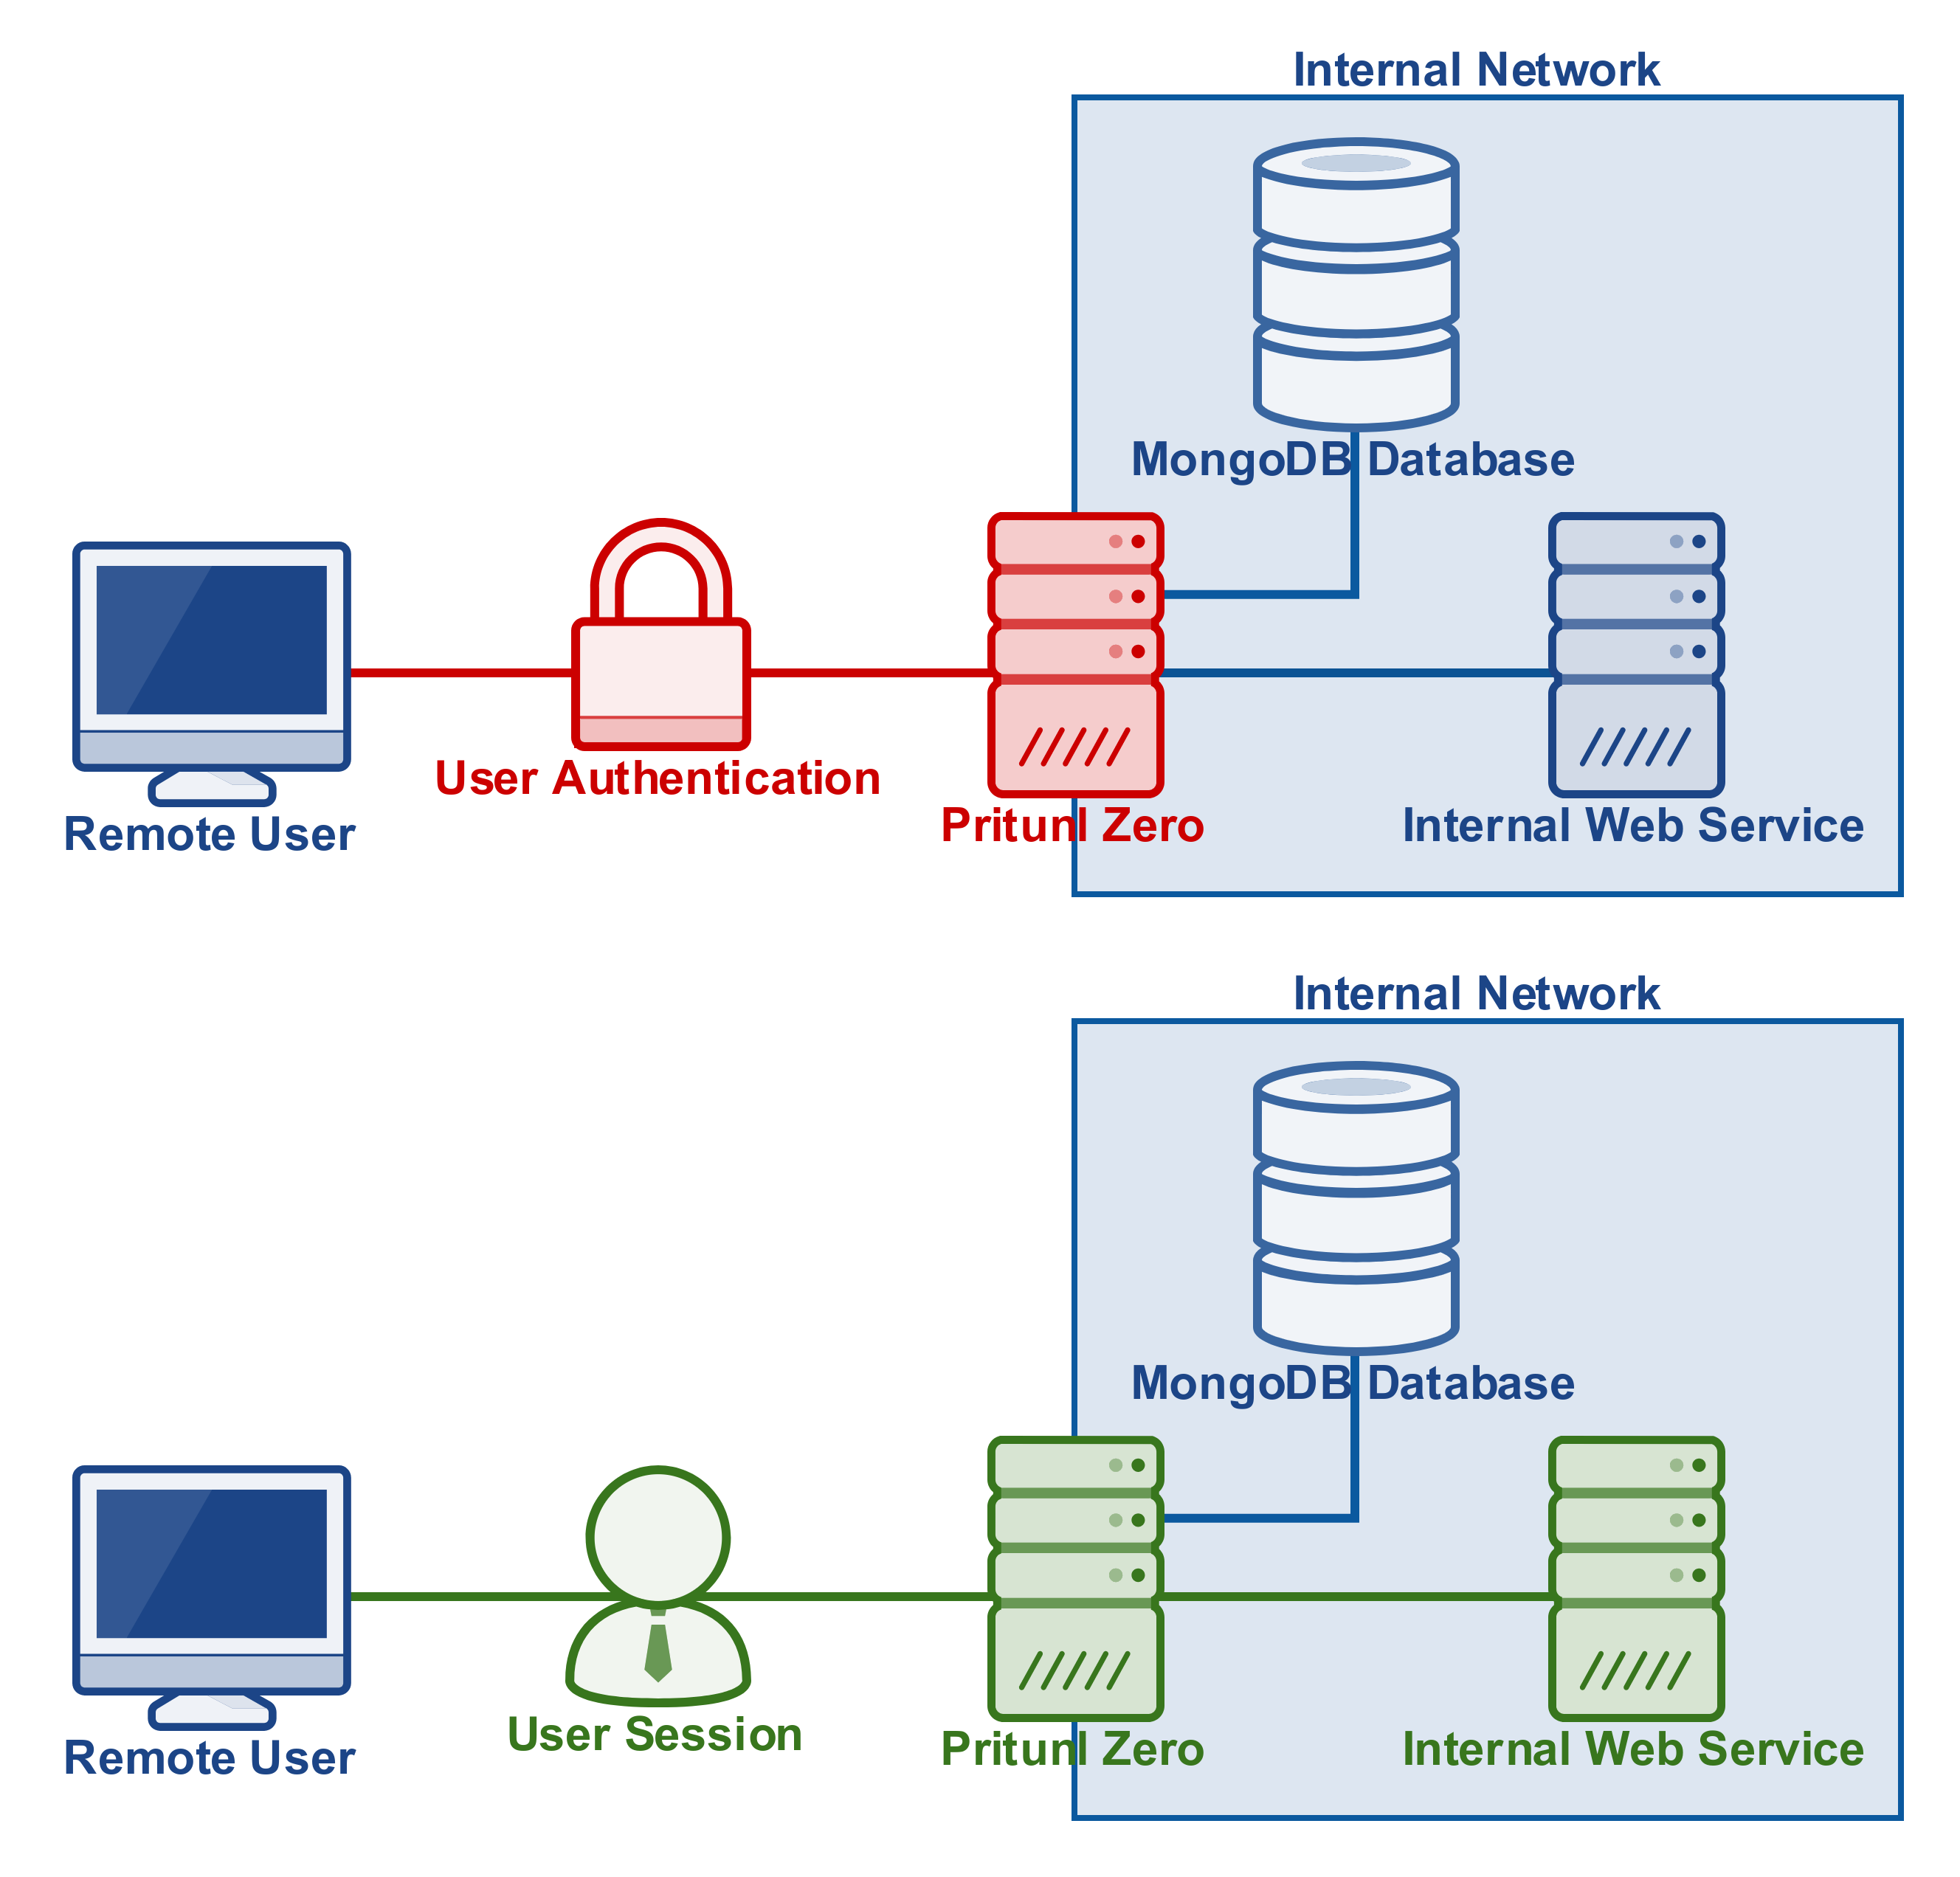
Pritunl Zero is a zero trust system that provides secure authenticated access to internal services from untrusted networks without the use of a VPN. Below is a tutorial for installing and configuring a single Pritunl Zero instance.
Refer to the Getting Started SSH for configuring Pritunl Zero for SSH authentication with SSH certificates.
Refer to the Pritunl Zero Gitlab tutorial for securing Gitlab with Pritunl Zero.
Create DNS Records
Create two DNS records pointing to the public IP address of the Pritunl Zero server. In this tutorial the domains used will be zero.pritunl.net and zeros.pritunl.net. The first domain will be used to access the management console and the second domain will be for accessing the internal service. Configure the firewall to open ports 80 and 443. Port 80 must be open to all IP addresses for the Lets Encrypt certificate.
Install
Pritunl Zero is packaged for several Linux distributions, below are the commands for each distribution. This will install both MongoDB and Pritunl Zero then start the services. If multiple hosts are being configured or the MongoDB server is not being run on the same server skip the steps installing MongoDB.
Follow theMongoDB Authentication documentation for configuring authentication.
sudo tee /etc/yum.repos.d/pritunl.repo << EOF
[pritunl]
name=Pritunl Repository
baseurl=https://repo.pritunl.com/stable/yum/almalinux/9/
gpgcheck=1
enabled=1
gpgkey=https://raw.githubusercontent.com/pritunl/pgp/master/pritunl_repo_pub.asc
EOF

sudo tee /etc/yum.repos.d/mongodb-org.repo << EOF
[mongodb-org]
name=MongoDB Repository
baseurl=https://repo.mongodb.org/yum/redhat/9/mongodb-org/8.0/x86_64/
gpgcheck=1
enabled=1
gpgkey=https://pgp.mongodb.com/server-8.0.asc
EOF

sudo yum -y install pritunl-zero mongodb-org
sudo systemctl start mongod pritunl-zero
sudo systemctl enable mongod pritunl-zero
sudo tee /etc/yum.repos.d/pritunl.repo << EOF
[pritunl]
name=Pritunl Repository
baseurl=https://repo.pritunl.com/stable/yum/oraclelinux/9/
gpgcheck=1
enabled=1
gpgkey=https://raw.githubusercontent.com/pritunl/pgp/master/pritunl_repo_pub.asc
EOF
sudo tee /etc/yum.repos.d/mongodb-org.repo << EOF
[mongodb-org]
name=MongoDB Repository
baseurl=https://repo.mongodb.org/yum/redhat/9/mongodb-org/8.0/x86_64/
gpgcheck=1
enabled=1
gpgkey=https://pgp.mongodb.com/server-8.0.asc
EOF
sudo yum -y install pritunl-zero mongodb-org
sudo systemctl start mongod pritunl-zero
sudo systemctl enable mongod pritunl-zerosudo tee /etc/apt/sources.list.d/pritunl.list << EOF
deb [ signed-by=/usr/share/keyrings/pritunl.gpg ] https://repo.pritunl.com/stable/apt noble main
EOF
sudo tee /etc/apt/sources.list.d/mongodb-org.list << EOF
deb [ signed-by=/usr/share/keyrings/mongodb-server-8.0.gpg ] https://repo.mongodb.org/apt/ubuntu noble/mongodb-org/8.0 multiverse
EOF
curl -fsSL https://raw.githubusercontent.com/pritunl/pgp/master/pritunl_repo_pub.asc | sudo gpg -o /usr/share/keyrings/pritunl.gpg --dearmor --yes
curl -fsSL https://www.mongodb.org/static/pgp/server-8.0.asc | sudo gpg -o /usr/share/keyrings/mongodb-server-8.0.gpg --dearmor --yes
sudo apt update
sudo apt --assume-yes install pritunl-zero openvpn mongodb-org
sudo systemctl start mongod pritunl-zero
sudo systemctl enable mongod pritunl-zeroIncrease Open File Limit
Increasing the open file limit will allow more idle/active HTTP connections and improve the reliability of the server. Run the commands below and restart the server.
sudo sh -c 'echo "* hard nofile 100000" >> /etc/security/limits.conf'
sudo sh -c 'echo "* soft nofile 100000" >> /etc/security/limits.conf'
sudo sh -c 'echo "root hard nofile 100000" >> /etc/security/limits.conf'
sudo sh -c 'echo "root soft nofile 100000" >> /etc/security/limits.conf'
Configure MongoDB
If multiple hosts are being run or MongoDB is run on a different server the MongoDB URI must be set. The command below will set the MongoDB URI. The service then needs to be restarted using the distributions init system. The MongoDB URI should be quoted.
sudo pritunl-zero mongo "mongodb://user:pass@domain.mongodb:27017/pritunl-zero?ssl=true&authSource=admin"Initial Login
Open the web console running on HTTPS port 443. Run sudo pritunl-zero default-password to get the default password.
Create Certificate
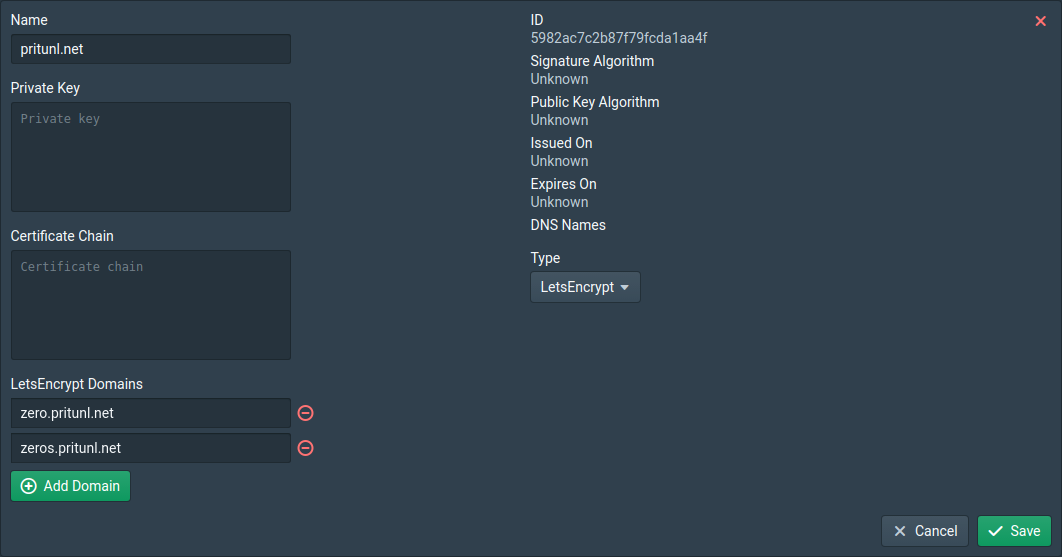
Click on Certificates and create a new certificate. Change the Type to LetsEncrypt then add the two domains created in the first step. This will require port 80 to be open to all IP addresses. The two domains must also point to the Pritunl Zero server. After clicking Save the certificate information should show up.
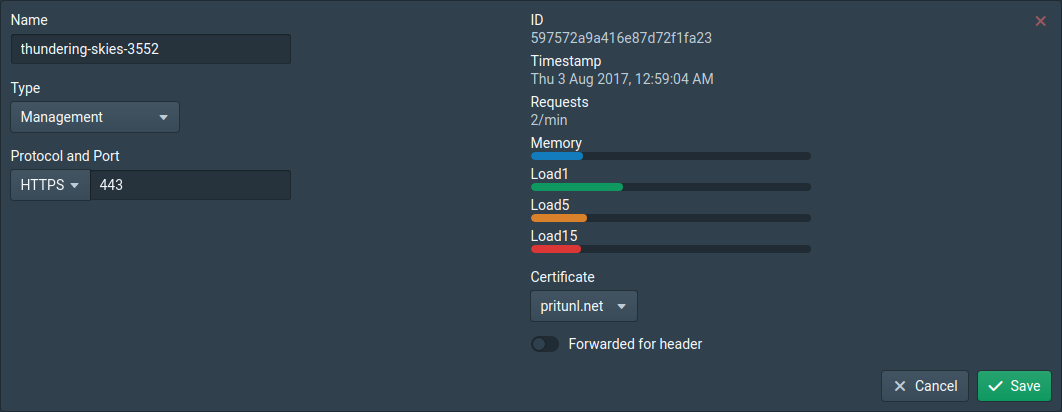
Next go to the Nodes and select the certificate created above. Then click Save and wait a few seconds for the web server to reload the certificate then refresh the page. You may need to close and reopen the page for Chrome to correctly show the certificate as valid.
Create Service
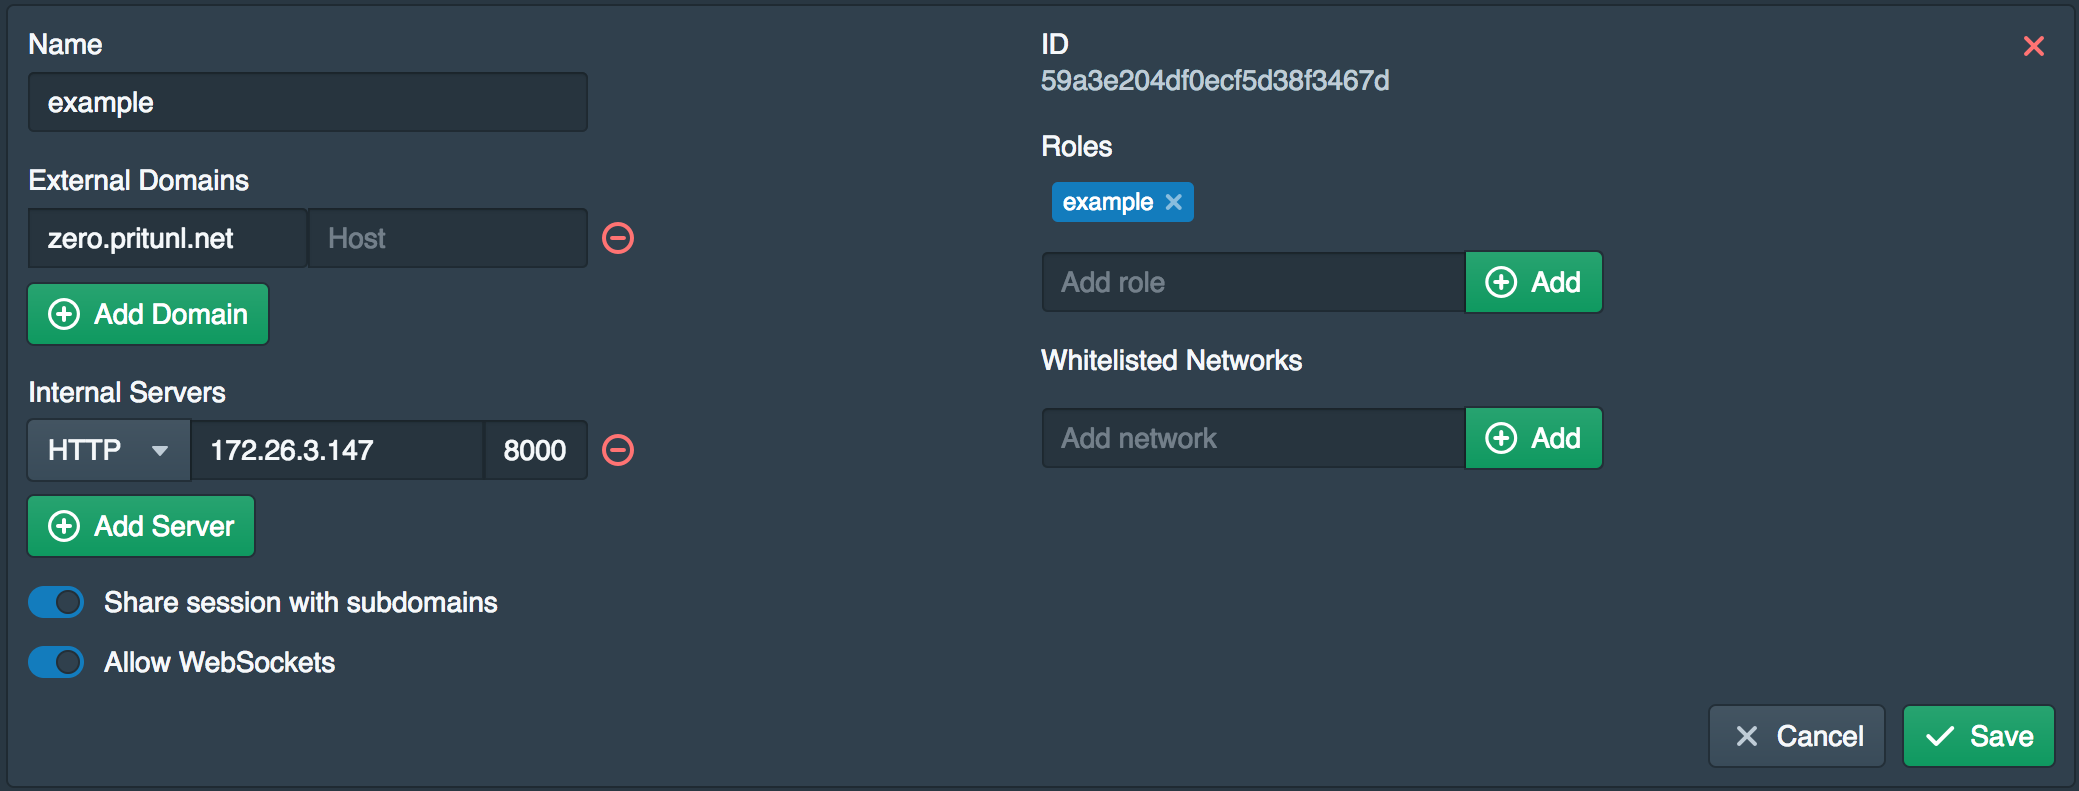
Click on Services and create a new service. Add an External Domain and set the Domain to the second DNS record that was created in the first step. Then add an Internal Server and set the Hostname to an IP address or domain of an internal web service. Some services will be expecting a specific host, if needed fill in the Host field. If a domain is used instead of an IP address with HTTPS it must have a valid certificate. Next add the Role example. If you are using multiple level sub-domains or you are having issues logging into a service you will need to disable Share session with subdomains.
Add Service to Node
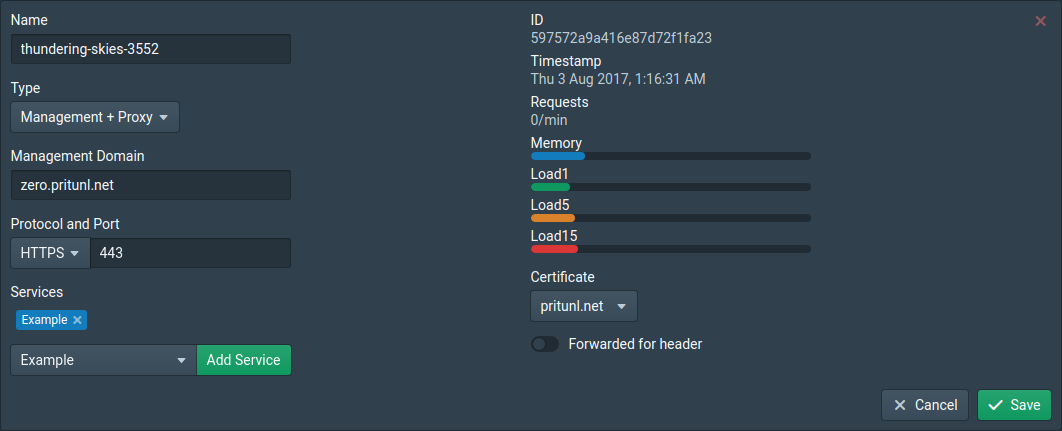
Open the Nodes and change the node Type to Management + Proxy and set the Management Domain to the first DNS record created in the first step. It is important to correctly configure the domain as the management console will only be available from that domain once saved. If incorrectly configured the command sudo pritunl reset-id can be used to reset the node settings. The pritunl-zero service must be restarted after running this command. Next add the service created above and click Save If you are using a load balancer enable Forwarded for header and use the /check handler on port 80.
Create Test User
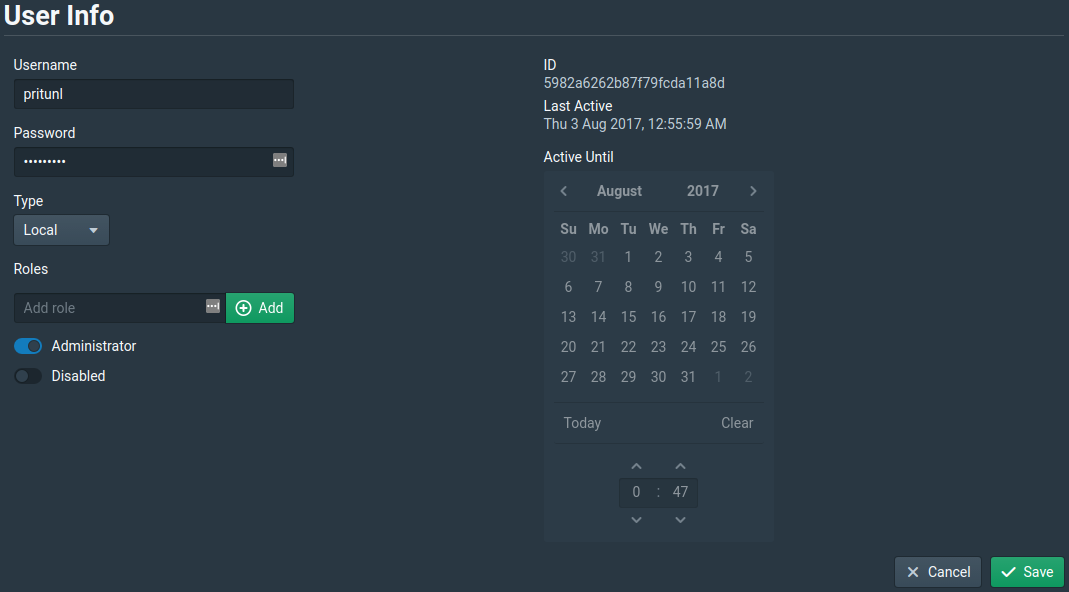
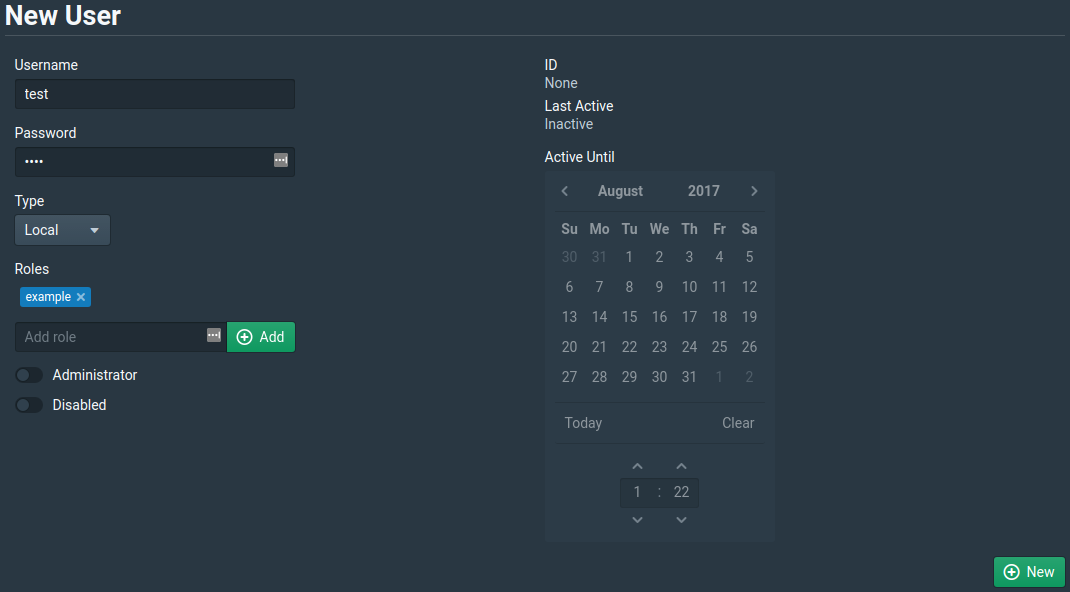
Open the Users and create a new user. Give the user a username and password then add the role that was added to the service above.
Test Service
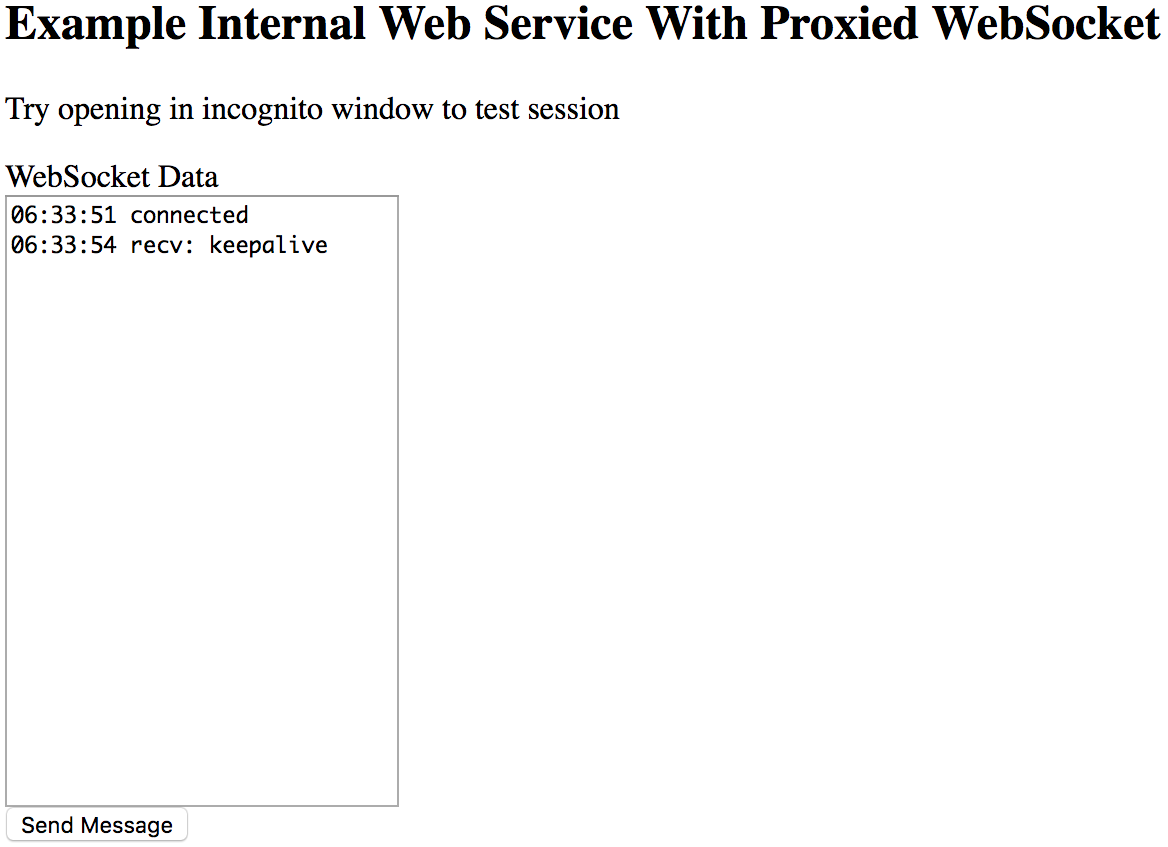
Open an incognito window and go to the service domain set above. Login with the test user created above. After logging in the internal service should be available. The user will be able to access the service until the session expires.
Updated 3 months ago
