Configuration
Initial configuration of Pritunl
Increase Open File Limit
Run the commands below to increase the open file limit on the server. This will prevent connections issues on servers with high load. This should also be done on the MongoDB server. Use the command sudo lsof -p `pgrep pritunl-web` | wc -l to check the file count for the Pritunl web server.
sudo sh -c 'echo "* hard nofile 64000" >> /etc/security/limits.conf'
sudo sh -c 'echo "* soft nofile 64000" >> /etc/security/limits.conf'
sudo sh -c 'echo "root hard nofile 64000" >> /etc/security/limits.conf'
sudo sh -c 'echo "root soft nofile 64000" >> /etc/security/limits.conf'
Routing on AWS and Google Cloud
Many Pritunl configurations will require the instances to route traffic to different networks. By default this will be blocked by the source/dest check (AWS) or fowarding option (Google) and should be disabled (AWS) or enabled (Google) to avoid issues. This can be done on AWS in the Network Interfaces panel in the EC2 dashboard. For Google Cloud the forwarding option can be found in the network options when creating the instance.
Database Setup
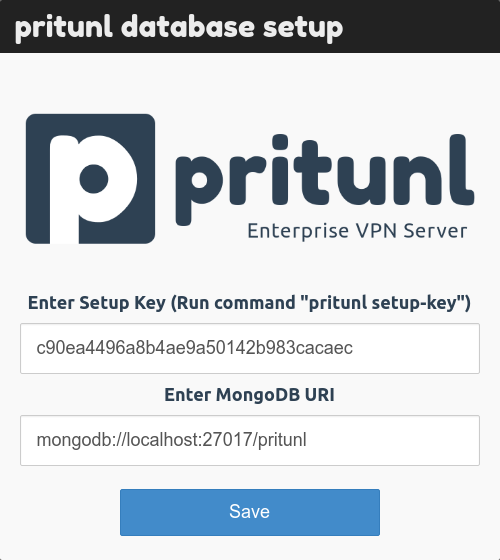
When Pritunl starts for the first time a database setup prompt will be shown on the web server running on port 443. The database setup will prompt for a setup key and MongoDB URI. To get the setup key ssh on to the server and run the command sudo pritunl setup-key this will return the setup key. By default the MongoDB URI will be filled with the URI for the localhost MongoDB server. This should be left as it is when the MongoDB server is running on the same server as the Pritunl instance. For Enterprise clusters refer to the MongoDB documentation for Connection String URI Format. Alternatively this can be set directly in the /etc/pritunl.conf file or using the cli command. More information on the cli command can be found in the Commands sections. Some MongoDB servers authenticate on the admin database and require the option authSource=admin to be included in the URI.

Database Security
If you are using SSL with MongoDB the ssl option must be added to the database uri. The ssl_ca_certs is also available for using a custom CA when connecting to the database. Below are examples using SSL.
mongodb://example.com/?ssl=true
mongodb://example.com/?ssl=true&ssl_ca_certs=/path/to/ca.pem
Initial Setup
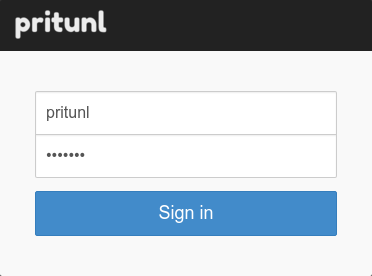
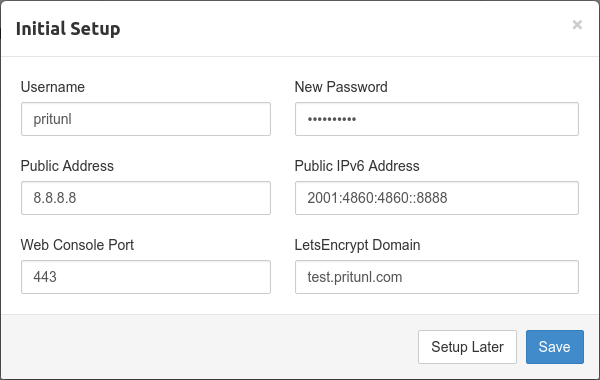
After the MongoDB database uri has been configured the web console will display the login dialog. The default username is pritunl, run sudo pritunl default-password to get the default password. After signing in the initial setup dialog will be shown. This will allow changing the username and password. The Pritunl servers public address will be automatically detected and should not need to be changed. For generating a signed SSL certificate refer to the LetsEncrypt SSL Certificate section.


Changing Web Console Port
The web console server runs on port 443 by default. An additional web server runs on port 80 for LetsEncrypt verification and redirecting HTTP requests to HTTPS. The web console server port can be changed in the Settings inside the web console or by running the command pritunl set app.server_port 443. To disable the web server on port 80 run the command pritunl set app.redirect_server false this will also prevent the use of LetsEncrypt certificates. The web server that runs during the initial setup for Pritunl also uses port 443 this can be changed by modifying /etc/pritunl.conf.
Security
For environments where high security is needed refer to the Securing Pritunl and Securing MongoDB sections.
Enterprise Cluster Configuration
If you are creating a Pritunl cluster with multiple hosts first activate the license on the host configured above. Then repeat the database setup step above with each host. When a new host connects to the database all other hosts will automatically be aware of the new host. No additional configuration is needed.
Connecting
Updated 3 months ago
