Auth0 Single Sign-On
Configure single sign-on with Auth0
Pritunl Zero supports single sign-on with Auth0. The Auth0 authorization extension is used to assign roles to users.
Auth0 Application
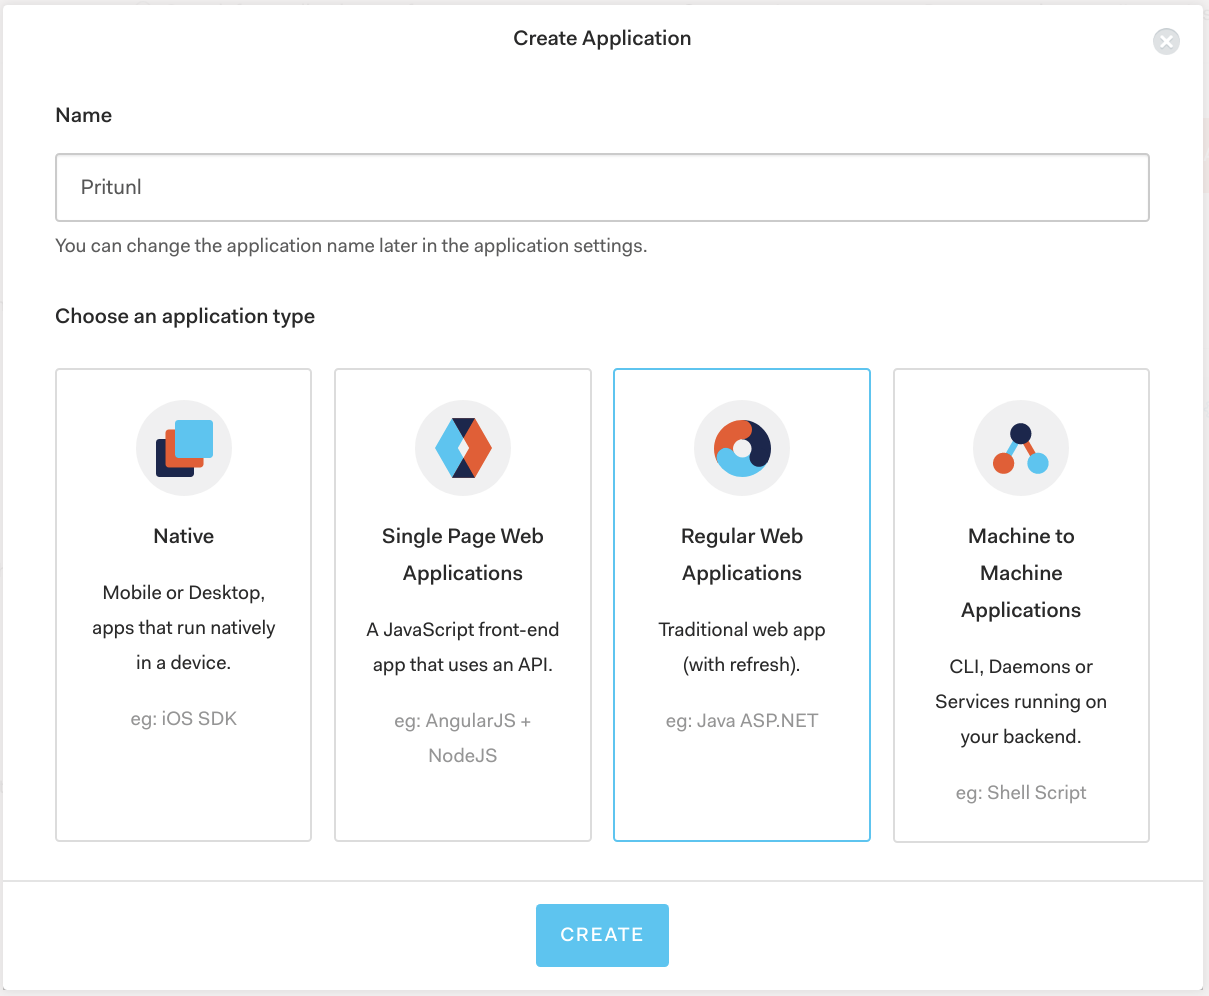
Open the auth0 dashboard and click Applications then select Create Application. Name the application Pritunl and select Regular Web Applications.
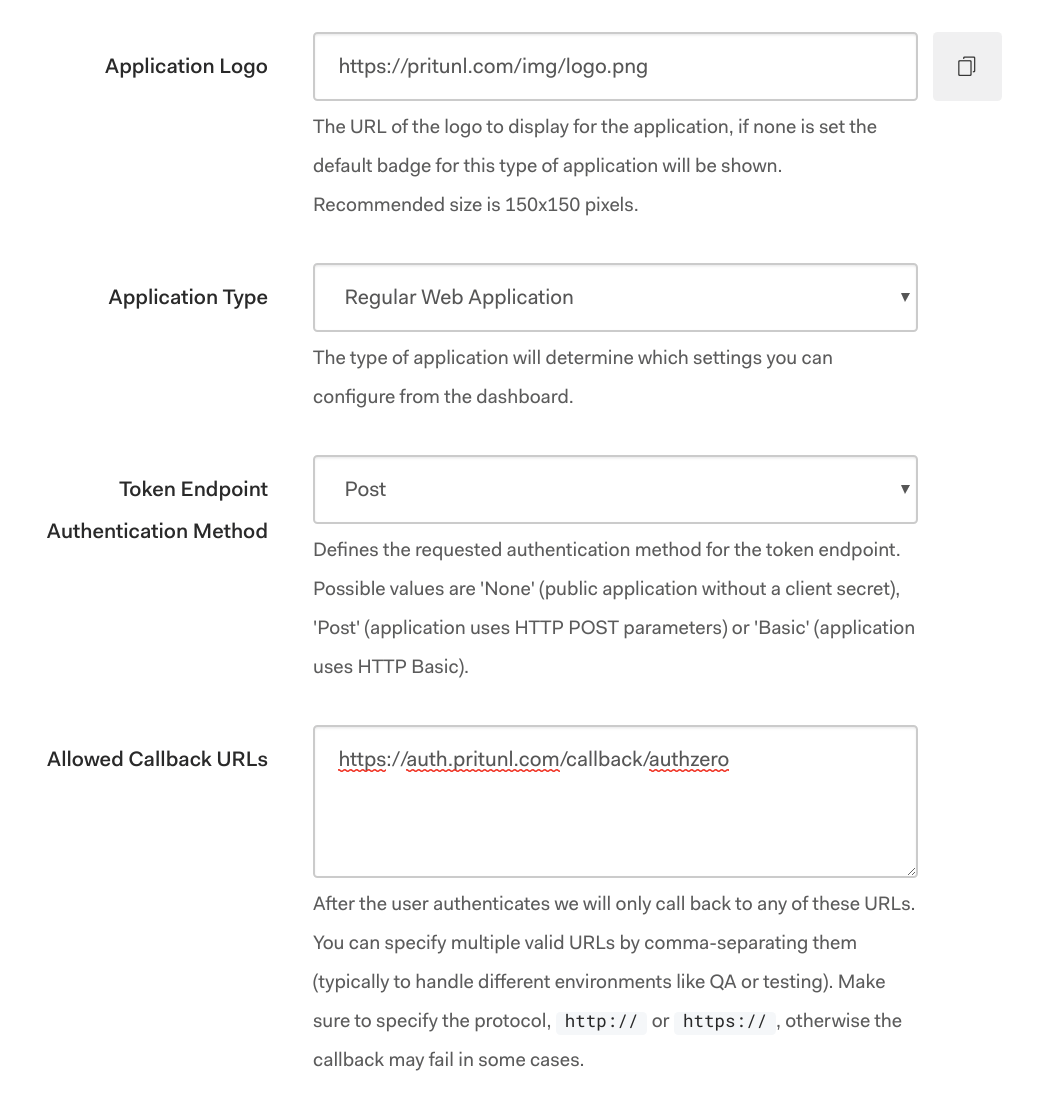
In the application settings set the Application Logo to https://pritunl.com/img/logo.png then set the Allowed Callback URLs to https://auth.pritunl.com/callback/authzero. Once done click Save Changes.
Auth0 Management API
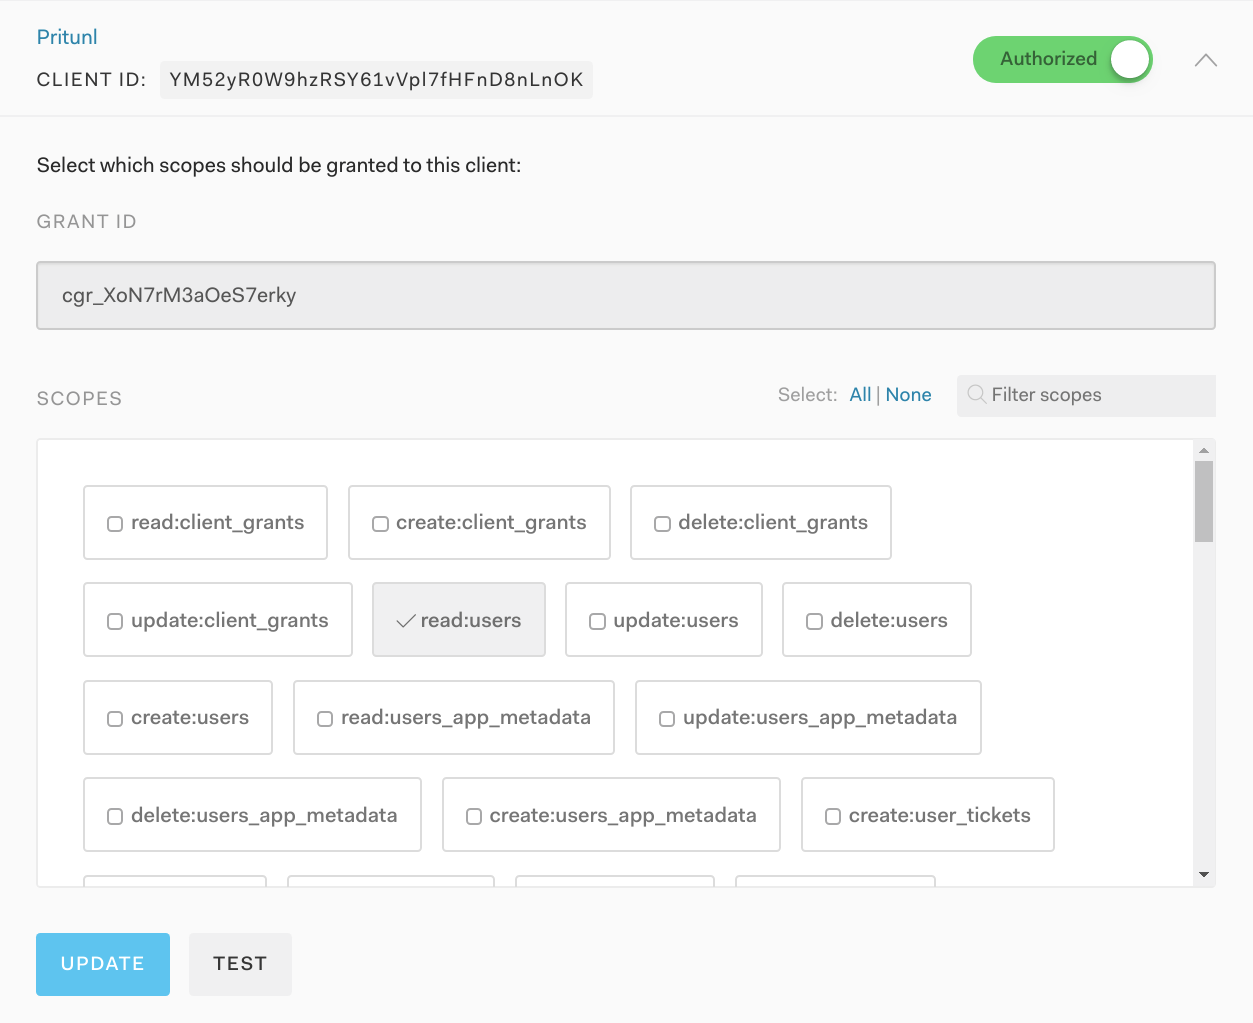
Open the APIs tab in the Auth dashboard then select Auth0 Management API and open the Machine to Machine Applications tab. Then enable the Authorized for Pritunl. In the drop down menu enable the read:users scope. Once done click Update.
Authorization Extension
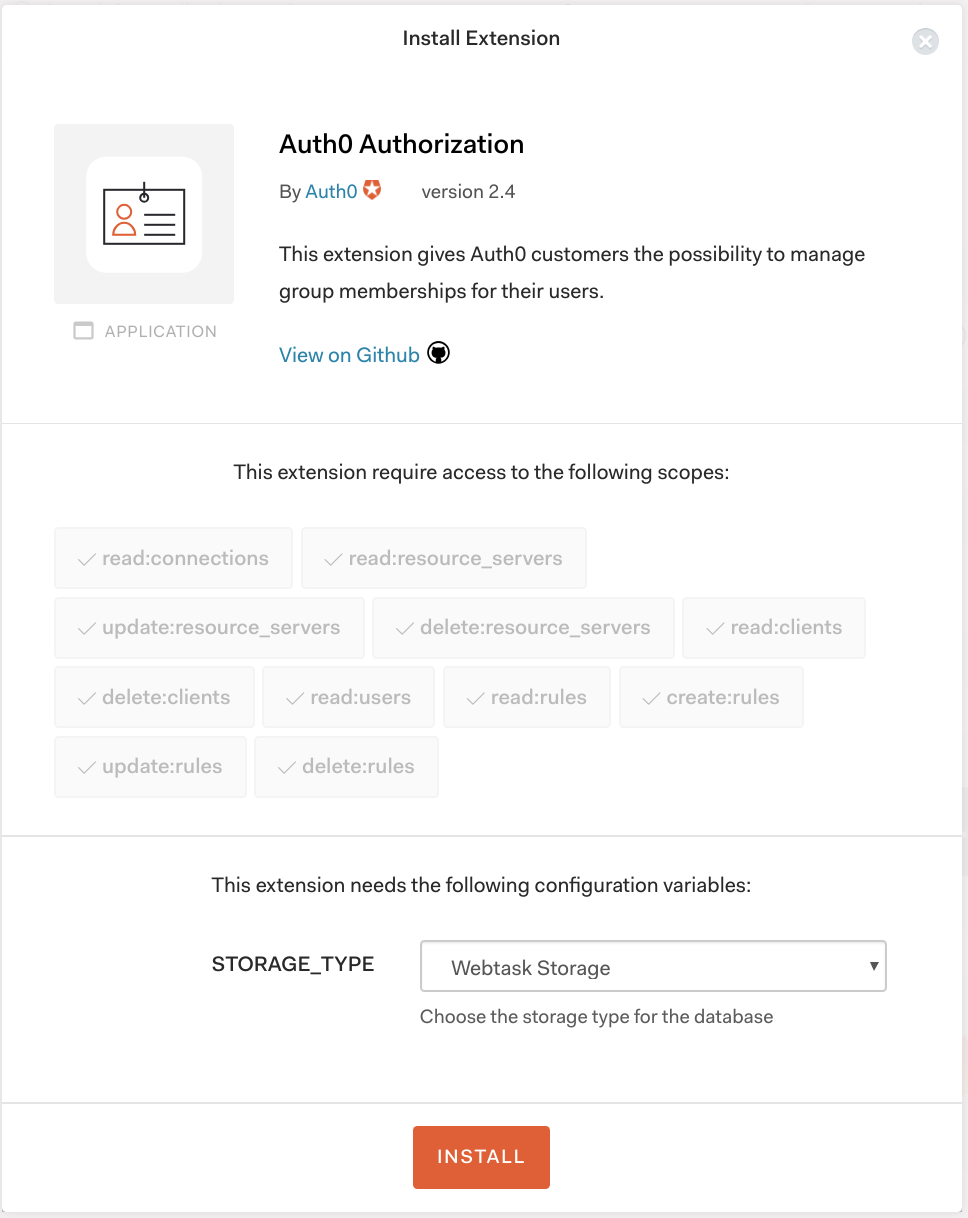
If the authorization extension already exists skip the first step to create it. In the Extensions tab of the Auth0 dashboard click All Extensions and select Auth0 Authorization. Then select install.
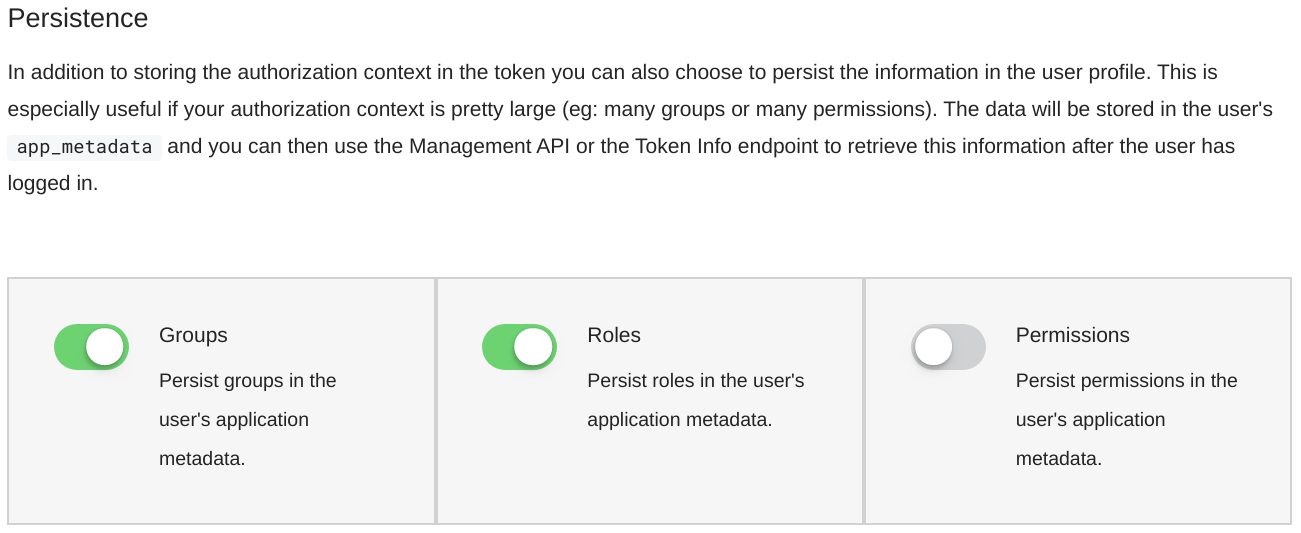
Click on the Auth0 Authorization extension to open the extension dashboard. Then in the top right menu click Configuration. At the bottom of the configuration page enable Groups and Roles in the Persistence section. Then at the top click Publish Rule.
Configure Pritunl Zero
Open the Applications section in the Auth0 dashboard and select the Pritunl application. Click Reveal client secret and copy the Client ID and Client Secret.
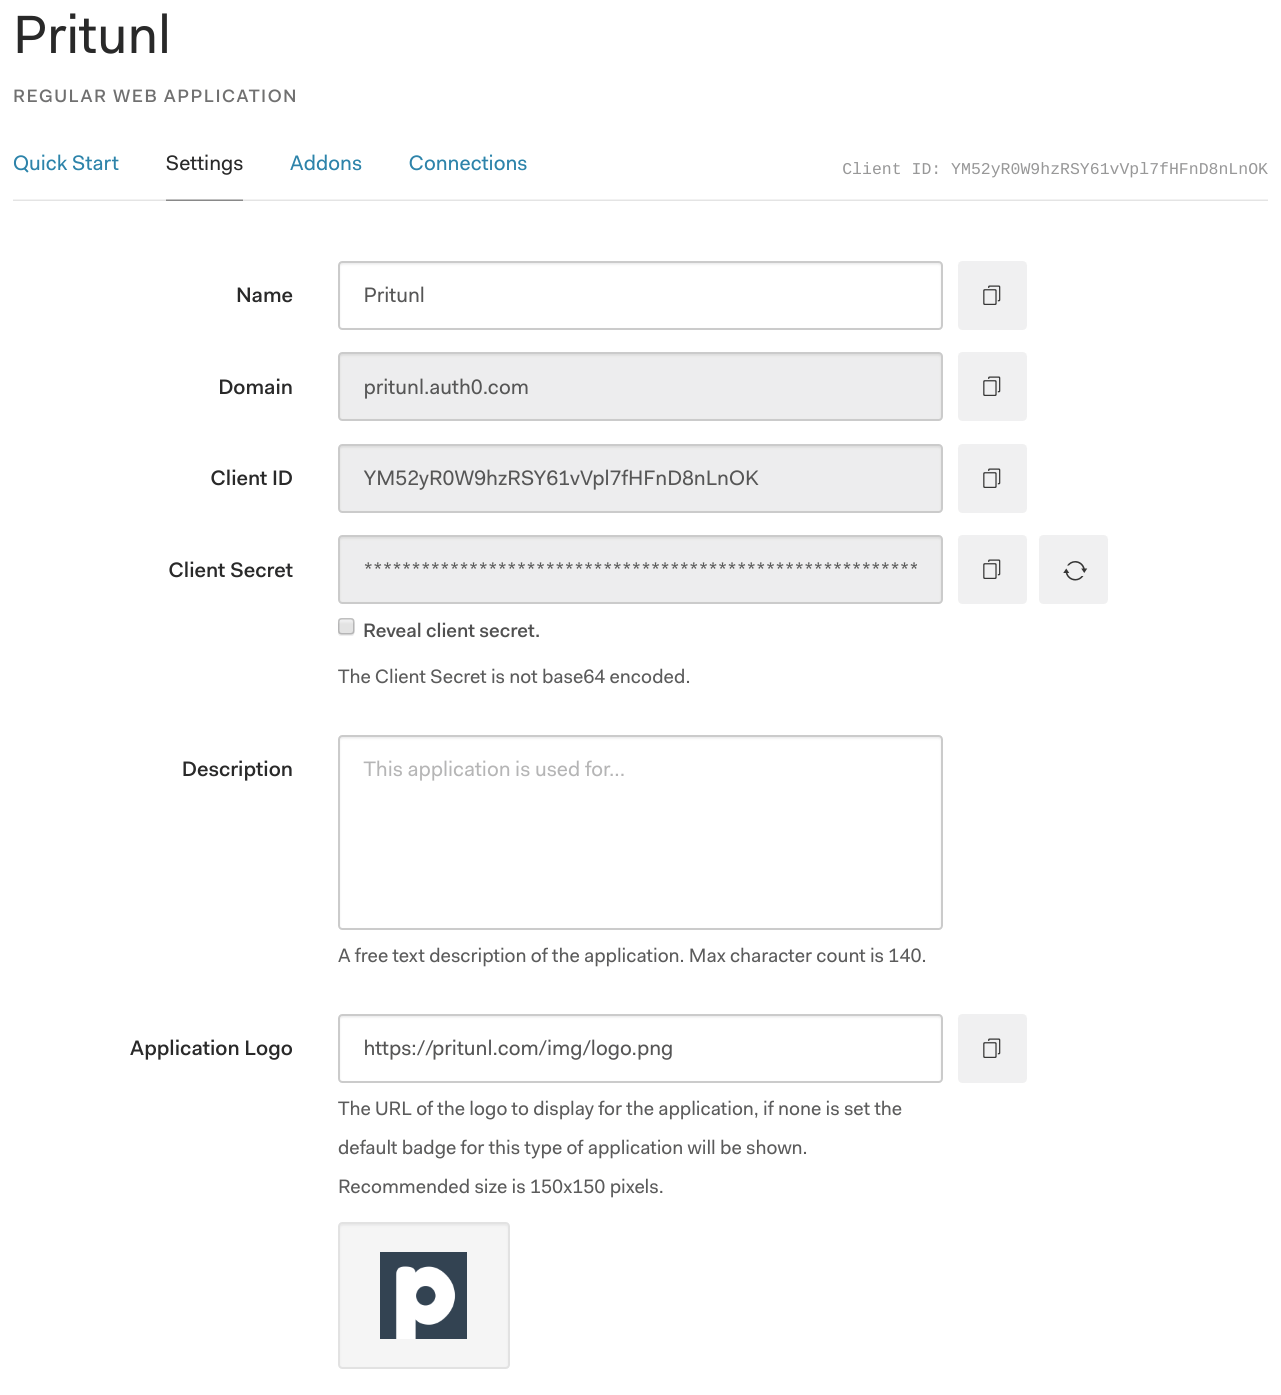
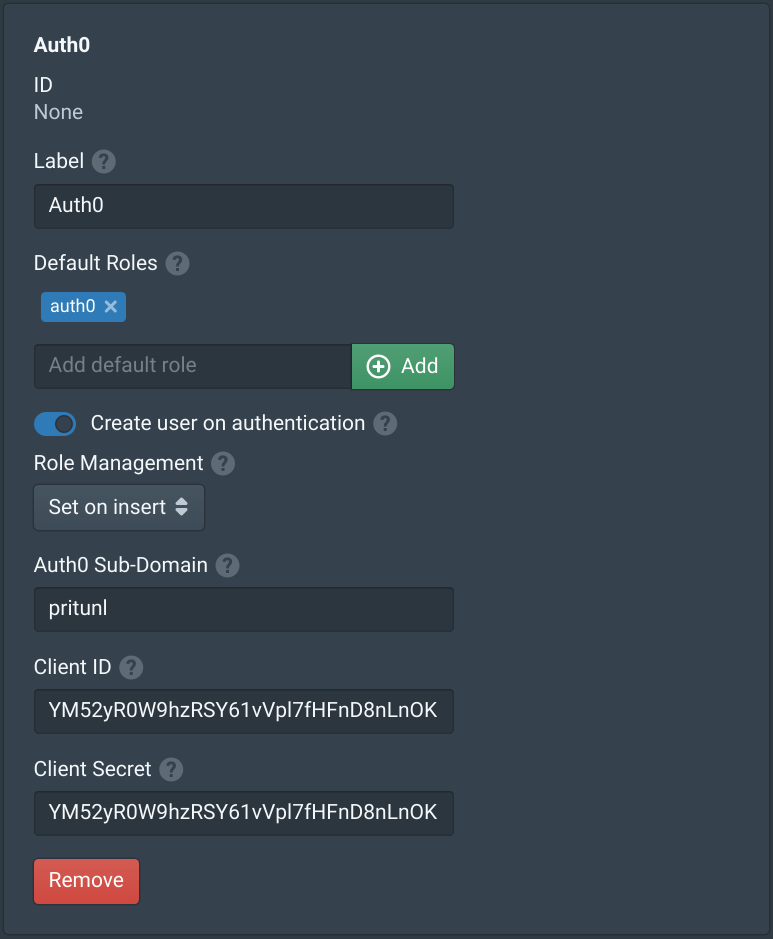
In the Pritunl Zero management interface open the Settings tab and select Auth0 in the provider list then click Add Provider. Set the Provider Label to Auth0 and add default roles. By default the Auth0 roles will only be set to the Pritunl Zero user on the first login, to change select a different Role Management. Then enter the Auth0 Sub-Domain. It must be the first portion of the Auth0 domain excluding the Auth0 domain, this domain is shown in the application settings page above. For this example configuration the domain is pritunl. Then copy the Client ID and Client Secret from the step above. Once done click Save.
Updated 3 months ago
