Azure
Pritunl Link client on Azure
For a more detailed tutorial refer toSite-to-Site with IPsec
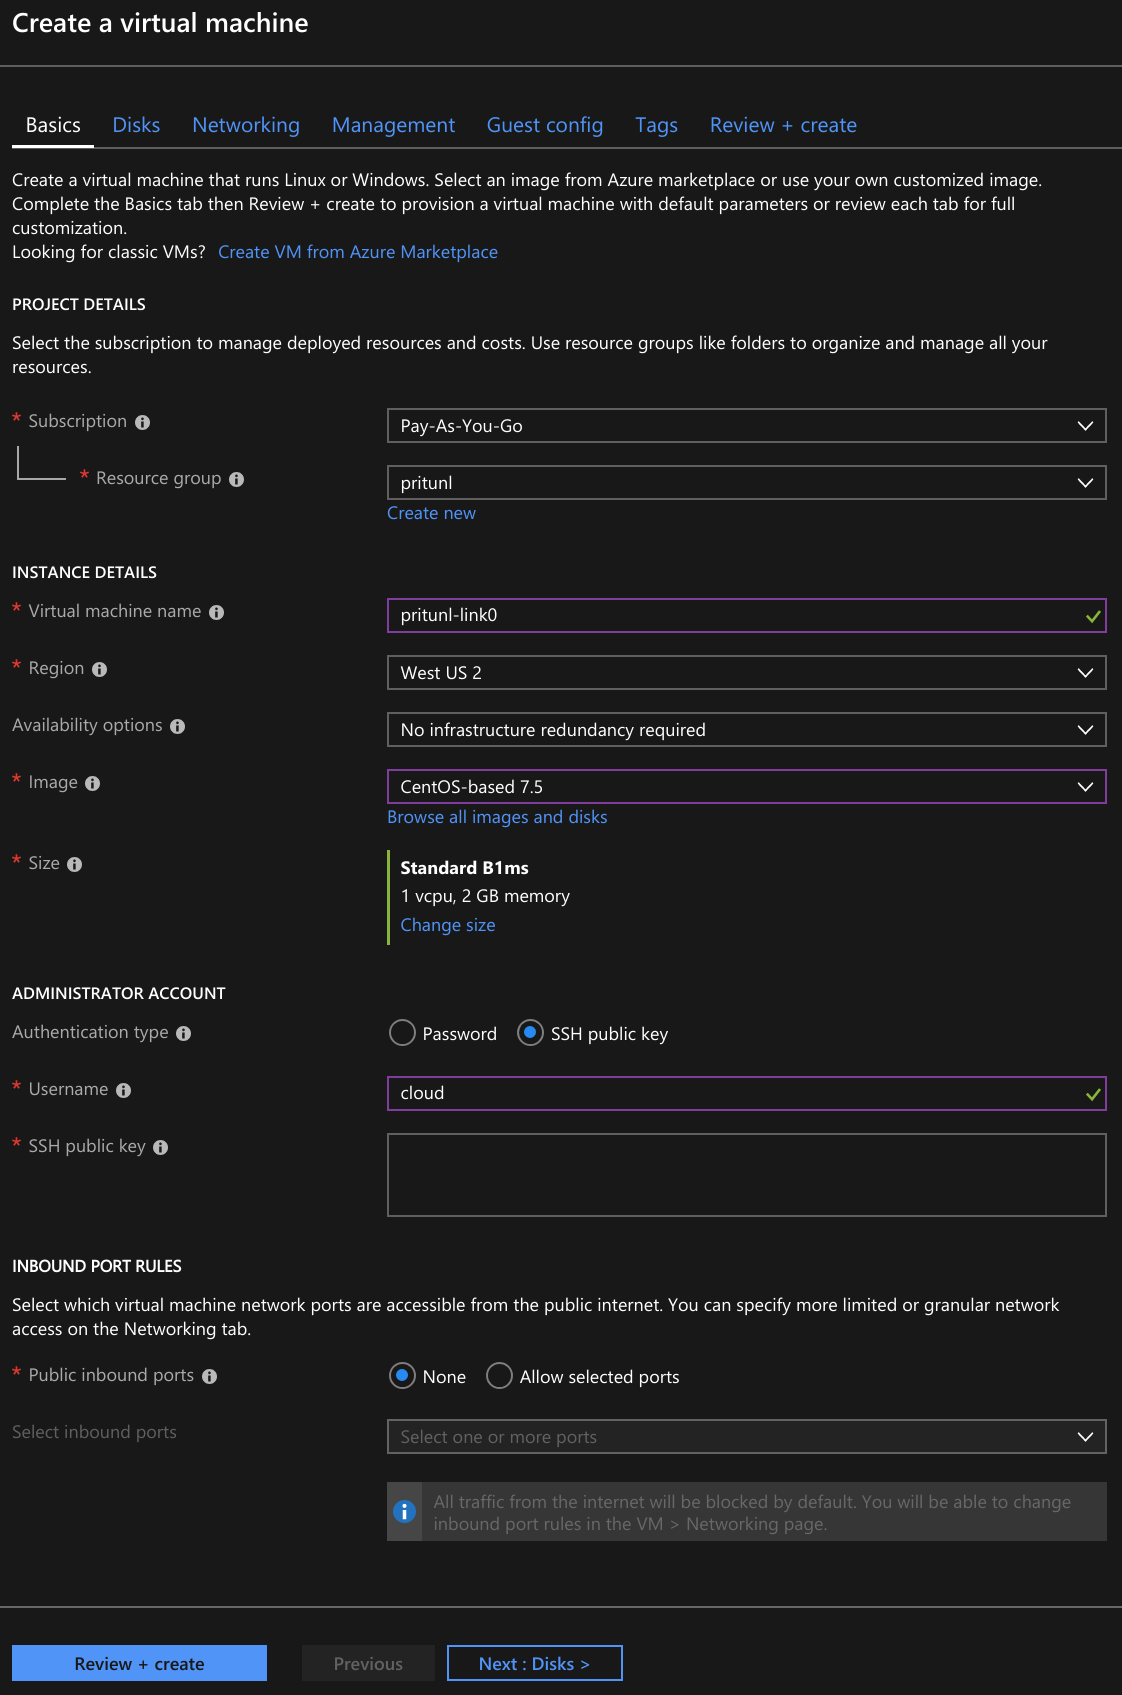
Create a Virtual Machine and set the Image to CentOS. Configure the instance authentication and set Public inbound ports to None. Then click Next Disks use the default disk settings and click Next: Networking.
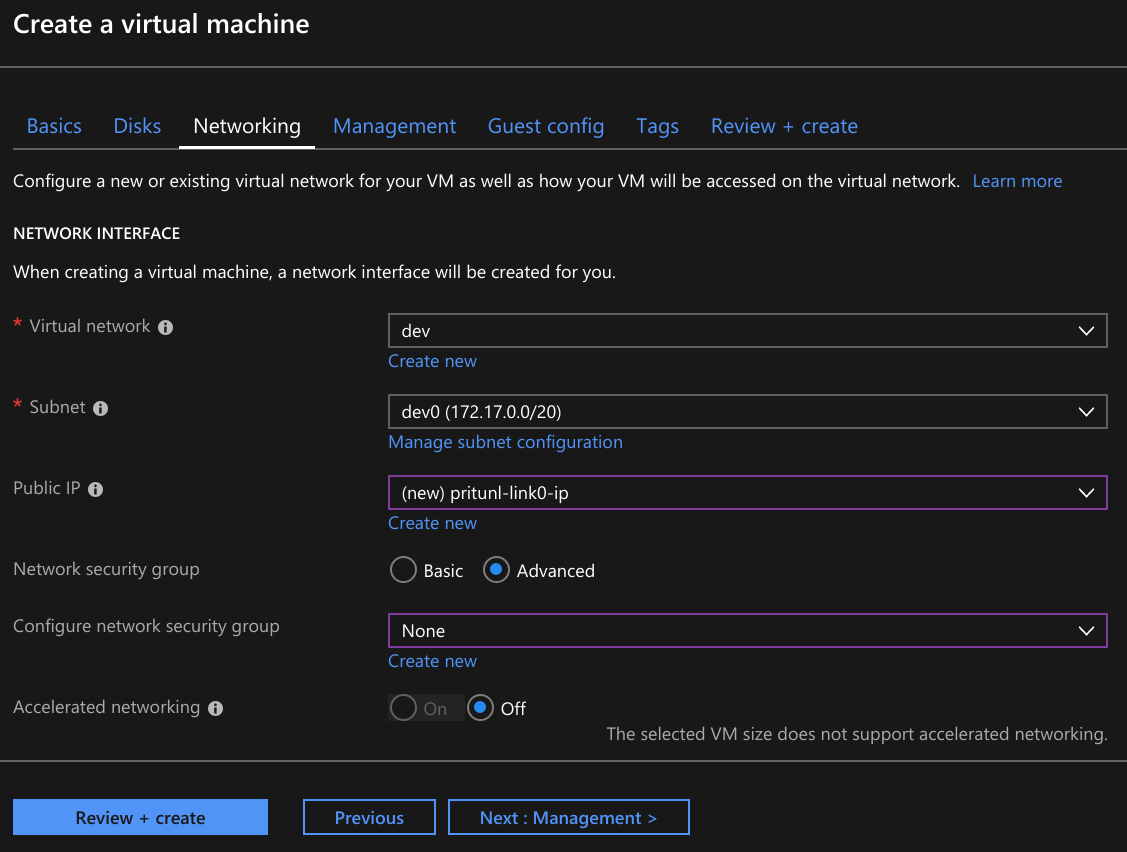
Select the Virtual network that will be peered and select a subnet. A link is only needed on one subnet. The routing table of all subnets in the virtual network will be configured. Set Network security group to Advanced and click Create new under Configure network security group.
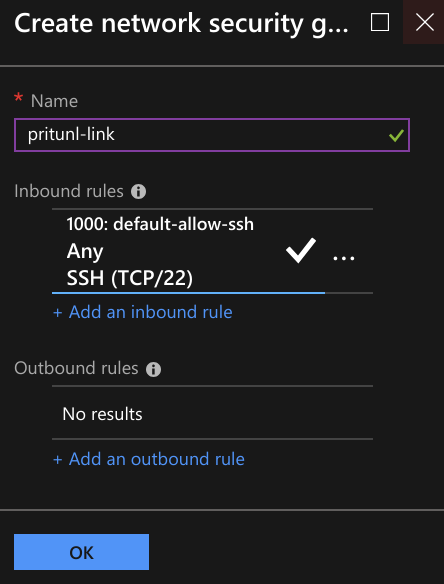
Set the Name of the security group to prutunl-link and click Add an inbound rule.
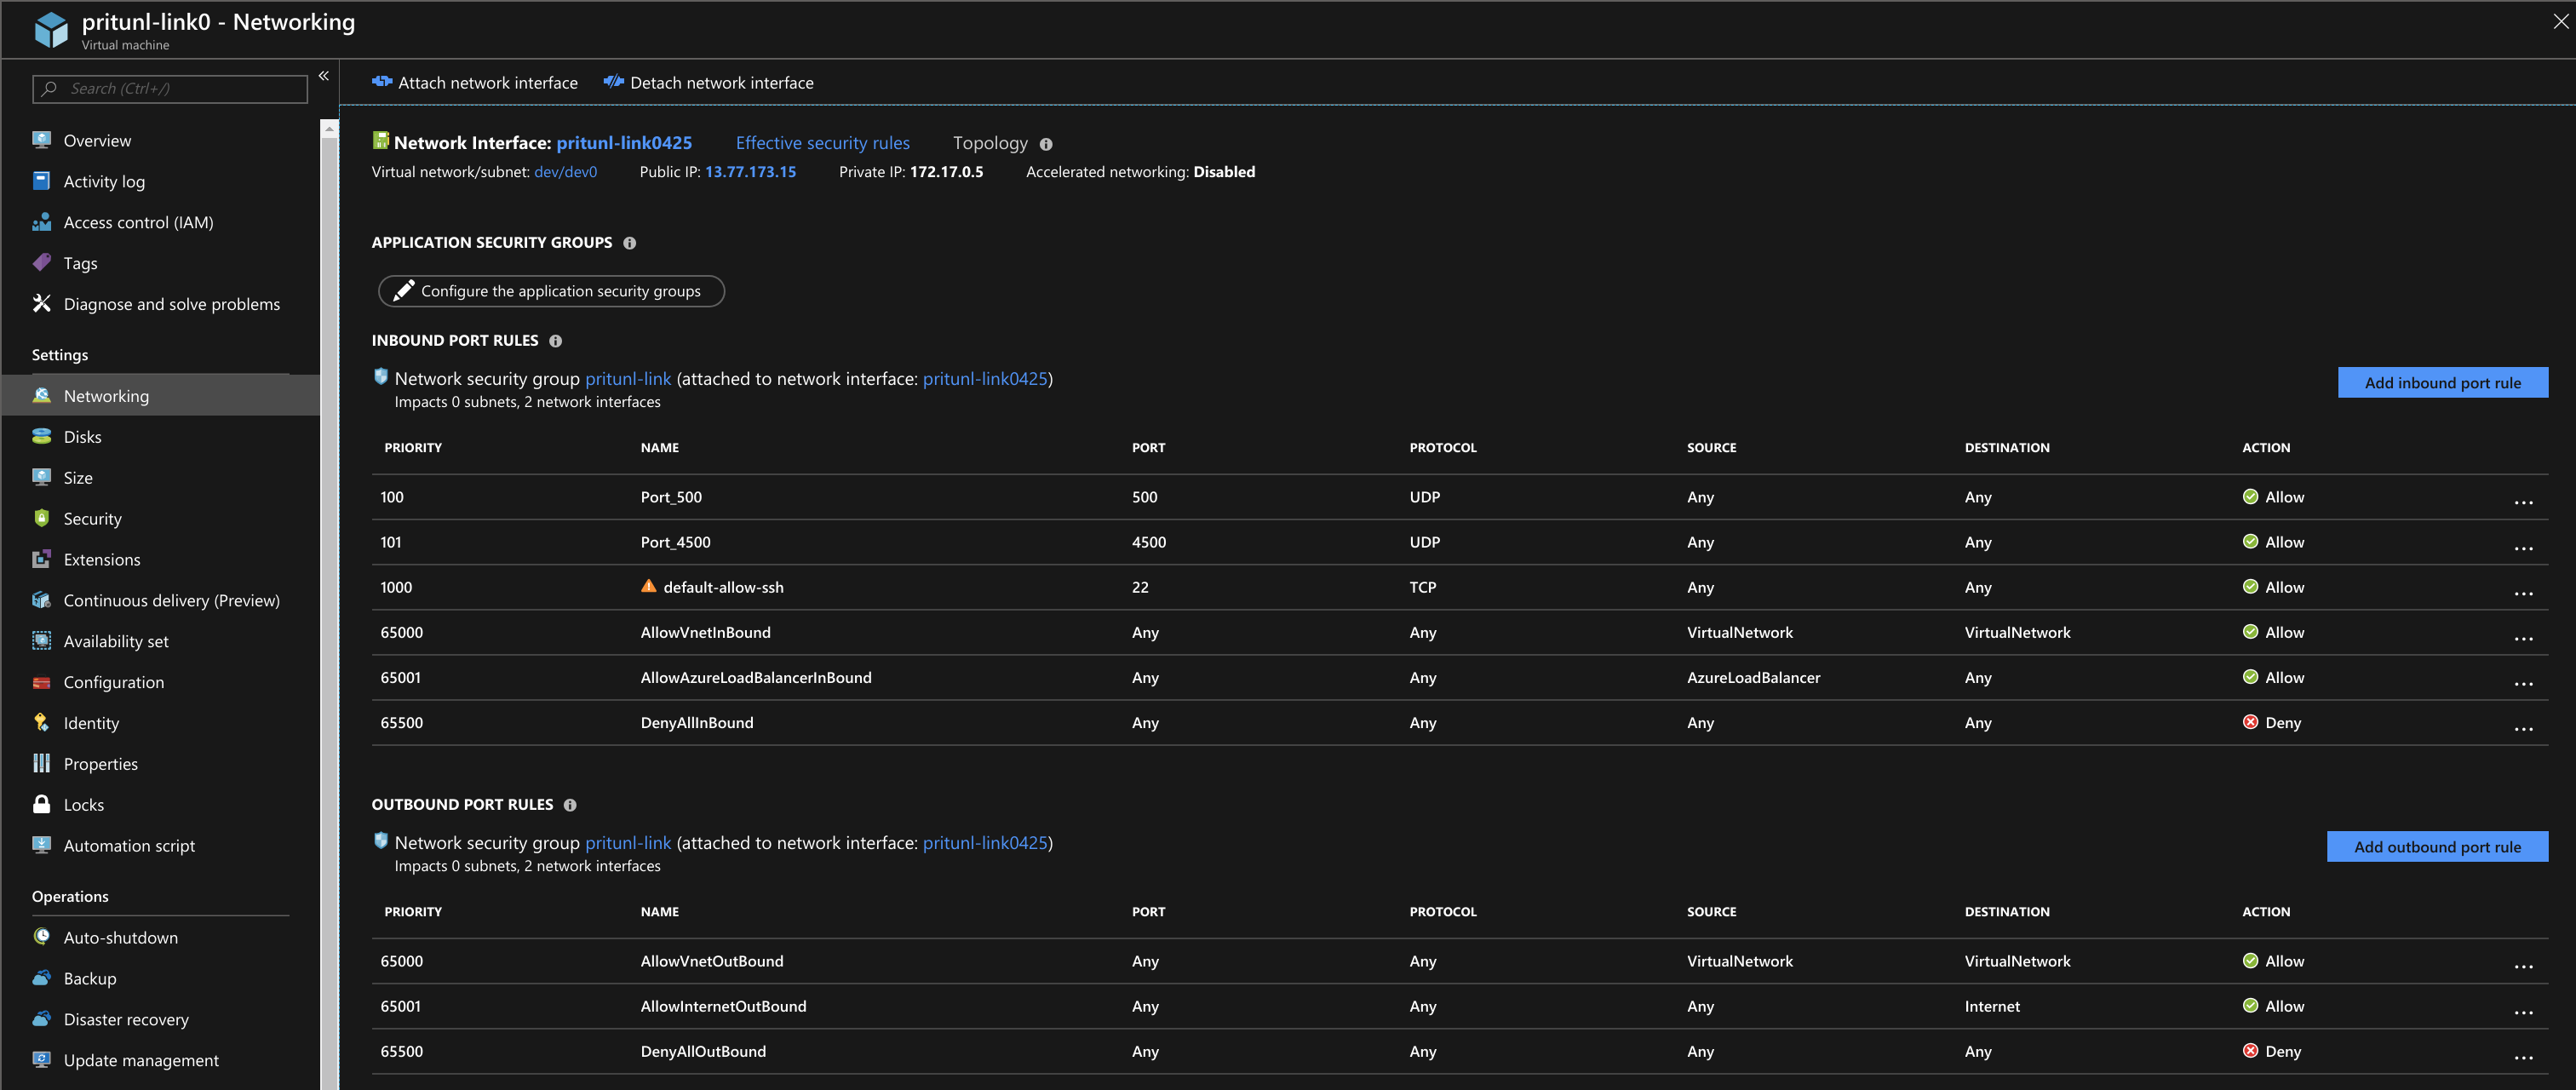
Set the Source to Any, Source port ranges to *, Destination to Any and Port to 500. Then select UDP and set Priority to 100. Set the Name to Port_500. Then click Add.
Optionally TCP port 9790 can also be opened for host to host checking. This allows each pritunl-link host to ping other hosts to measure latency and availability. These checks are used to detect network partitions and discover the best link to activate in a high availability configuration.

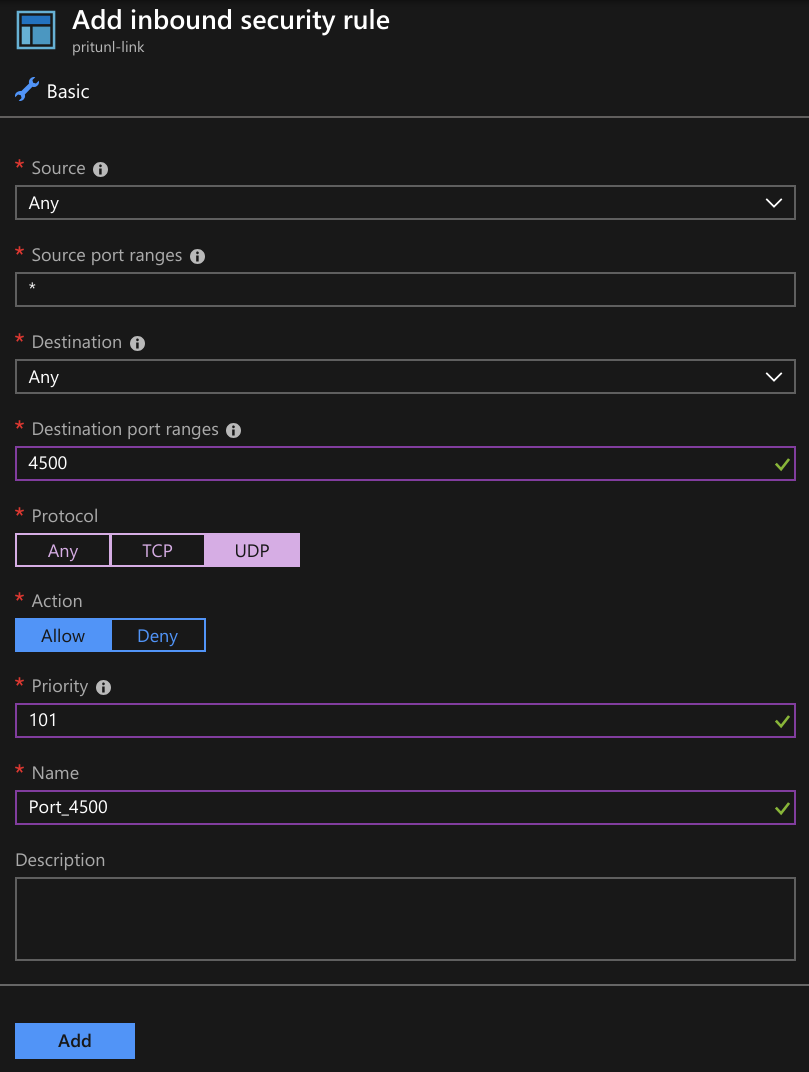
Click Add an inbound rule again. Set the Source to Any, Source port ranges to *, Destination to Any and Port to 4500. Then select UDP and set Priority to 101. Set the Name to Port_4500.
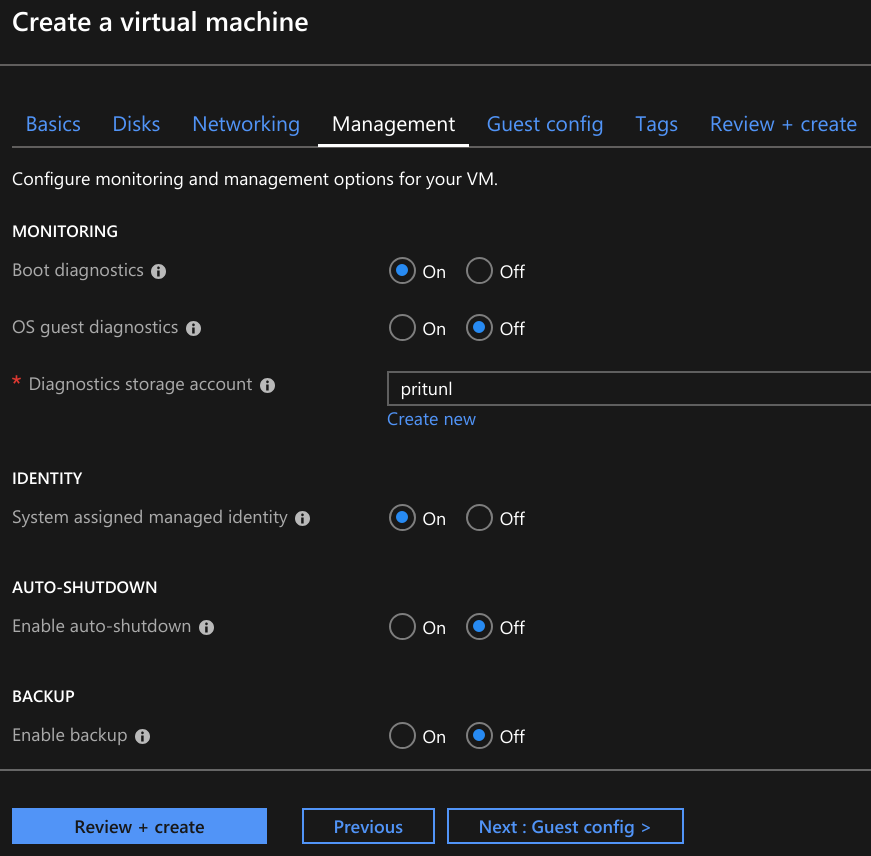
Click Next: Management and set System assigned managed identity to On. Then create the virtual machine.
Open the Virtual Machine settings and select Networking. Then click on the Network Interface.
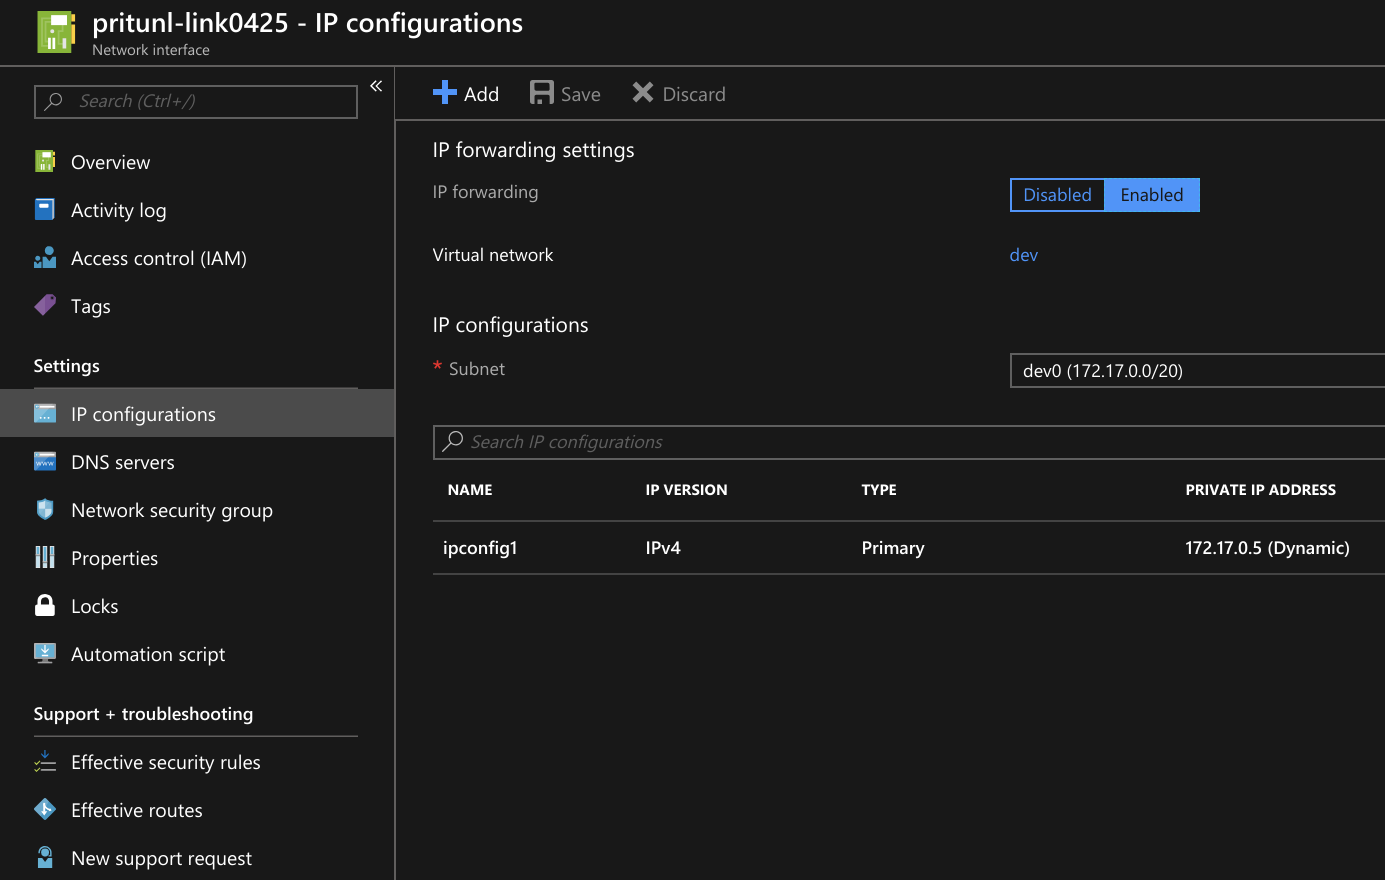
Open IP configurations and set IP forwarding to Enabled. Then click Save.
Open the Resource Groups dashboard and select the resource group that contains the Pritunl Link instance. Then open Access control (IAM). Optionally these access controls can be added to the virtual network and Pritunl Link instance instead of the resource group for a more restricted configuration.
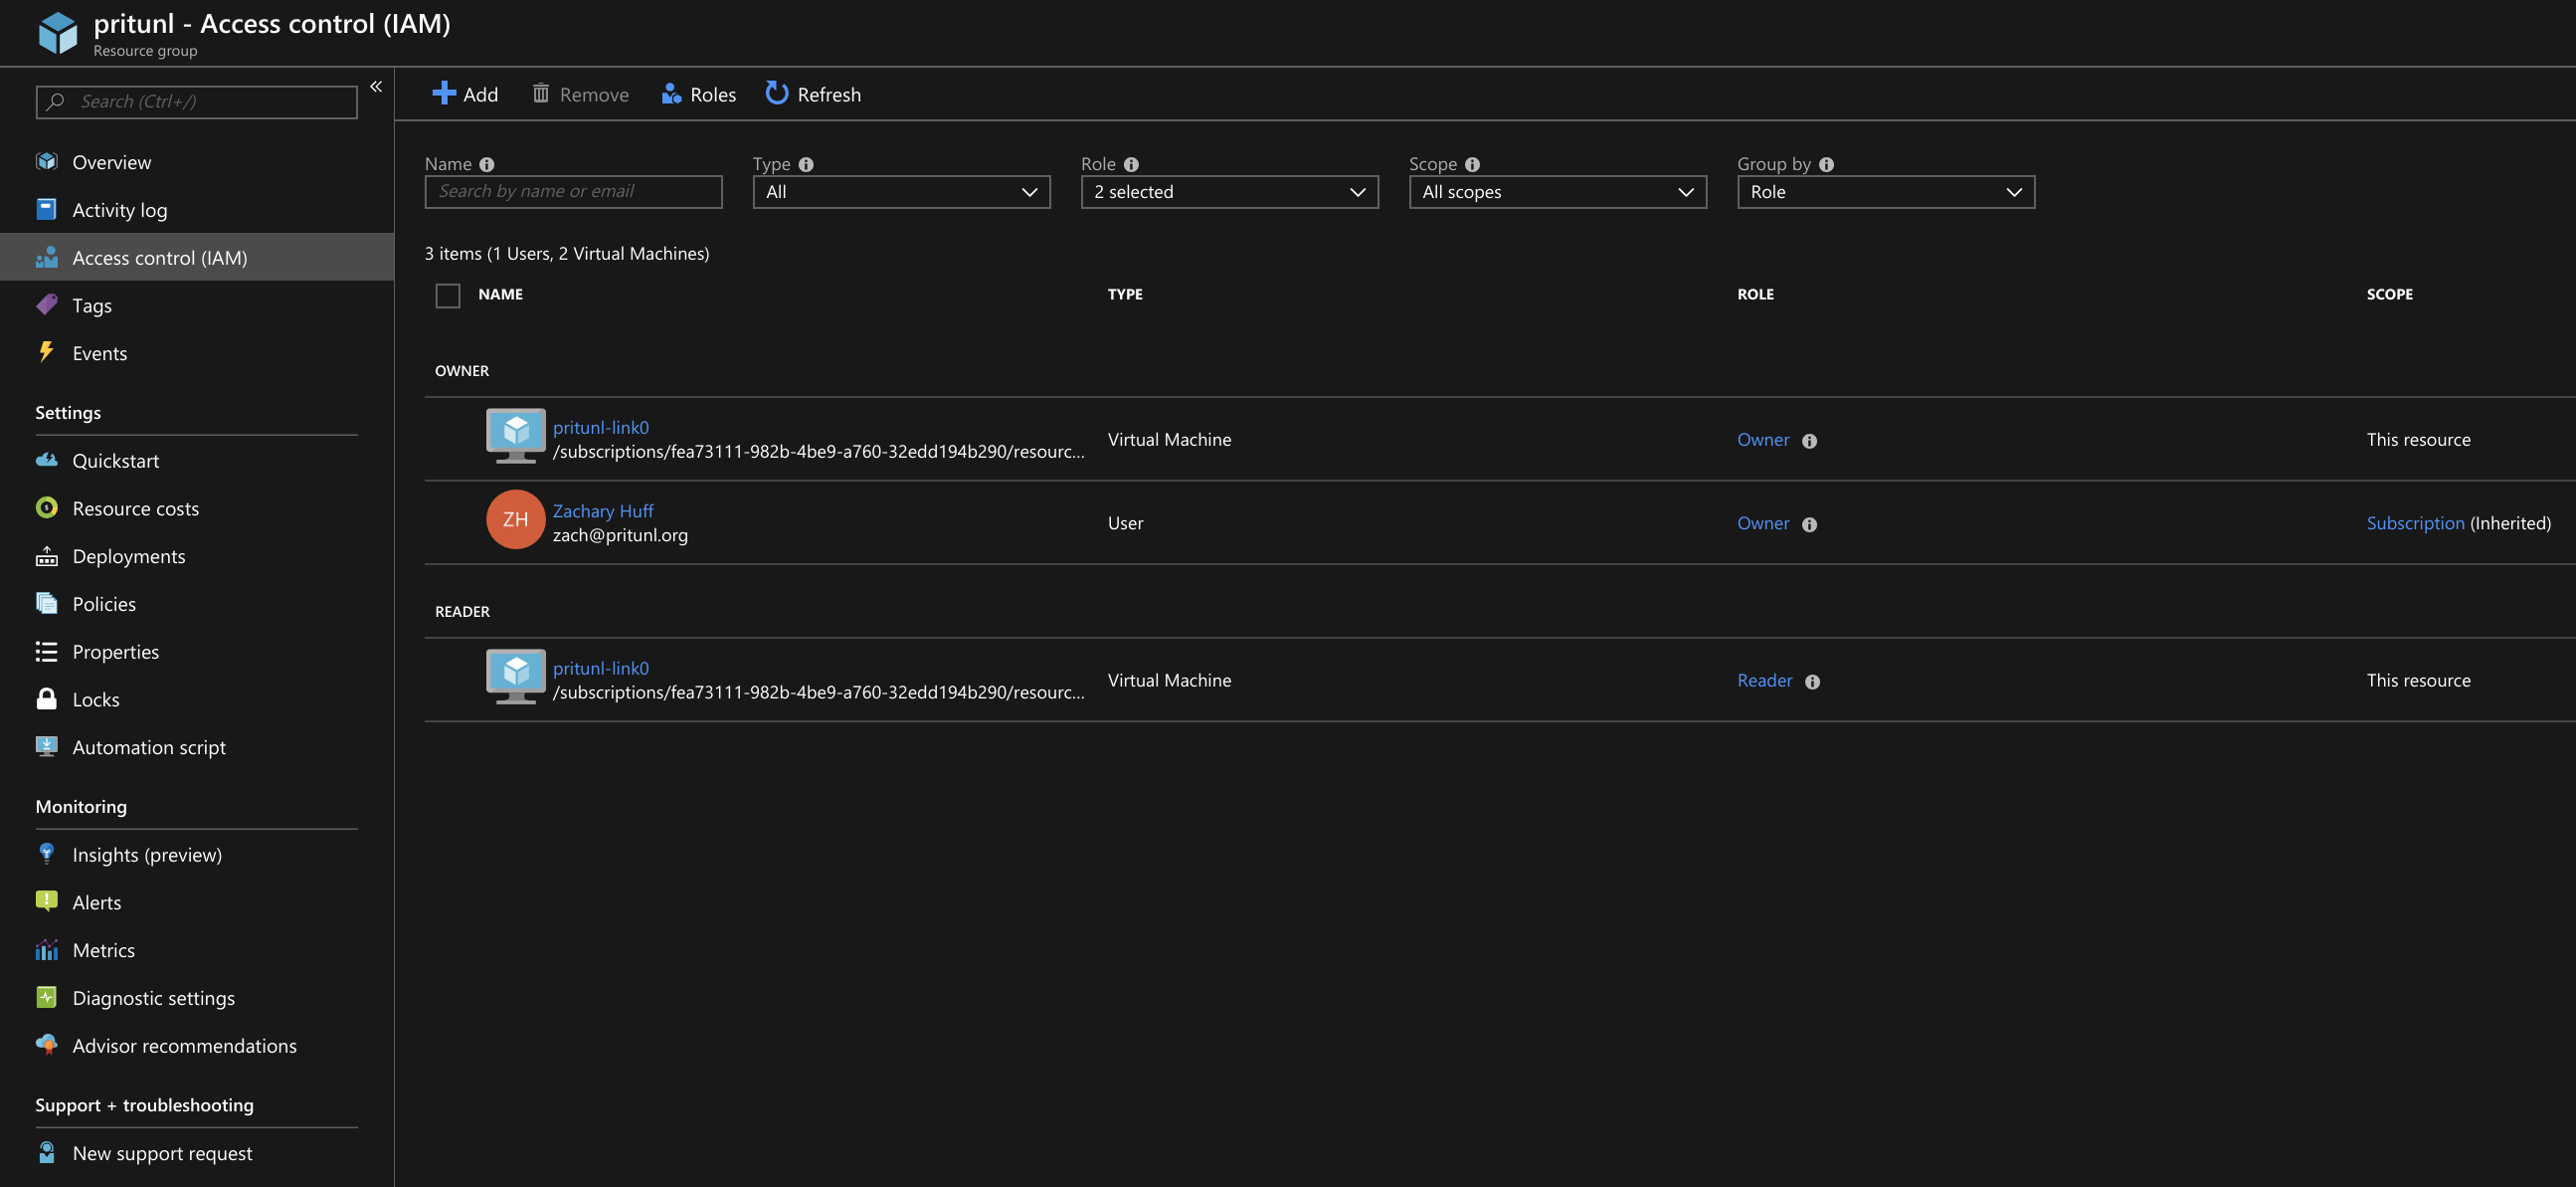
Click Add and set the Role to Owner, Assign access to to Virtual Machine and search for the Pritunl Link instance and add it. Then click Save.

Click Add again and set the Role to Reader, Assign access to to Virtual Machine and search for the Pritunl Link instance and add it. Then click Save.

Connect to the server with SSH and run the script below. The first pritunl-link command needs to be run if the Pritunl server does not have a signed HTTPS certificate. The second command sets the provider to azure. The third command will add the URI, this needs to be replaced by clicking Get URI in the Pritunl web console. This command can be run multiple times if more then one link is configured. The pritunl-link verify-off line can be left out if the Pritunl server is configured with a valid SSL certificate. It is not necessary to verify the SSL certificate, the sensitive data is encrypted with AES-256 and signed with HMAC SHA-512 using the token and secret in the URI.
#!/bin/bash
sudo tee -a /etc/yum.repos.d/pritunl.repo << EOF
[pritunl]
name=Pritunl Repository
baseurl=https://repo.pritunl.com/stable/yum/centos/7/
gpgcheck=1
enabled=1
EOF
gpg --keyserver hkp://keyserver.ubuntu.com --recv-keys 7568D9BB55FF9E5287D586017AE645C0CF8E292A
gpg --armor --export 7568D9BB55FF9E5287D586017AE645C0CF8E292A > key.tmp; sudo rpm --import key.tmp; rm -f key.tmp
sudo yum -y update
sudo yum -y install pritunl-link

sudo pritunl-link verify-off
sudo pritunl-link provider azure
sudo pritunl-link add pritunl://token:secret@test.pritunl.com
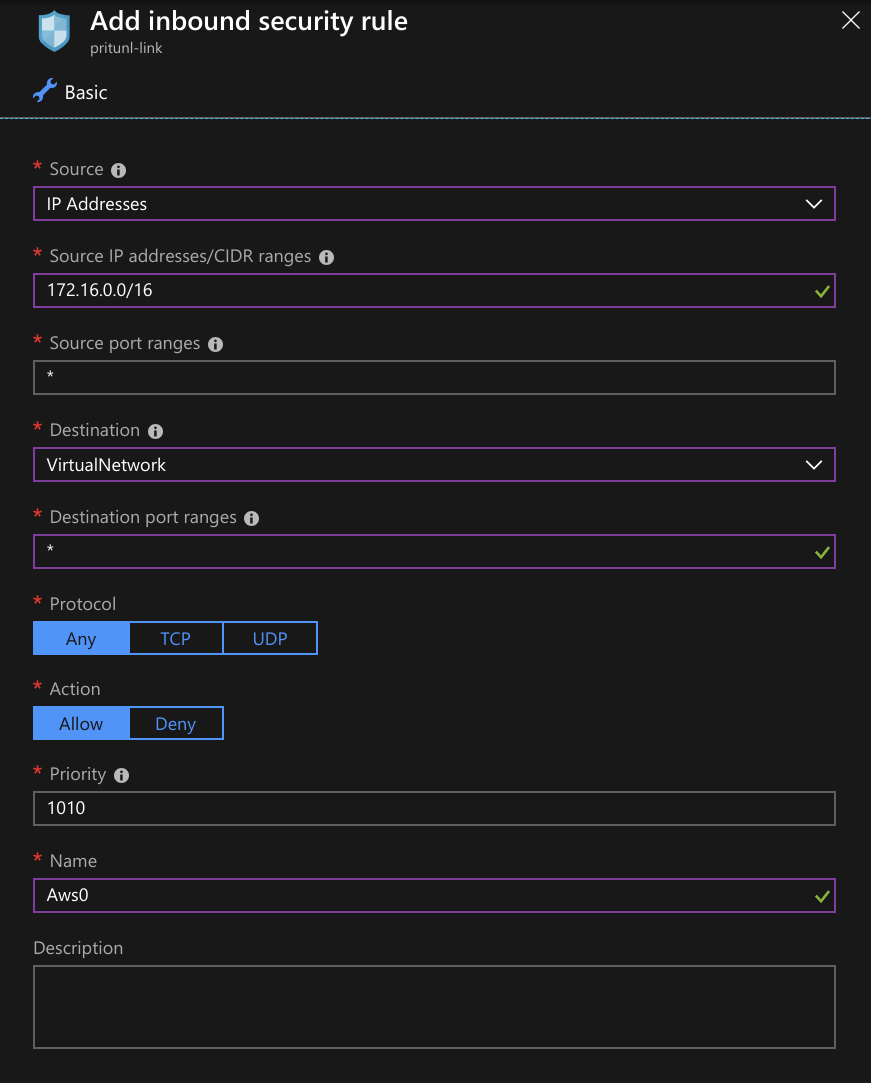
The security group or security rules of other instances will need to be modified to allow traffic from the peered networks. The outbound security rules may also need to be modified to allow traffic to the peered networks.
The commands below can be run to check the logs and status of the link. The pritunl-link service will already be running and connected once the URI is added.
journalctl -u pritunl-link
sudo ipsec status
Updated 3 months ago
