Pritunl Cloud is a distributed private cloud server written in Go using Qemu and MongoDB. This documentation will explain installing and running Pritunl Cloud on a local server.
Hardware Virtualization Support
If the host CPU does not support hardware virtualization such as when running Pritunl Cloud inside a virtual machine the Hypervisor Mode must be set to Qemu. Some virtual machine software allows enabling virtualization support in virtual machines as documented below.
Pritunl Cloud Network Topology
Below is a diagram of the Pritunl Cloud network topology for two physicals hosts each with two virtual instances. Each instance is instance is given a static VPC IPv4 and IPv6 address. The instance interface is attached to a bridge in a network namespace. A network namespace is created for each instance on the physical host. The VPC traffic is tagged on a VLAN interface and the instance public IPv4 and IPv6 address is SNATed to the instance VPC address. The instance firewall is managed in the network namespace with iptables. Any custom VPC routes are added to the instance network namespace. This example uses a dual physical interface configuration which separates instance to instance VPC traffic onto a dedicated network. A single physical interface would merge the pritunlbr0 and pritunlbr1 bridges sending both VPC and internet traffic over the one physical interface.


The diagram below includes host networking. A bridge is created for the host network and static host network addresses are SNATed to the instance VPC address.


Cloud Comparison
Running an on-site datacenter for production resources isn't a realistic option for most companies but development systems that do not need high availability will often benefit from an on-site solution. Development instances are often run on slower instances to reduce costs which leads to slower development time as developers wait for software to compile and start. An on-site Pritunl Cloud platform can be built for a fraction of the cost of equivalent cloud instances. This will give developers low cost, fast and secure access to on-site instances for development use.
-
Lower Costs
Running a small on site cloud platform for development instances can significantly reduce cloud costs. -
Faster Development
Development speed will improve as developers will have on-site low latency access to high performance instances that don't share oversold resources. -
Improved Security
Pritunl Cloud can be configured on the private company network preventing accidental data leaks from misconfigured firewalls.
Configure Router (Optional)
Each Pritunl instance will create a bridged interface on the external interface bridge and assign an address using DHCP. This DHCP address is considered the instance public IP address, the instance will also receive a static IP address configured by Pritunl Cloud on the VPC subnet that will be considered the instance private IP address. For most network configurations the instance public IPv4 address will not actually be a public IP address. Configuring IPv6 on the router will allow assigning real public IPv6 addresses that will allow accessing instances from the IPv6 internet.
The minimum network requirement is a router with a DHCP server that will assign IPv4 addresses, almost any network will support this. A switch that does not control VLAN tagging is also required for internal VPC traffic between instances if multiple Pritunl hosts are used. All unmanaged switches (switches that do not have a web/ssh control panel) will work with multiple Pritunl Hosts.
To allow incoming access from the internet to the Pritunl Cloud instances IPv6 without a firewall will need to be used. If this isn't available port forwarding will need to be used to allow incoming connections from the internet. This will require a ISP that provides IPv6 SLAAC and a router that allows configuring IPv6 without a firewall. The configuration below is for a Ubiquiti EdgeRouter. The EdgeRouter 4 or EdgeRouter 6P are both high performance routers that will work with Pritunl Cloud. The configuration below will create a cloud network on eth2 and a local network on eth3. The wan6_in firewall must be updated to replace xxxx:xxxx:xxxx:xxx0::0/64
with the subnet of the cloud network on eth2. This configuration will allow all incoming IPv6 traffic on the cloud network and block incoming IPv6 traffic on the local network. Connect Pritunl Cloud hosts to the cloud network and all other devices to the local network.
firewall {
all-ping enable
broadcast-ping disable
ipv6-name wan6_in {
default-action drop
rule 1 {
action accept
description "Allow established/related"
state {
established enable
related enable
}
}
rule 2 {
action drop
description "Drop invalid state"
state {
invalid enable
}
}
rule 3 {
action accept
description "Allow ping"
protocol icmpv6
}
rule 4 {
action accept
destination {
address xxxx:xxxx:xxxx:xxx0::0/64
}
}
}
ipv6-name wan6_local {
default-action drop
rule 1 {
action accept
description "Allow established/related"
protocol all
state {
established enable
related enable
}
}
rule 2 {
action drop
description "Drop invalid state"
protocol all
state {
invalid enable
}
}
rule 3 {
action accept
description "Allow ping"
protocol icmpv6
}
rule 4 {
action accept
description "Allow DHCP client/server"
destination {
port 546
}
protocol udp
source {
port 547
}
}
}
ipv6-receive-redirects disable
ipv6-src-route disable
ip-src-route disable
log-martians enable
name wan_in {
default-action drop
rule 1 {
action accept
description "Allow established/related"
state {
established enable
related enable
}
}
rule 2 {
action drop
description "Drop invalid state"
state {
invalid enable
}
}
}
name wan_local {
default-action drop
rule 1 {
action accept
description "Allow established/related"
state {
established enable
related enable
}
}
rule 2 {
action drop
description "Drop invalid state"
state {
invalid enable
}
}
}
receive-redirects disable
send-redirects enable
source-validation disable
syn-cookies enable
}
interfaces {
ethernet eth0 {
address dhcp
description uplink0
dhcpv6-pd {
no-dns
pd 0 {
interface eth2 {
host-address ::1
no-dns
prefix-id :0
service slaac
}
interface eth3 {
host-address ::1
no-dns
prefix-id :1
service slaac
}
prefix-length 60
}
rapid-commit enable
}
firewall {
in {
ipv6-name wan6_in
name wan_in
}
local {
ipv6-name wan6_local
name wan_local
}
}
speed auto
}
ethernet eth2 {
address 10.192.0.1/16
description cloud
duplex auto
firewall {
local {
ipv6-name wan6_local
}
}
speed auto
}
ethernet eth3 {
address 10.194.0.1/16
description local
duplex auto
firewall {
local {
ipv6-name wan6_local
}
}
speed auto
}
}
service {
dhcp-server {
disabled false
hostfile-update disable
shared-network-name cloud {
authoritative enable
subnet 10.192.0.0/16 {
default-router 10.192.0.1
dns-server 10.192.0.1
lease 86400
start 10.192.0.100 {
stop 10.192.255.250
}
}
}
shared-network-name local {
authoritative enable
subnet 10.194.0.0/16 {
default-router 10.194.0.1
dns-server 10.194.0.1
lease 86400
start 10.194.0.100 {
stop 10.194.255.250
}
}
}
static-arp disable
use-dnsmasq enable
}
gui {
http-port 80
https-port 443
older-ciphers disable
}
nat {
rule 5000 {
description uplink
log disable
outbound-interface eth0
type masquerade
}
}
ssh {
disable-host-validation
port 22
protocol-version v2
}
ubnt-discover {
disable
}
unms {
disable
}
}
system {
domain-name silicon.red
host-name router.silicon.red
login {
user ubnt {
authentication {
plaintext-password PASSWORD
}
full-name ""
level admin
}
}
name-server 8.8.8.8
name-server 8.8.4.4
ntp {
server 0.ubnt.pool.ntp.org {
}
server 1.ubnt.pool.ntp.org {
}
server 2.ubnt.pool.ntp.org {
}
server 3.ubnt.pool.ntp.org {
}
}
offload {
hwnat disable
ipv4 {
forwarding enable
pppoe enable
vlan enable
}
ipv6 {
forwarding enable
}
}
syslog {
global {
facility all {
level notice
}
facility protocols {
level debug
}
}
}
time-zone UTC
}
Managed Switches
The Pritunl Cloud VPC design uses VLANs any managed switches that are VLAN aware or control the routing of VLANs cannot be used. If only one Pritunl Cloud host is used any switch can be used.
Install
Pritunl Cloud is developed and tested on Oracle Linux 8. It is recommend to use Oracle Linux 8 when available. Download Oracle Linux 8 from the Oracle Software Delivery Cloud by searching for REL: Oracle Linux 8
. The select REL: Oracle Linux 8.1.0.0.0


Copy the ISO to a USB device, this can be run on Linux or macOS using the command below.
sudo dd if=V984216-01.iso of=/dev/sdX
Some motherboards will have Intel VT-d or AMD Vi hardware virtualization extensions disabled by default. The extensions can be enabled in the BIOS and are required for running virtual machines. Boot from the USB drive and select Test this media & install Oracle Linux 8.1.0


Click on Network & Host Name then enable the the network interface at the top right and enter a hostname in the bottom left.


Open Kdump and uncheck Enable kdump.


Open Software Selection and select Minimal Install.


Open Time & Date and set Region to Etc and City to Greenwich Mean Time to use UTC on the server.


Open Installation Destination and select a disk to install to. Then set Storage Configuration to Custom and click Done.


Set the partition scheme to Standard Partition and click Click here to create them automatically.


Remove the home directory partition and set the / partition Desired Capacity to 100%
. Then click Done.


Click Begin Installation and set a root password. Don't create a user account.


Nested Virtualization (Optional)
Nested virtualization allows Pritunl Cloud instances to run virtual machines with KVM. This can be enabled with the commands below on Intel and AMD. This will require a reboot.
sudo tee /etc/modprobe.d/kvm_intel.conf << EOF
options kvm_intel nested=1
EOF
sudo tee /etc/modprobe.d/kvm_amd.conf << EOF
options kvm-amd nested=1
EOF
Tunning
For systems with a memory capacity 32GB+ the Linux dirty ratio should be reduced to prevent excessive buffered writes. The default of 40% can lead to significant issues under load.
# 32GB+
sudo tee /etc/sysctl.d/10-dirty.conf << EOF
vm.dirty_ratio = 10
vm.dirty_background_ratio = 5
EOF
# 128GB+
sudo tee /etc/sysctl.d/10-dirty.conf << EOF
vm.dirty_ratio = 5
vm.dirty_background_ratio = 3
EOF
Configure the swappiness to 10 using the command below.
sudo tee /etc/sysctl.d/10-swappiness.conf << EOF
vm.swappiness = 10
EOF
When using a mdadm software RAID the speed limit should be configured to prevent a RAID resync from consuming excessive disk throughput. Below will set a limit of 100MB/S.
sudo tee /etc/sysctl.d/10-raid.conf << EOF
dev.raid.speed_limit_max = 100000
EOF
Disabling netfilter on bridges is sometimes recommended for virtualization. Pritunl Cloud uses iptables rules for bridges and requires netfilter to be enabled on bridges. This can be check with the command below. Both options should be set to 1
by default.
sudo sysctl net.bridge.bridge-nf-call-iptables
sudo sysctl net.bridge.bridge-nf-call-ip6tables
Configure Server
Once the install has finished restart and login as root. Then run the commands below to enable sshd and get the IP address.
systemctl start sshd
ip addr
SSH into the server as root and run the script below to configure the server. Pritunl Cloud will manage both the instance and node firewalls. Replace the SSH key in below with your public SSH key. This should be run as root or in sudo su
.
#!/bin/bash
set -e
sed -i 's/^SELINUX=.*/SELINUX=disabled/g' /etc/selinux/config || true
sed -i 's/^SELINUX=.*/SELINUX=disabled/g' /etc/sysconfig/selinux || true
setenforce 0
sed -i '/^PermitRootLogin/d' /etc/ssh/sshd_config
sed -i '/^PasswordAuthentication/d' /etc/ssh/sshd_config
sed -i '/^TrustedUserCAKeys/d' /etc/ssh/sshd_config
sed -i '/^AuthorizedPrincipalsFile/d' /etc/ssh/sshd_config
tee -a /etc/ssh/sshd_config << EOF
PermitRootLogin no
PasswordAuthentication no
EOF
useradd -G adm,video,wheel,systemd-journal cloud
sed -i '/^%wheel/d' /etc/sudoers
tee -a /etc/sudoers << EOF
%wheel ALL=(ALL) NOPASSWD:ALL
EOF
mkdir /home/cloud/.ssh
chown cloud:cloud /home/cloud/.ssh
chmod 700 /home/cloud/.ssh
tee -a /home/cloud/.ssh/authorized_keys << EOF
ssh-rsa AAAAB3NzaC1yc2EAAAADAQABAAABAQC/x14X6jWFr/ZDkpt8AsomumKmekGm2Jbk/eP6g/pdAnvEGD1zB2+llmmcSYaZdtle4o0/QSURYYNA2wEXClxXWymrNAic/HNkSC069gKF8C52NK+STRuK4VYQNHAH8MG6dLvFO2dhUDke7DGcO8nWr8tGSribLJX1qqhmBocBtHC38bSYklD40sOqy2YDChI08kEv9PhOVcQAdkG8qoxqG3AoapeUQKc2Rvqqvd9NxsGAJygsT5SHPQDR69e0Me9AhaclRVhRRjrCwkad8/rc3ZG/Q22m72i9HT2GJTsMG0ZC3Le00H2PB1KRlqJlFli1fu8+ycSilYP8Rvkqvk0b cloud
EOF
chown cloud:cloud /home/cloud/.ssh/authorized_keys
chmod 600 /home/cloud/.ssh/authorized_keys
systemctl enable sshd
systemctl restart sshd
systemctl disable firewalld
systemctl stop firewalld
yum -y update
yum -y install bash-completion chrony
systemctl start chronyd
systemctl enable chronyd
Run the commands below to enable automatic updates.
sudo dnf -y install dnf-automatic
sudo sed -i 's/^upgrade_type =.*/upgrade_type = default/g' /etc/dnf/automatic.conf
sudo sed -i 's/^download_updates =.*/download_updates = yes/g' /etc/dnf/automatic.conf
sudo sed -i 's/^apply_updates =.*/apply_updates = yes/g' /etc/dnf/automatic.conf
sudo systemctl enable --now dnf-automatic.timer
Install Podman MongoDB (Optional)
For single host configurations it can be helpful to run a MongoDB database in a Podman container on the Pritunl Cloud server. This will provide isolation and limit the memory usage of the MongoDB server. Running a Podman container without --network host
will break the Pritunl Cloud networking. The commands below will install Podman and start a MongoDB service that will run on localhost:27017
with a 1024m memory limit. The MongoDB database data will be stored in the /var/lib/mongo
directory.
sudo yum -y install podman
sudo mkdir -p /var/lib/mongo
sudo podman run -d --name mongo --network host --cpus 1 --memory 1024m --volume /var/lib/mongo:/data/db mongo --bind_ip 127.0.0.1
sudo tee /etc/systemd/system/mongo.service << EOF
[Unit]
Description=MongoDB Podman container
Wants=syslog.service
[Service]
Restart=always
ExecStart=/usr/bin/podman start -a mongo
ExecStop=/usr/bin/podman stop -t 10 mongo
[Install]
WantedBy=multi-user.target
EOF
sudo systemctl enable mongo
sudo systemctl start mongo
Install MongoDB (Optional)
Logout of the server and SSH as the cloud user then install MongoDB. MongoDB >= 3.6 is required. If MongoDB is running on another server or the MongoDB Docker configuration above is being used skip this step.
sudo tee /etc/yum.repos.d/mongodb-org-4.2.repo << EOF
[mongodb-org-4.2]
name=MongoDB Repository
baseurl=https://repo.mongodb.org/yum/redhat/8/mongodb-org/4.2/x86_64/
gpgcheck=1
enabled=1
gpgkey=https://www.mongodb.org/static/pgp/server-4.2.asc
EOF
sudo yum -y install mongodb-org
sudo systemctl start mongod
sudo systemctl enable mongod
Configure Bridge Interfaces
Before using Pritunl Cloud a bridge interface must be created. The code below will configure an interface to the bridge pritunlbr0
. Each bridged should be named pritunlbr
ending with a number. A bridge should be configured for each individual interface, bonding is not necessary Pritunl Cloud will balance instances between multiple interfaces. The command uuidgen
will generate a random IPv6 UUID. If IPv6 is not available remove the lines starting with IPV6
. The first set of commands will configure a DHCP interface the second will configure a static interface.
Replace <IFACE>
with the interface name on the server. Replace <HARDWARE_ADDR>
with the MAC address of the network interface in format ff:ff:ff:ff:ff:ff
. Run ip a
to get the interface MAC address. These files should be verified before restarting the server to prevent loosing connectivity.
sudo tee /etc/sysconfig/network-scripts/ifcfg-<IFACE> << EOF
TYPE="Ethernet"
BOOTPROTO="none"
NAME="<IFACE>"
DEVICE="<IFACE>"
ONBOOT="yes"
HWADDR="<HARDWARE_ADDR>"
BRIDGE="pritunlbr0"
EOF
sudo tee /etc/sysconfig/network-scripts/ifcfg-pritunlbr0 << EOF
TYPE="Bridge"
PROXY_METHOD="none"
BROWSER_ONLY="no"
BOOTPROTO="dhcp"
DEFROUTE="yes"
IPV4_FAILURE_FATAL="no"
IPV6INIT="yes"
IPV6_AUTOCONF="yes"
IPV6_DEFROUTE="yes"
IPV6_FAILURE_FATAL="no"
IPV6_ADDR_GEN_MODE="stable-privacy"
NAME="pritunlbr0"
UUID="`uuidgen`"
DEVICE="pritunlbr0"
ONBOOT="yes"
EOF
Replace <IFACE>
with the interface name on the server. Replace <HARDWARE_ADDR>
with the MAC address of the network interface in format ff:ff:ff:ff:ff:ff
. Run ip a
to get the interface MAC address. Replace 10.0.0.50
, 255.255.0.0
, and 10.0.0.1
with the interface static IP address. These files should be verified before restarting the server to prevent loosing connectivity.
sudo tee /etc/sysconfig/network-scripts/ifcfg-eno1 << EOF
TYPE="Ethernet"
BOOTPROTO="none"
NAME="<IFACE>"
DEVICE="<IFACE>"
ONBOOT="yes"
HWADDR="<HARDWARE_ADDR>"
BRIDGE="pritunlbr0"
EOF
sudo tee /etc/sysconfig/network-scripts/ifcfg-pritunlbr0 << EOF
TYPE="Bridge"
PROXY_METHOD="none"
BROWSER_ONLY="no"
BOOTPROTO="static"
IPADDR="10.0.0.50"
NETMASK="255.255.0.0"
GATEWAY="10.0.0.1"
DEFROUTE="yes"
IPV4_FAILURE_FATAL="no"
IPV6INIT="yes"
IPV6_AUTOCONF="yes"
IPV6_DEFROUTE="yes"
IPV6_FAILURE_FATAL="no"
IPV6_ADDR_GEN_MODE="stable-privacy"
NAME="pritunlbr0"
UUID="`uuidgen`"
DEVICE="pritunlbr0"
ONBOOT="yes"
EOF
Install Pritunl Cloud
Run the commands below to install Pritunl and QEMU from the Pritunl KVM repository. The directory /var/lib/pritunl-cloud
will be used to store virtual disks, optionally a different partition can be mounted at this directory. If you have disks that will be dedicated to the virtual machines these should be mounted at the /var/lib/pritunl-cloud
directory.
sudo tee /etc/yum.repos.d/pritunl-kvm.repo << EOF
[pritunl-kvm]
name=Pritunl KVM Repository
baseurl=https://repo.pritunl.com/kvm/
gpgcheck=1
enabled=1
EOF
gpg --keyserver hkp://keyserver.ubuntu.com --recv-keys 1BB6FBB8D641BD9C6C0398D74D55437EC0508F5F
gpg --armor --export 1BB6FBB8D641BD9C6C0398D74D55437EC0508F5F > key.tmp; sudo rpm --import key.tmp; rm -f key.tmp
sudo tee /etc/yum.repos.d/pritunl.repo << EOF
[pritunl]
name=Pritunl Repository
baseurl=https://repo.pritunl.com/stable/yum/oraclelinux/8/
gpgcheck=1
enabled=1
EOF
gpg --keyserver hkp://keyserver.ubuntu.com --recv-keys 7568D9BB55FF9E5287D586017AE645C0CF8E292A
gpg --armor --export 7568D9BB55FF9E5287D586017AE645C0CF8E292A > key.tmp; sudo rpm --import key.tmp; rm -f key.tmp
sudo yum -y install edk2-ovmf pritunl-qemu-kvm pritunl-qemu-img pritunl-qemu-system-x86 pritunl-cloud
If the Pritunl Cloud node will be connecting to a remote MongoDB database use the command below to set the MongoDB URI. By default localhost will be used. For multi-node configurations connect all nodes to the same MongoDB database.
sudo pritunl-cloud mongo "mongodb://localhost:27017/pritunl-cloud"
Once Pritunl Cloud is installed use the command below to start Pritunl Cloud. It is not recommended to enable or autostart the Pritunl Cloud service, if there is an issue with the Pritunl Cloud firewall configuration access can be restored by restarting the server. On the first start the pritunlbr bridged network interface will be automatically configured. This may cause network connectivity to be lost and may require a reboot to restart the networking.
sudo systemctl start pritunl-cloud
In the Users tab select the pritunl user and set a password. Then add the org
role to Roles and click Save.


In the Storages tab click New. Set the Name to pritunl-images
, the Endpoint to images.pritunl.com
and the Bucket to stable
. Then click Save. This will add the official Pritunl images store.


In the Organizations tab click New. Name the organization org
, add org
to Roles and click Save.


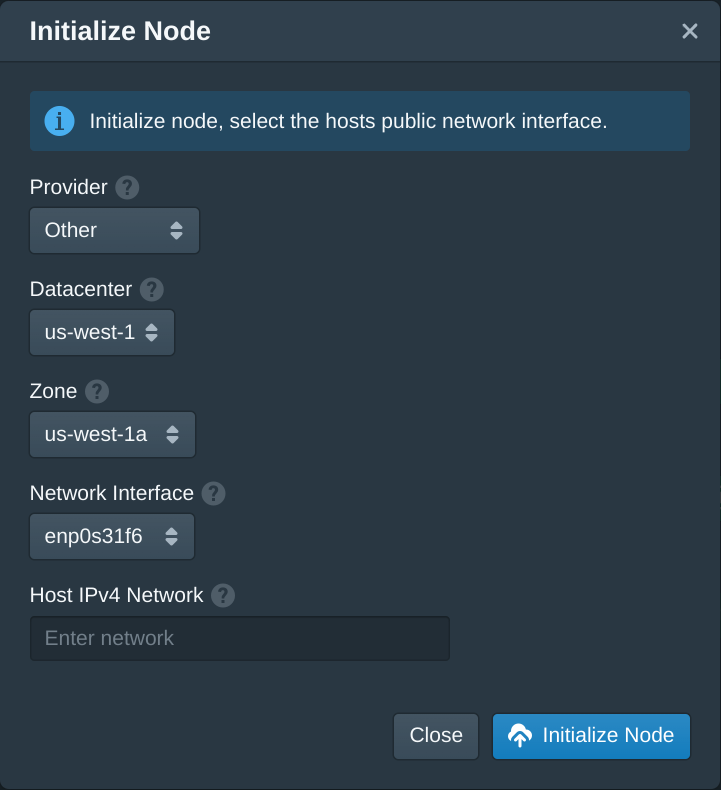
In the Datacenters tab click new and name the datacenter us-west-1
then add pritunl-images
to Public Storages.


In the Zones tab click New and set the Name to us-west-1a
.


In the Nodes tab set the node Zone to us-west-1a
and click Save. Add pritunlbr0
to External Interfaces and Internal Interfaces.


In the Firewalls tab click New. Set the Name to instance
, set the Organization to org
and add instance
to the Network Roles.


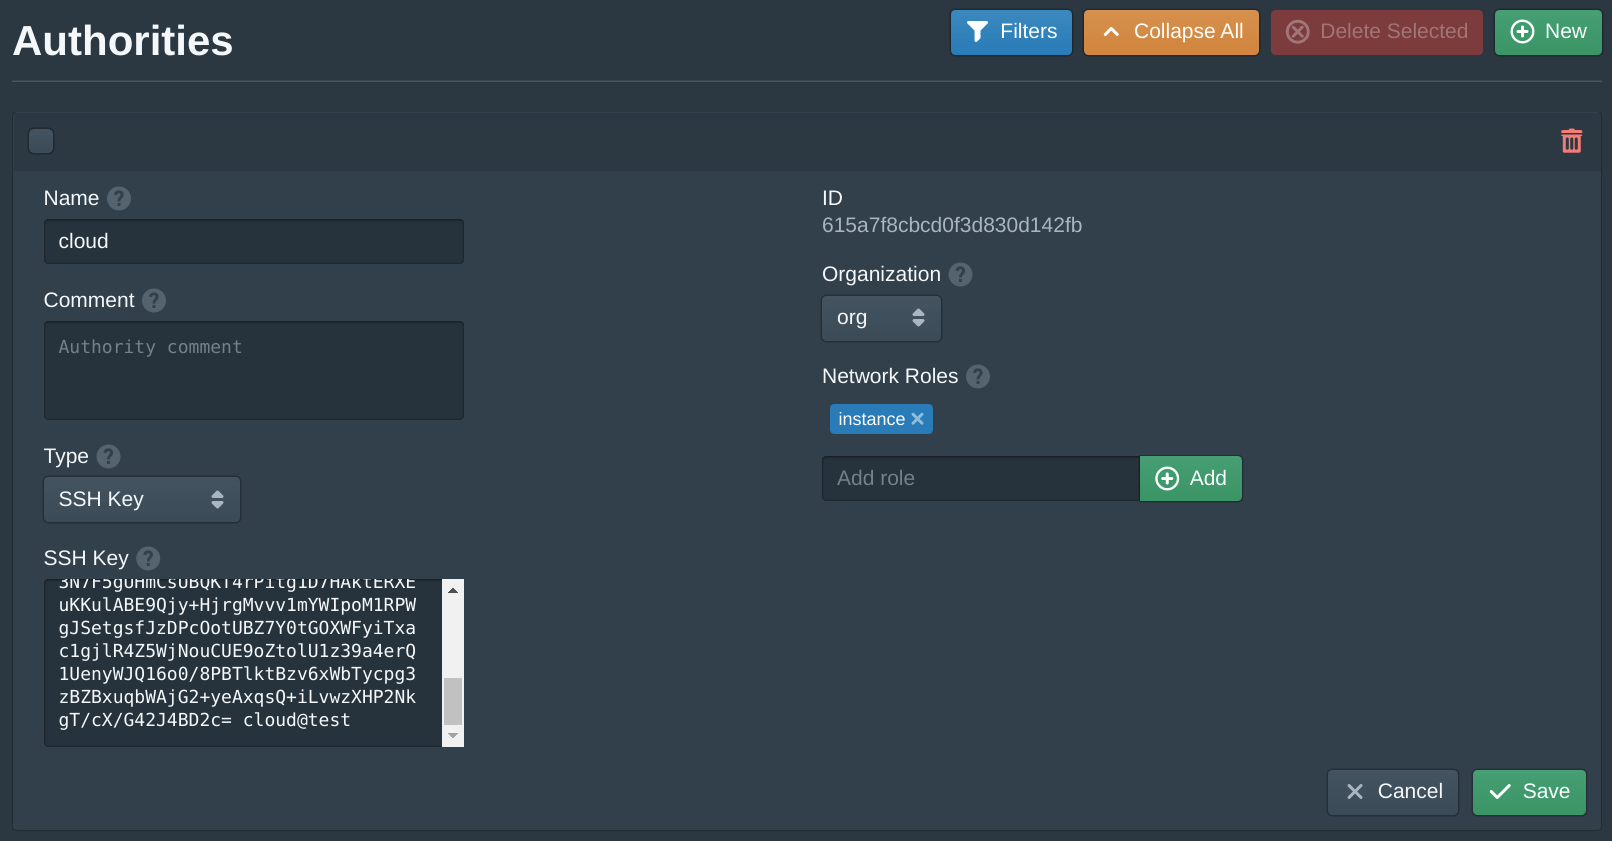
In the Authorities tab click New. Set the Name to cloud
, set the Organization to org
and add instance
to the Network Roles. Then copy your public SSH key to the SSH Key field. If you are using Pritunl Zero or SSH certificates set the Type to SSH Certificate and copy the Public Key form the SSH authority in Pritunl Zero to the SSH Certificate field. Then add roles to control access.


In the VPCs tab enter 10.97.0.0/16
in the network field and click New. Add 10.97.1.0/24
to the Subnets with the name primary
. Then set the Name to vpc
and click Save.


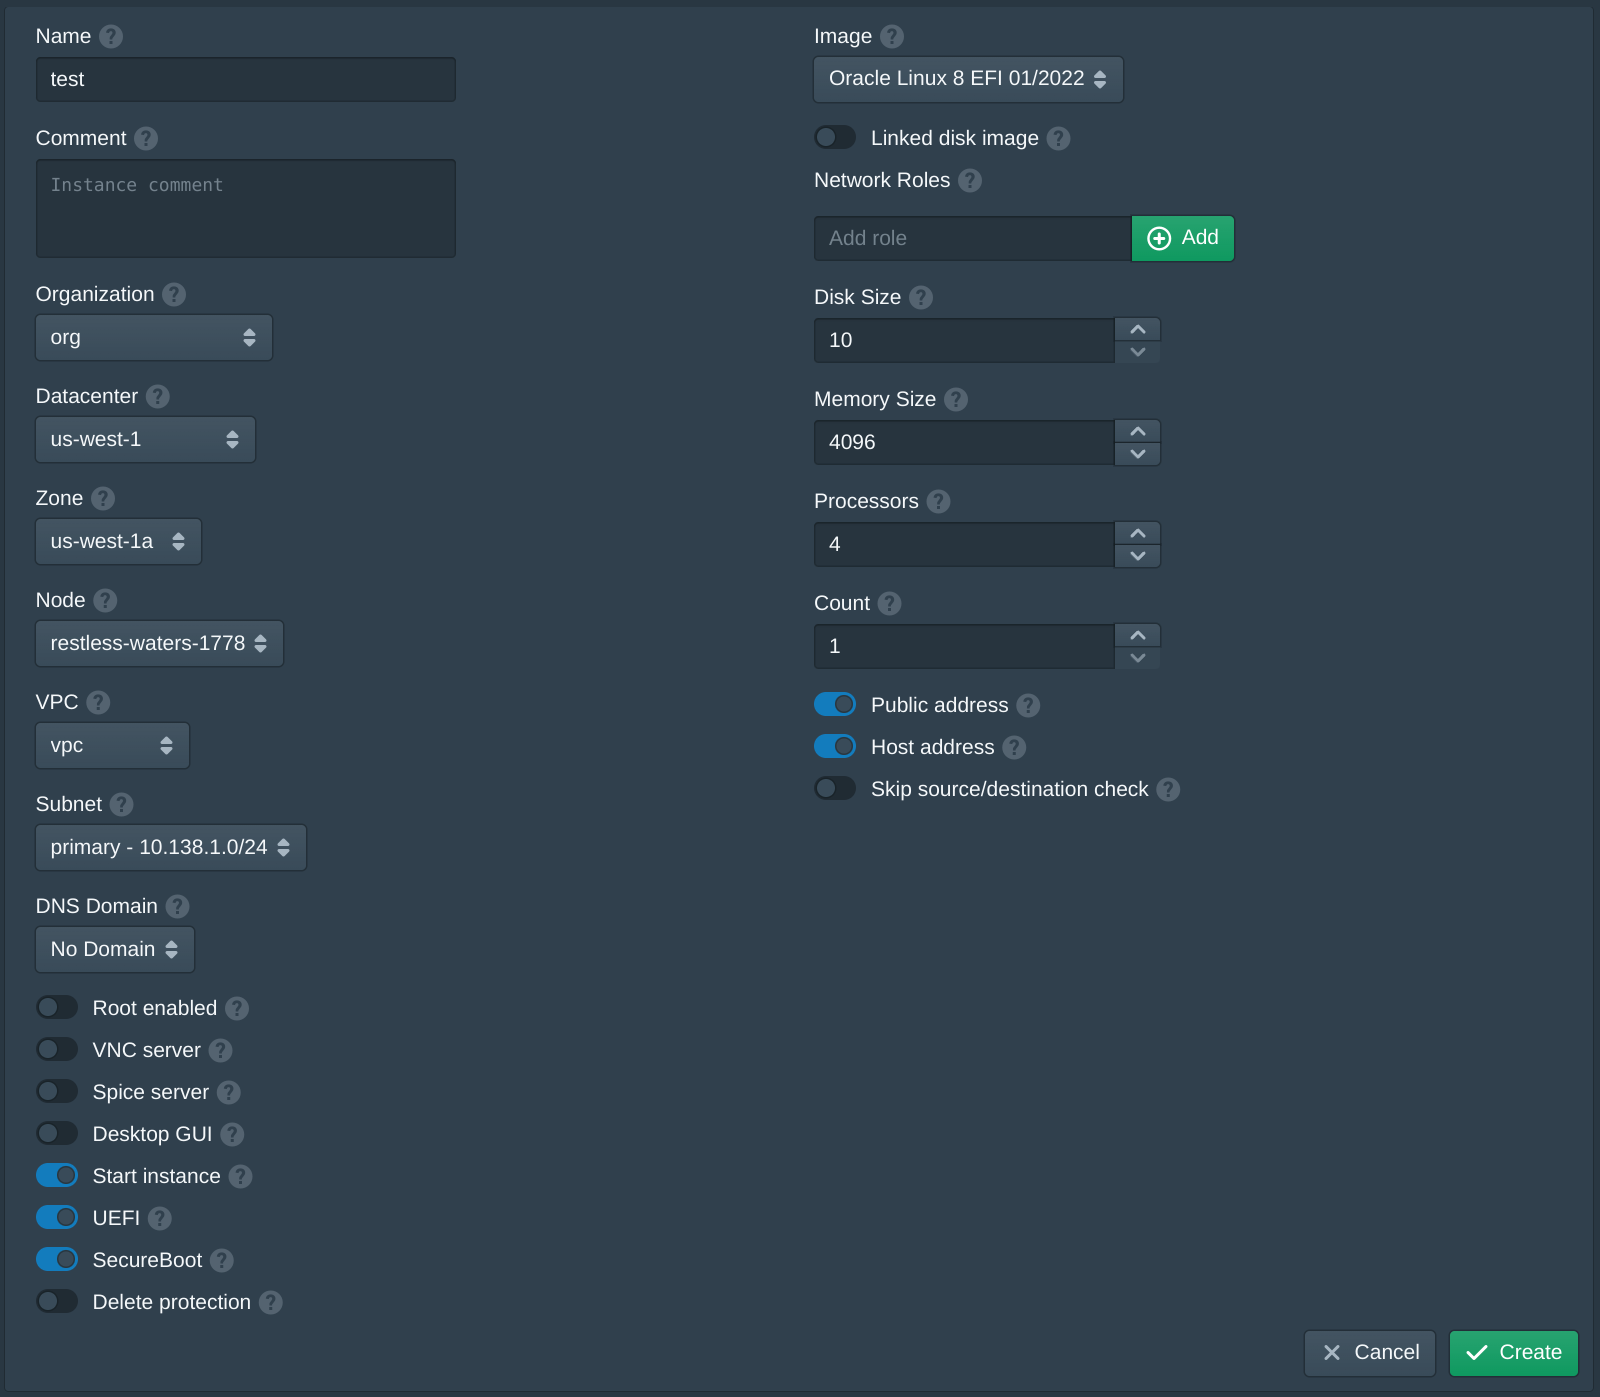
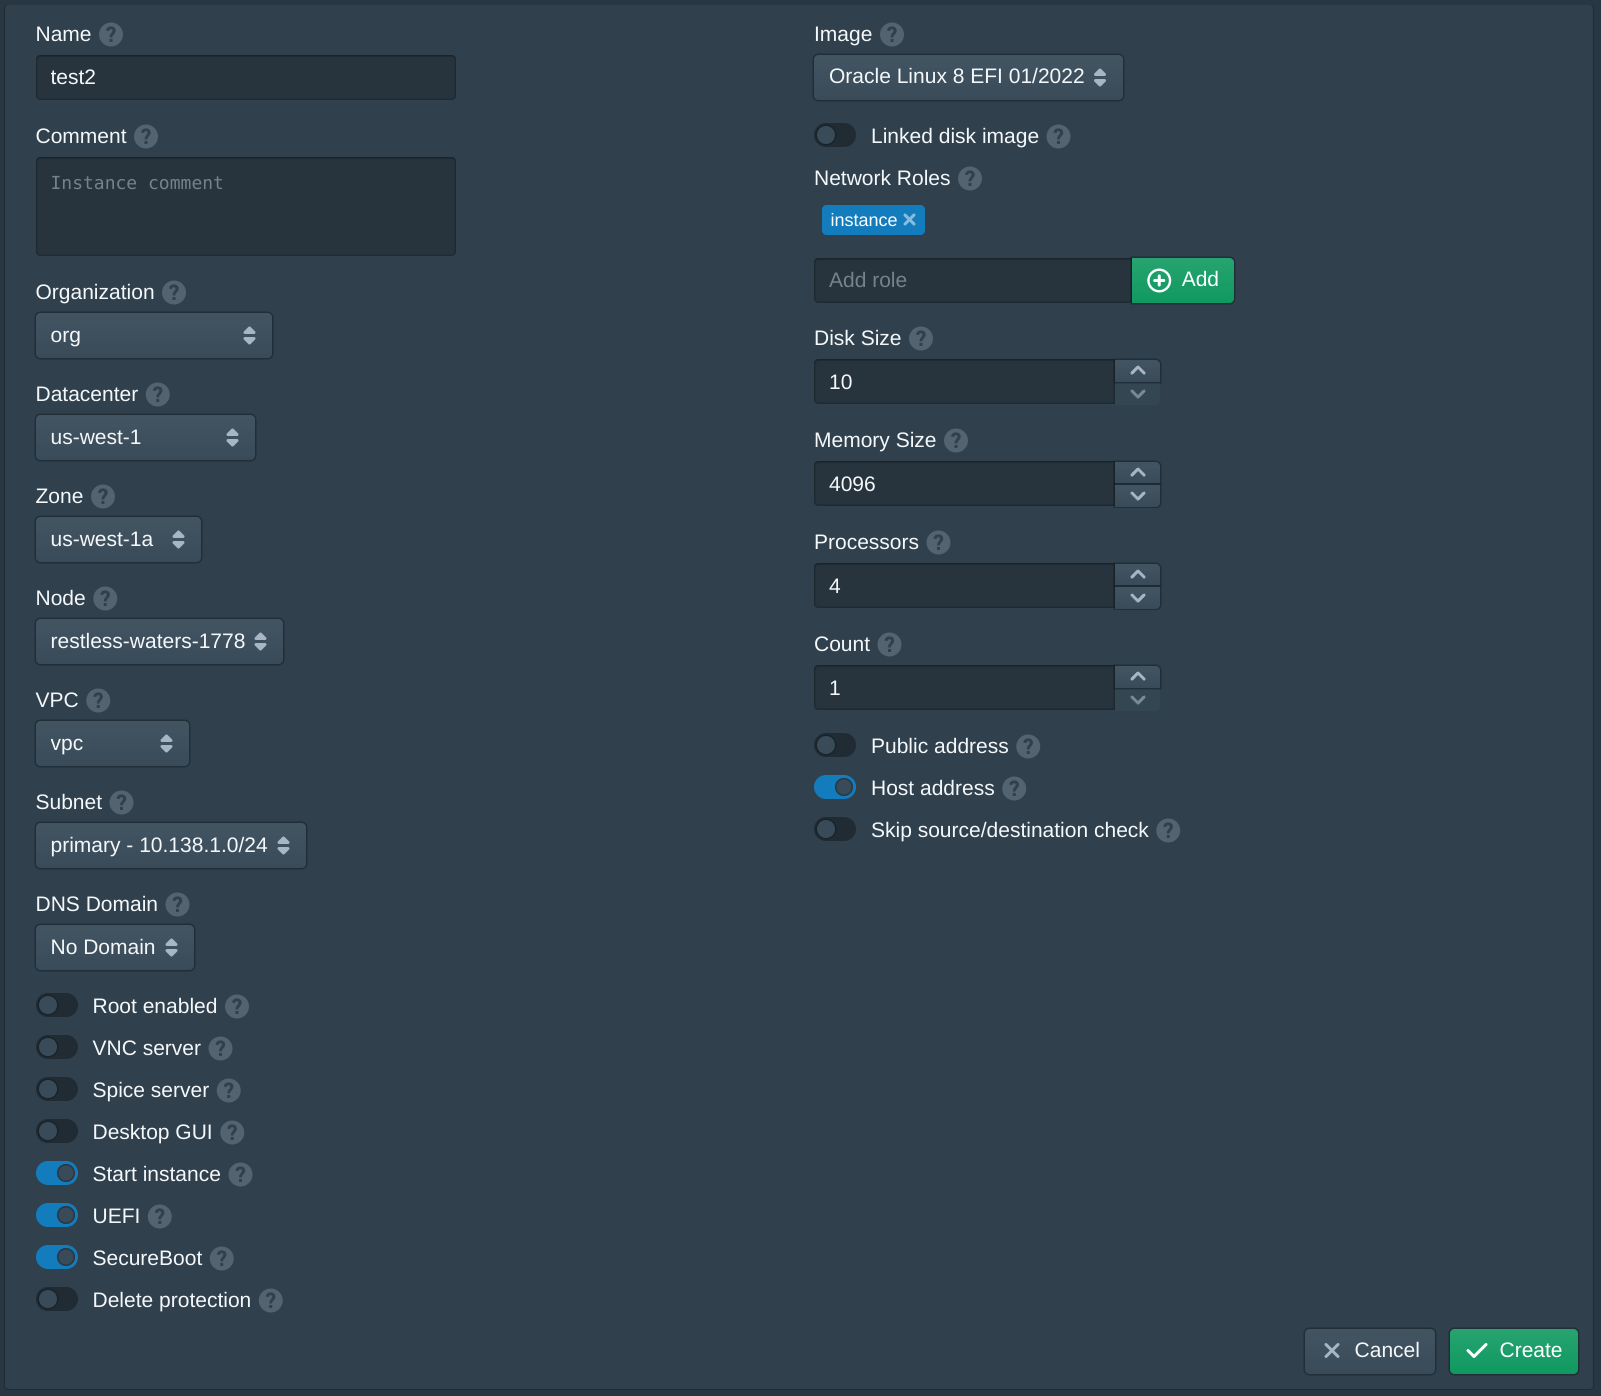
In the Instances tab click New. Set the Name to test
, set the Datacenter to us-west-1
, set the Zone to us-west-1a
and set the Node. Set VPC to vpc
and the Subnet to primary
. Add instance
to the Network Roles and set the Image to oraclelinux8_1912.qcow2
. If no images are shown check the Storages and restart the pritunl-cloud
service. Click Create twice to accept the Oracle license. Repeat this again to create instances on each node.


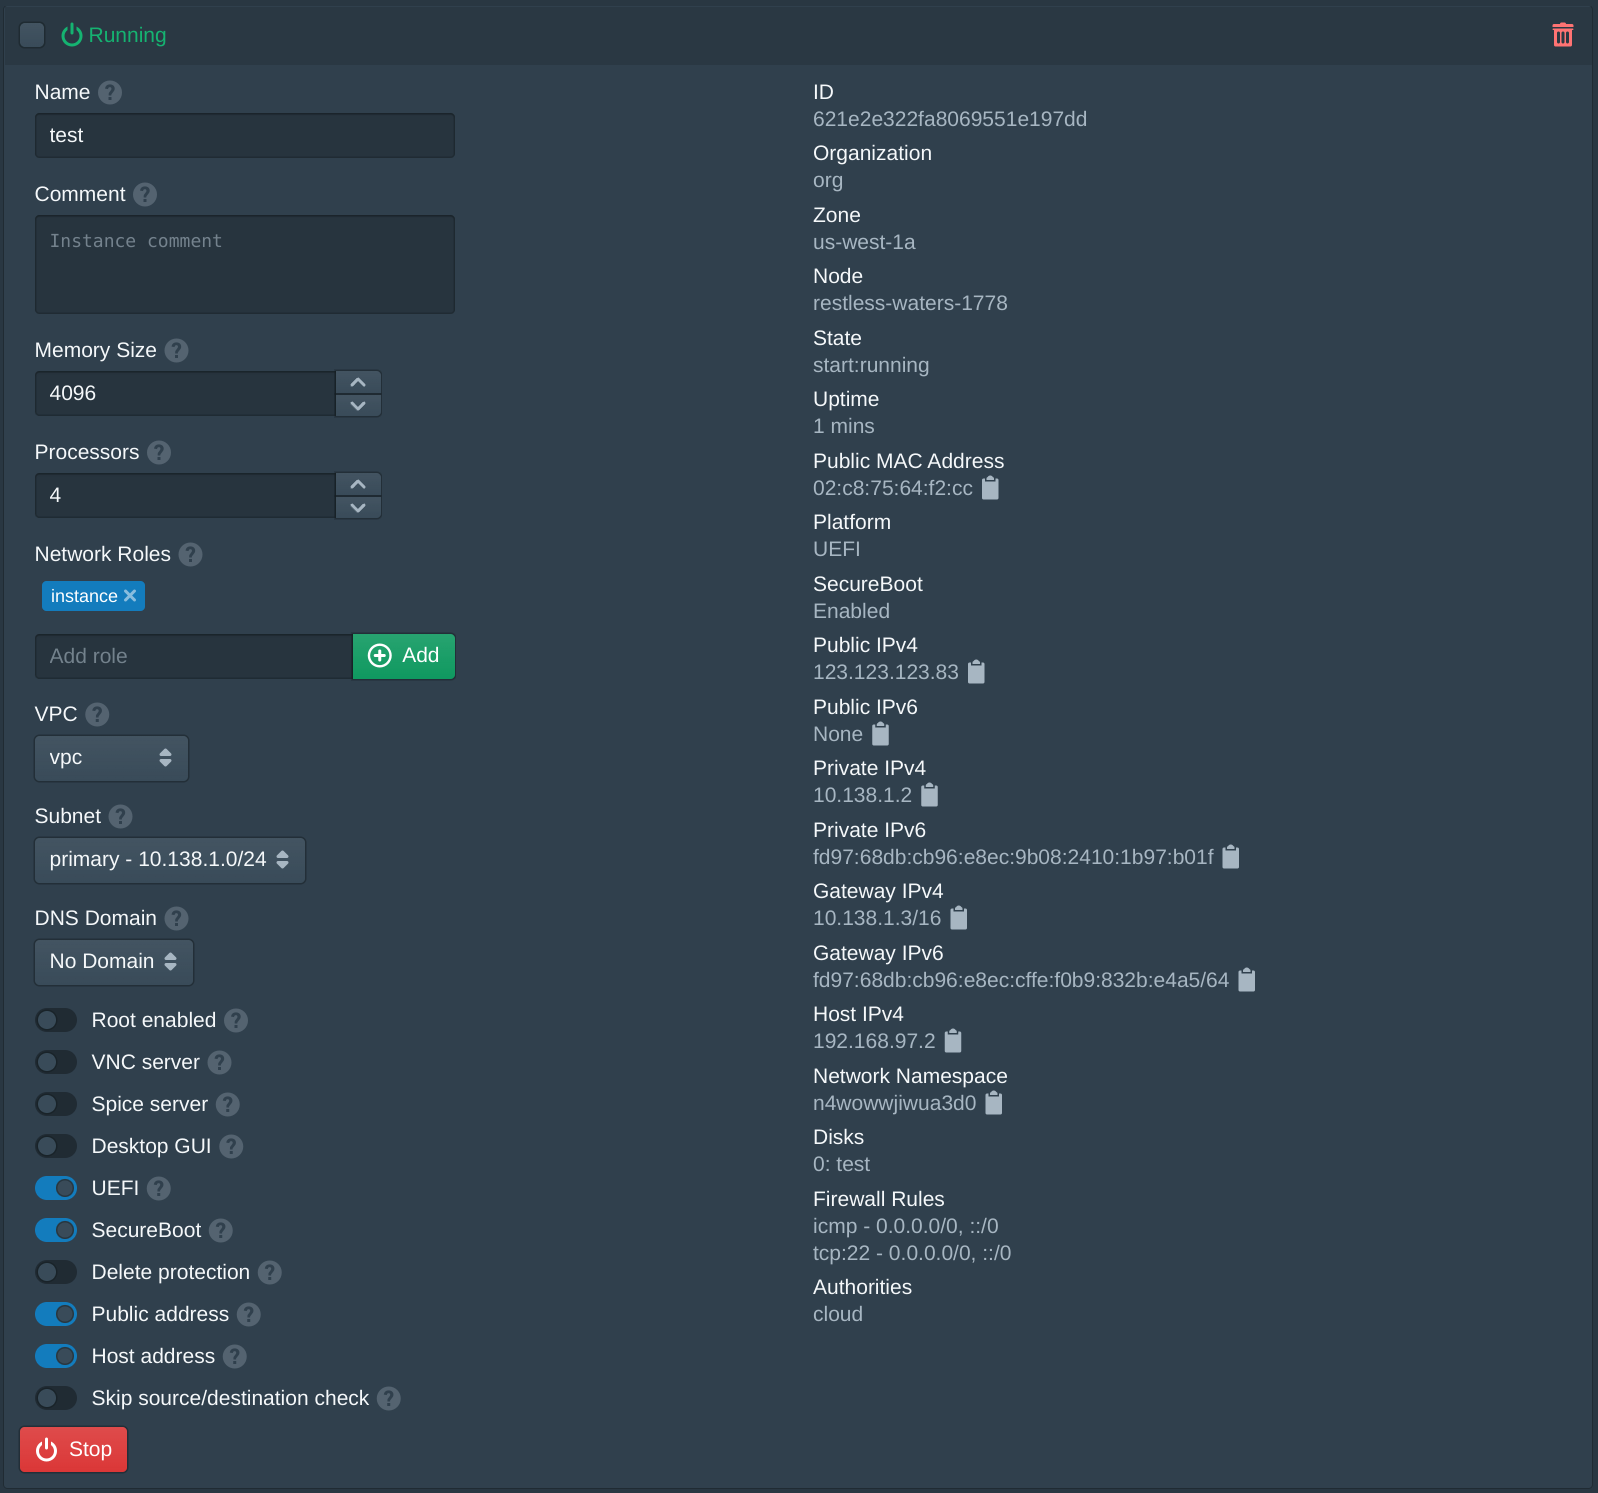
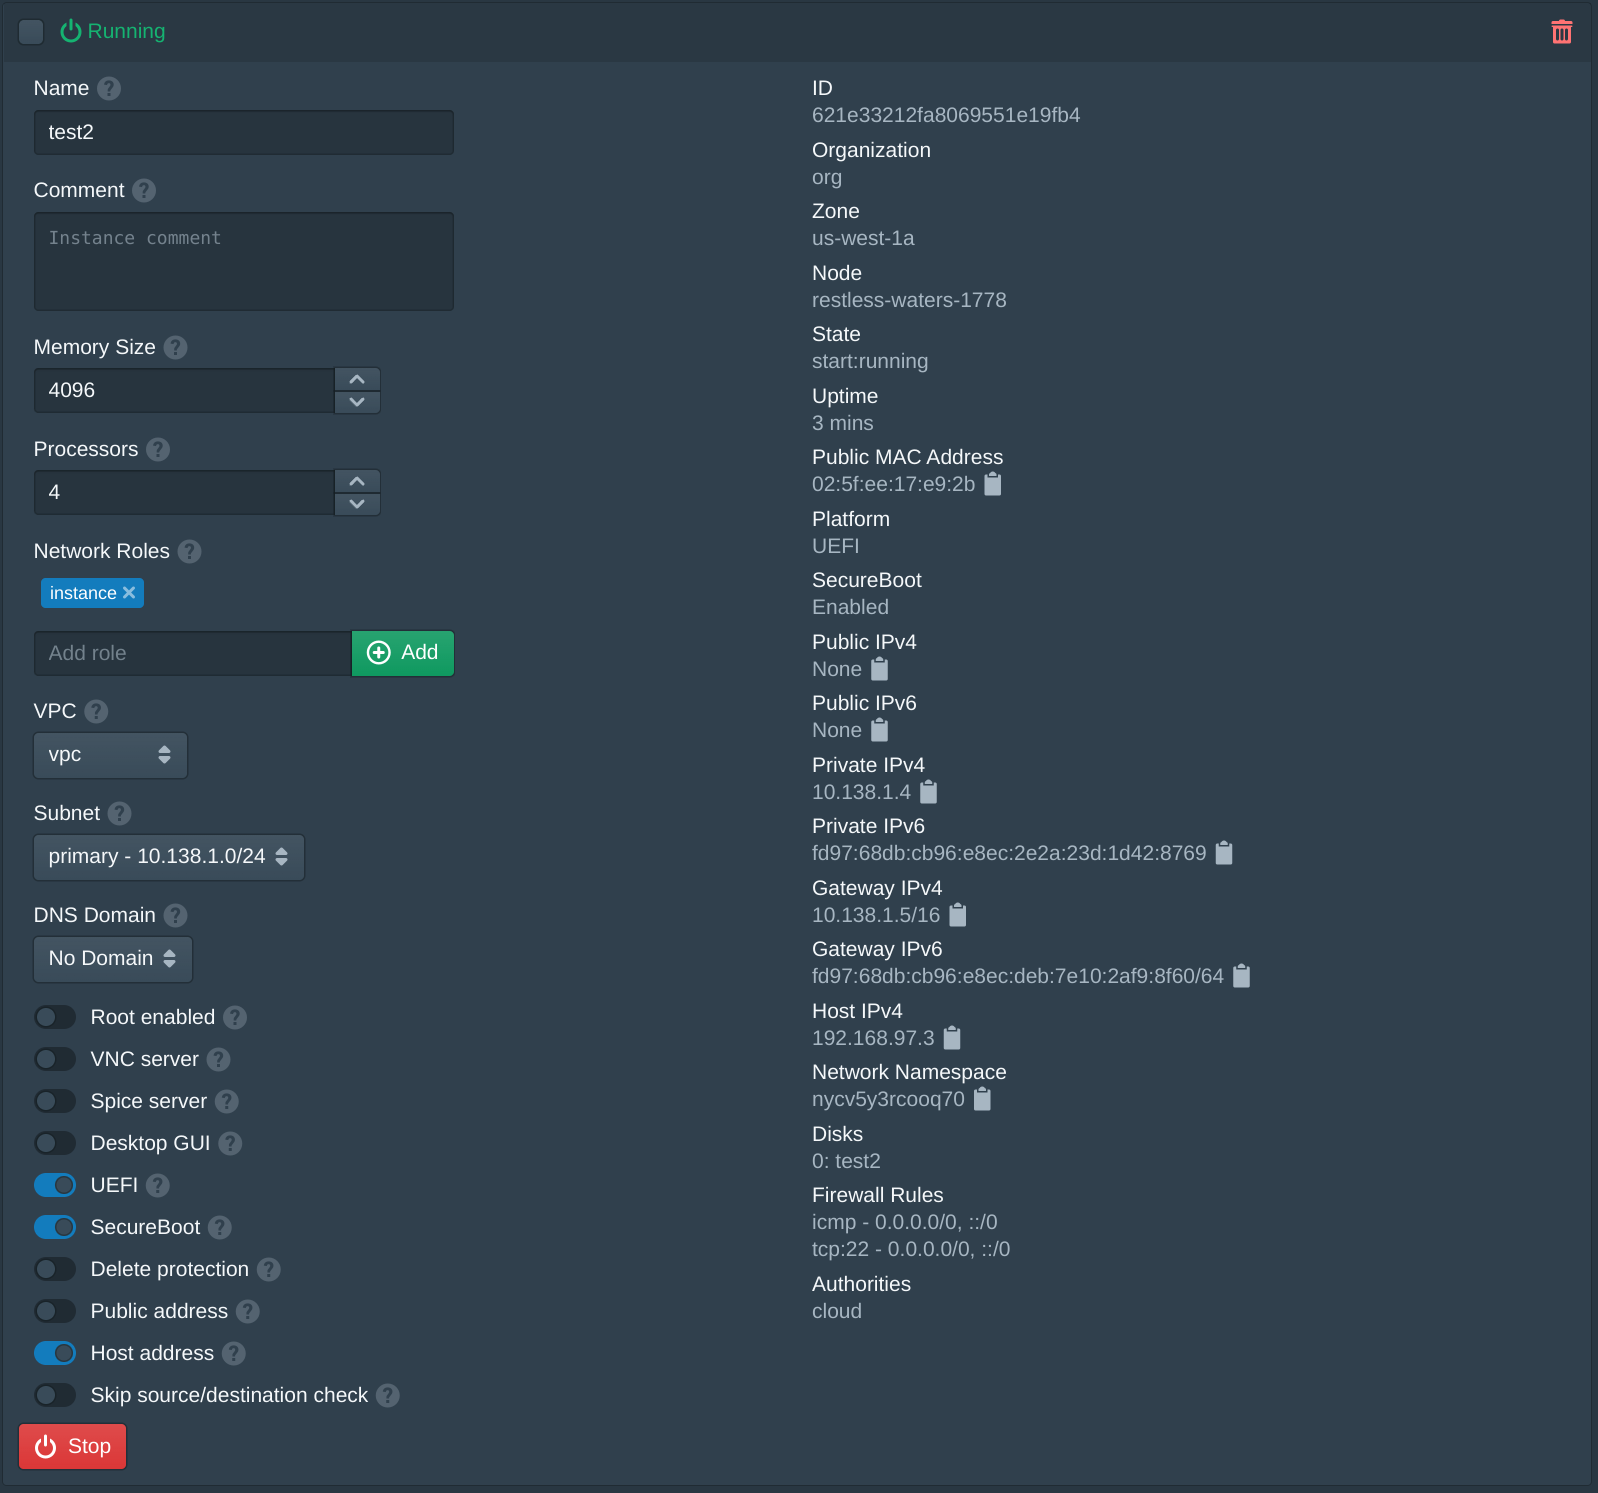
After the instance has been created copy the Public IPv4 address and SSH into the server using your SSH key with the username cloud
.
Configure Node Firewall
In the Firewalls tab click New then set the Name to node
. Click the + button next to the port 22 rule and add two rules. Then set the Port of the new rules to 80
and 443
. If MongoDB is running on the server add a third rule for port 27017 and set the source to 127.0.0.1
, if other hosts need access to the MongoDB server add the local network as a source. Set Organization to Node Firewall and addnode
to Network Roles. Then click Save. If IPv6 is configured to allow incoming connections from the internet the ::/0
should be adjusted to the local IPv6 subnets.


Open the Nodes tab and enable Firewall then add the node
role to the node Network Roles. Then click Save.


If access to the host is lost remove the node_id
from /cloud/pritunl-cloud.json
and run sudo systemctl restart pritunl-cloud
.
Configure Node Domains (Optional)
Configuring the Node domains allows adding signed certificates with LetsEncrypt and allows access to the user console. The user console is a restricted web console that only provides access to one organizations resources. This is intended for multi-tenant configurations.
If IPv6 is available the domains should be configured with AAAA records otherwise use A records. Create two domain records for the admin and user consoles. In this example cloud.pritunl.net
and user.cloud.pritunl.net
will be used. Set the DNS record value to the public IP address of the node, this can be found in the Nodes tab.


Wait a few minutes for the DNS records to become available then open the Nodes tab. Enable Admin and User. Then set the Admin Domain and User Domain.


Once configured the node must be accessed from one of the domains and cannot be accessed from the IP address. The user roles will match organization roles to permit user access to organizations from the user web console. If access to the host is lost remove the node_id
from /cloud/pritunl-cloud.json
and run sudo systemctl restart pritunl-cloud
.
Configured YubiKey or U2F (Optional)
Optionaly a YubiKey or U2F device can be configured, this requires the user domain to be configured in the previous section. Add the role u2f
to the user then click Save. Next enter a Device name and click Add Device then activate the U2F device.


Next apply a policy to require the U2F device, the policy will match the users u2f
role. In the Policies tab click New. Set the Name to u2f
and add u2f
to the Roles. Then enable Admin U2F device authentication and User U2F device authentication. Once done click Save.


Once done logging in will require the U2F device.
Created Private Storage (Optional)
This optional step will create a Minio server in a Pritunl Cloud instance to allow creating disk snapshots. Minio is a self hosted S3 compatible storage server. This will also demonstrate running services on a Pritunl Cloud instance.
First create a firewall for the Minio server. This can be created with more restricted rules as long as the Pritunl Cloud nodes have access to port 80.


Update an authority to add the role that will be used for the Minio server. If a shared role has already been configured for your authorities that can be added to the instance roles.


Create an instance for the Minio server. Increase the Disk Size as needed and set the Network Roles to roles that will match the firewall rules and authority above.


Connect to the server and run the commands below to install and configure Minio.
sudo yum -y install git wget
wget https://dl.google.com/go/go1.11.2.linux-amd64.tar.gz
sudo tar -C /usr/local -xf go1.11.2.linux-amd64.tar.gz
rm -f go1.11.2.linux-amd64.tar.gz
tee -a ~/.bashrc << EOF
export GOPATH=\$HOME/go
export PATH=/usr/local/go/bin:\$PATH:\$HOME/go/bin
EOF
source ~/.bashrc
go get github.com/minio/minio
sudo mkdir -p /minio/pritunl
sudo tee /etc/systemd/system/minio.service << EOF
[Unit]
Description=Minio Server
[Service]
LimitNOFILE=50000
ExecStart=/home/cloud/go/bin/minio server --address :80 /minio
[Install]
WantedBy=multi-user.target
EOF
sudo systemctl daemon-reload
Run the Minio server in the foreground to verify it is working and copy the access and secret key then ctrl+c
to exit. Once the server is ready start and enable the systemd service.
sudo /home/cloud/go/bin/minio server --address :80 /minio
sudo systemctl start minio
sudo systemctl enable minio
Login to the Minio console in the browser using the IP address of the instance and access keys above. If the pritunl
bucket doesn't already exists click Create bucket in the bottom left and create a bucket with the name pritunl
.


Create and configure a new storage using the access keys and IP address of the instance above. Use the bucket name from above. The Type must be Private.


Update the datacenter to set the Private Storage to the storage created above.


The private storage will now be available to create disk snapshots.
Updated 13 days ago