AWS
Pritunl Link client on AWS
For a more detailed tutorial refer toSite-to-Site with IPsec
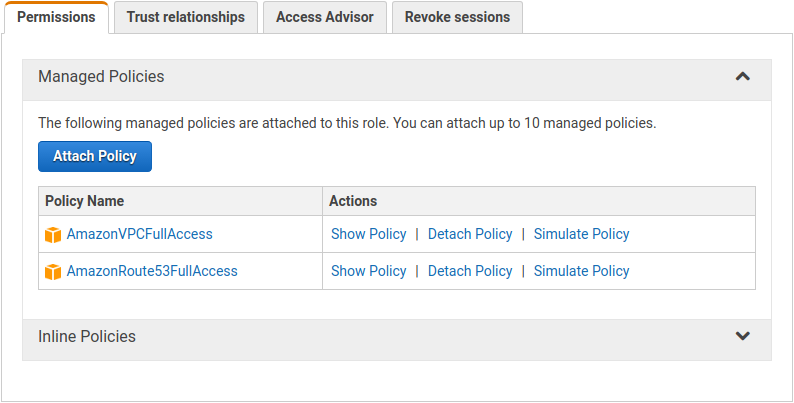
First create a IAM Instance Role with full VPC access. This is needed to allow the Pritunl Link client to modify the VPC routing table.

Below is a more specific IAM JSON policy for the instance role.
{
 "Version": "2012-10-17",
 "Statement": [
   {
     "Effect": "Allow",
     "Action": [
       "ec2:DescribeRouteTables",
       "ec2:CreateRoute",
       "ec2:ReplaceRoute",
       "ec2:DeleteRoute"
     ],
     "Resource": "*"
   }
 ]
}
Create a security group and open UDP ports 500 and 4500 to allow IPsec traffic. The clients must also have HTTPS access to the Pritunl cluster.
Optionally TCP port 9790 can also be opened for host to host checking. This allows each pritunl-link host to ping other hosts to measure latency and availability. These checks are used to detect network partitions and discover the best link to activate in a high availability configuration.

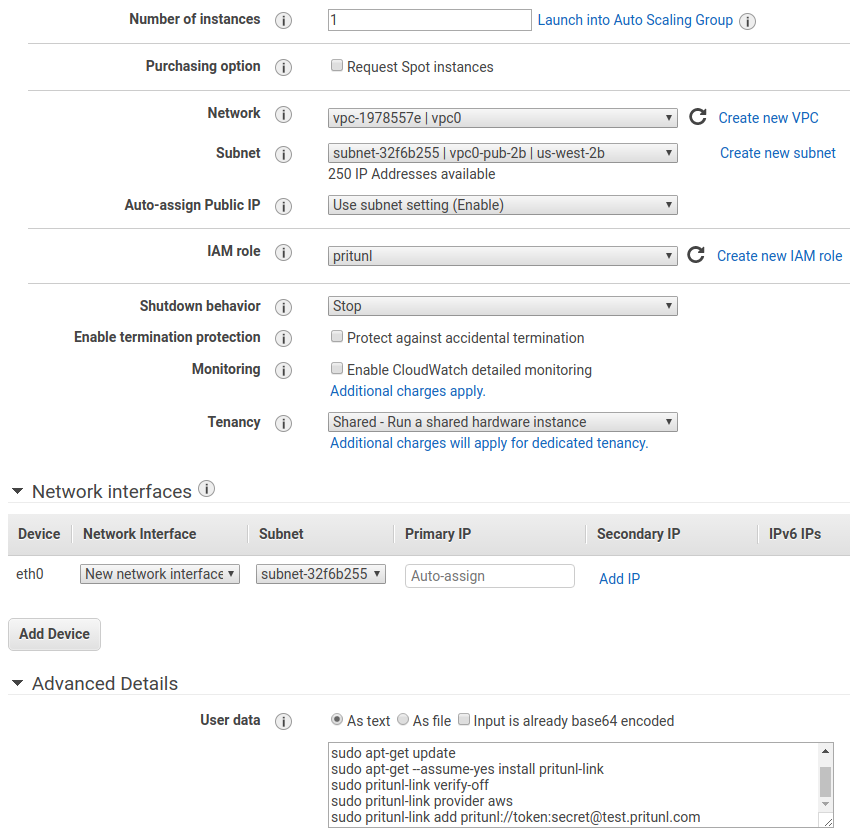
Launch an Amazon Linux 2 server in the VPC that is going to be linked. Select the IAM role created earlier. Use the startup script below.

Below is the startup script that can be put it in the User data or run manually. The first pritunl-link command needs to be run if the Pritunl server does not have a signed HTTPS certificate. The data will be signed and encrypted with AES independently an unsigned certificate will not effect security. The second command sets the provider to aws. The third command will add the URI, this needs to be replaced by clicking Get URI in the Pritunl web console. This command can be run multiple times if more then one link is configured. The pritunl-link verify-off line can be left out if the Pritunl server is configured with a valid SSL certificate. It is not necessary to verify the SSL certificate, the sensitive data is encrypted with AES-256 and signed with HMAC SHA-512 using the token and secret in the URI.
#!/bin/bash
tee /etc/yum.repos.d/pritunl.repo << EOF
[pritunl]
name=Pritunl
baseurl=https://repo.pritunl.com/stable/yum/amazonlinux/2/
gpgcheck=1
enabled=1
EOF
rpm -Uvh https://dl.fedoraproject.org/pub/epel/epel-release-latest-7.noarch.rpm
gpg --keyserver hkp://keyserver.ubuntu.com --recv-keys 7568D9BB55FF9E5287D586017AE645C0CF8E292A
gpg --armor --export 7568D9BB55FF9E5287D586017AE645C0CF8E292A > key.tmp; rpm --import key.tmp; rm -f key.tmp
yum -y update
yum -y install pritunl-link

pritunl-link verify-off
pritunl-link provider aws
pritunl-link add pritunl://token:secret@test.pritunl.com
If an IPv6 link is being configured the sysctl commands below must be run at the instance startup to configure IPv6 autoconf.
sudo sysctl -w net.ipv6.conf.all.accept_ra=2
sudo sysctl -w net.ipv6.conf.default.accept_ra=2
sudo sysctl -w net.ipv6.conf.eth0.accept_ra=2
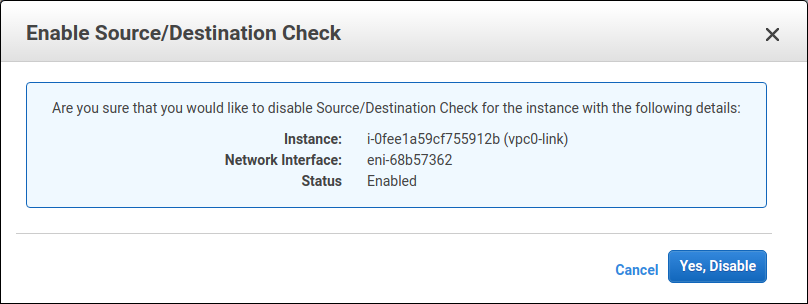
Right click on the instance and select Networking then Change Source/Dest. Check to disable the source/dest check. This is needed to allow the instance to transmit network traffic from other networks.

The commands below can be run to check the logs and status of the link. The pritunl-link service will already be running and connected once the URI is added.
journalctl -u pritunl-link
sudo ipsec status
Updated 3 months ago
