Okta
Single sign-on with Okta
This tutorial will explain configuring Okta for single sign-on to Pritunl. Users will authenticate through Okta when downloading VPN profiles. After a user has downloaded a VPN profile the Pritunl server will use the Okta API to verify that the user still exists and is enabled before each VPN connection.
Okta Push
Okta Push can be enabled for each VPN connection if it is available. If you are using Okta Push but do not want it used for VPN connections uncheck Enable Okta Push in the settings. This configuration option is stored in the database and will only need to be run on one host. The change will be immediately applied to all hosts and will not require restarting any hosts.
Create Pritunl App on Okta
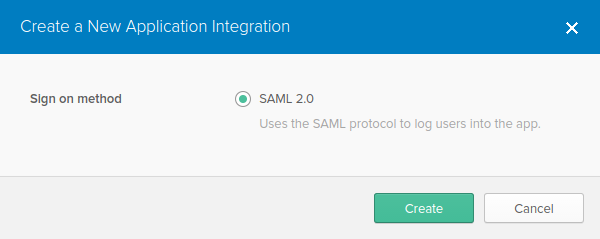
In the Applications section of the admin interface click Add Application. Then click Create New App and select SAML 2.0
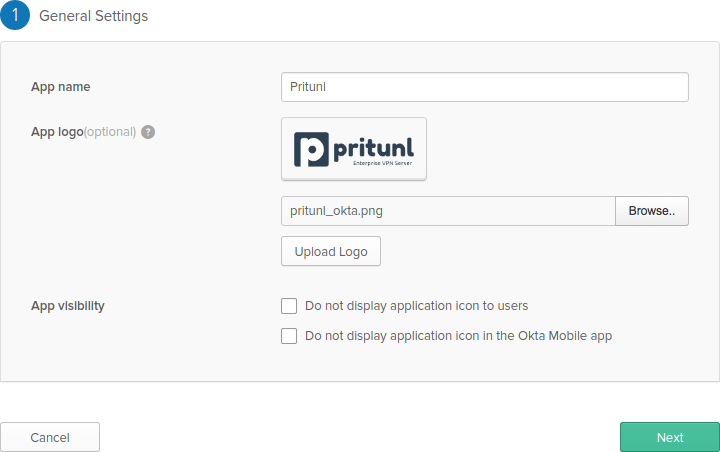
Next name the app Pritunl and download the Okta Pritunl logo pritunl.com/img/pritunl_okta.png and click Upload Logo then click Next.
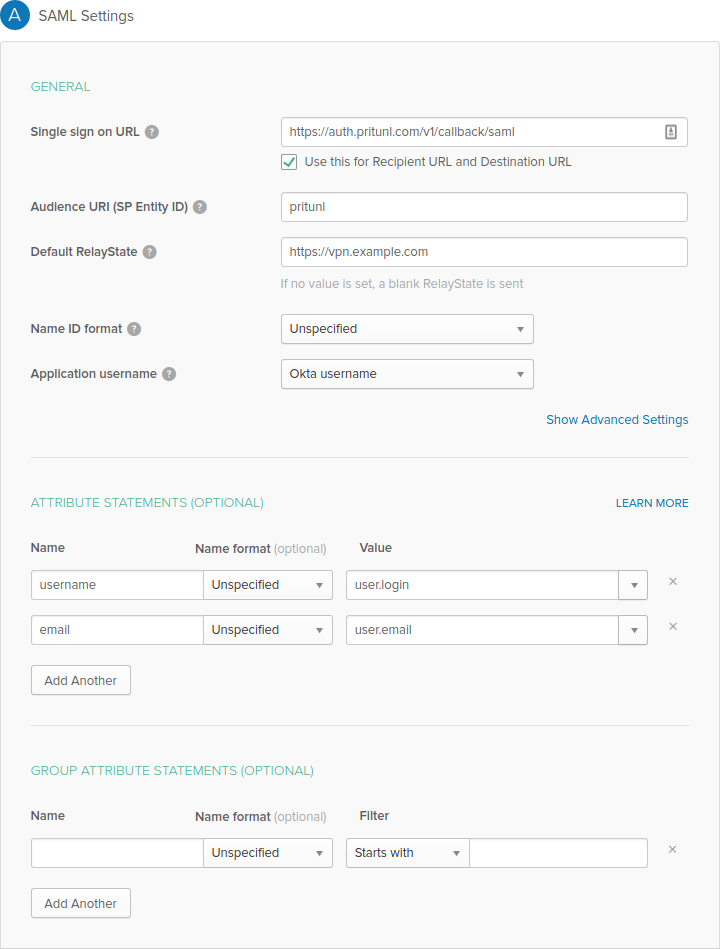
On the next page enter https://auth.pritunl.com/v1/callback/saml as the Single sign on URL and pritunl as the Audience URI. Set the Default RelayState to the address your users would use to access the Pritunl server such as https://vpn.example.com. Then add the two attributes username with a value of user.login and email with a value of user.email. Once done click Next then Finish.
Setting User Organization
By default all Okta users will be added to the default organization set in the Pritunl settings. Users can be added to a specific organization using the org attribute. This attribute can be mapped to a value such as user.department. The value of the attribute must exactly match the name of an existing organization on the Pritunl server. If a value is given for an organization that does not exist the user will be added to the default organization. Okta provides several mapped values for attributes. Refer to the Okta documentation for setting the value of the org attribute to best match Pritunl organizations.

Create API Token
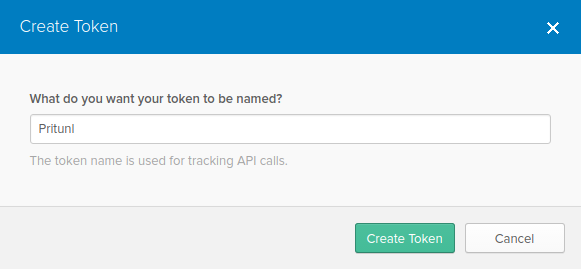
Pritunl will require an API token to validate if a user exists and is enabled before allowing a VPN connection. To create a token click Security then API and Create Token. Name the token Pritunl and save the token for later.
Add Users to Pritunl App
After the Okta app has been created you will need to add users to the Pritunl app before they are able to use it. This can be done in the People tab on the Pritunl app settings on Okta.
Okta App ID
Next get the Okta app ID from the url in the Okta application settings. The ID is the last component of the URL. For example the ID for this url https://pritunl-dev-admin.okta.com/admin/app/pritunlorg473326_pritunl_1/instance/0oarolrfv30ouSTcm2p6/#tab-signon is 0oarolrfv30ouSTcm2p6. This ID will be needed in the next step.
Configure Pritunl
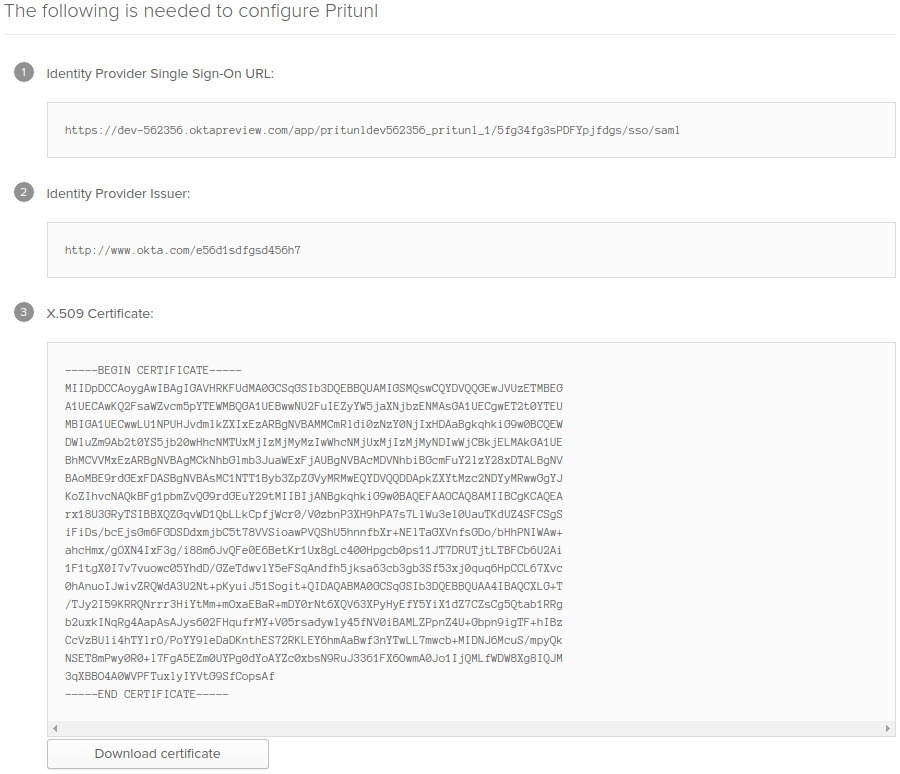
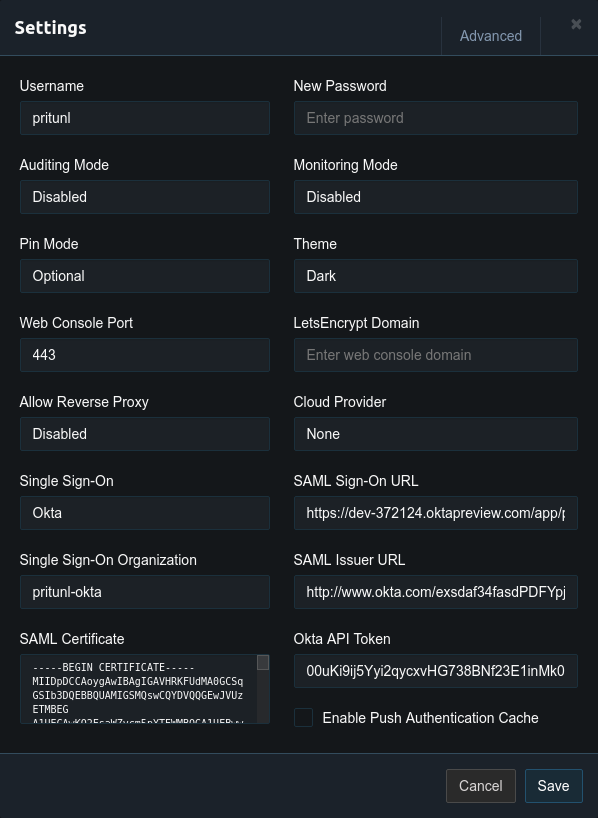
Once the Okta app has been configured click on the app then click Sign On and View SAML setup instructions on the right side. Then open the Pritunl settings and set Single Sign-On to Okta and set the Single Sign-On Organization. This organization will be the default organization Okta users are added to. Set the Okta App ID to the ID from the previous step. Then copy the Identity Provider Single Sign-On URL to SAML Sign-On URL. Then Identity Provider Issuer to SAML Issuer URL. Then X.509 Certificate to SAML Certificate. Use the API token from earlier to fill in Okta API Token.
Updated 3 months ago
