Packet
Configure Pritunl Cloud on Packet
Outdated Documentation - This documentation has not yet been updated for the latest release, refer to the Vultr documentation for updated information.
This tutorial will create a multi host Pritunl Cloud cluster on Packet with public IPv6 addresses for each instance. Instances will have VPC networking across all Pritunl Cloud hosts.
Create MongoDB Server
First create a server to host the MongoDB database. All Pritunl Cloud hosts will connect to this database. For high availability a replica set can be configured. Select CentOS 8 as the Operating System. Then add SSH keys and click Deploy Now.
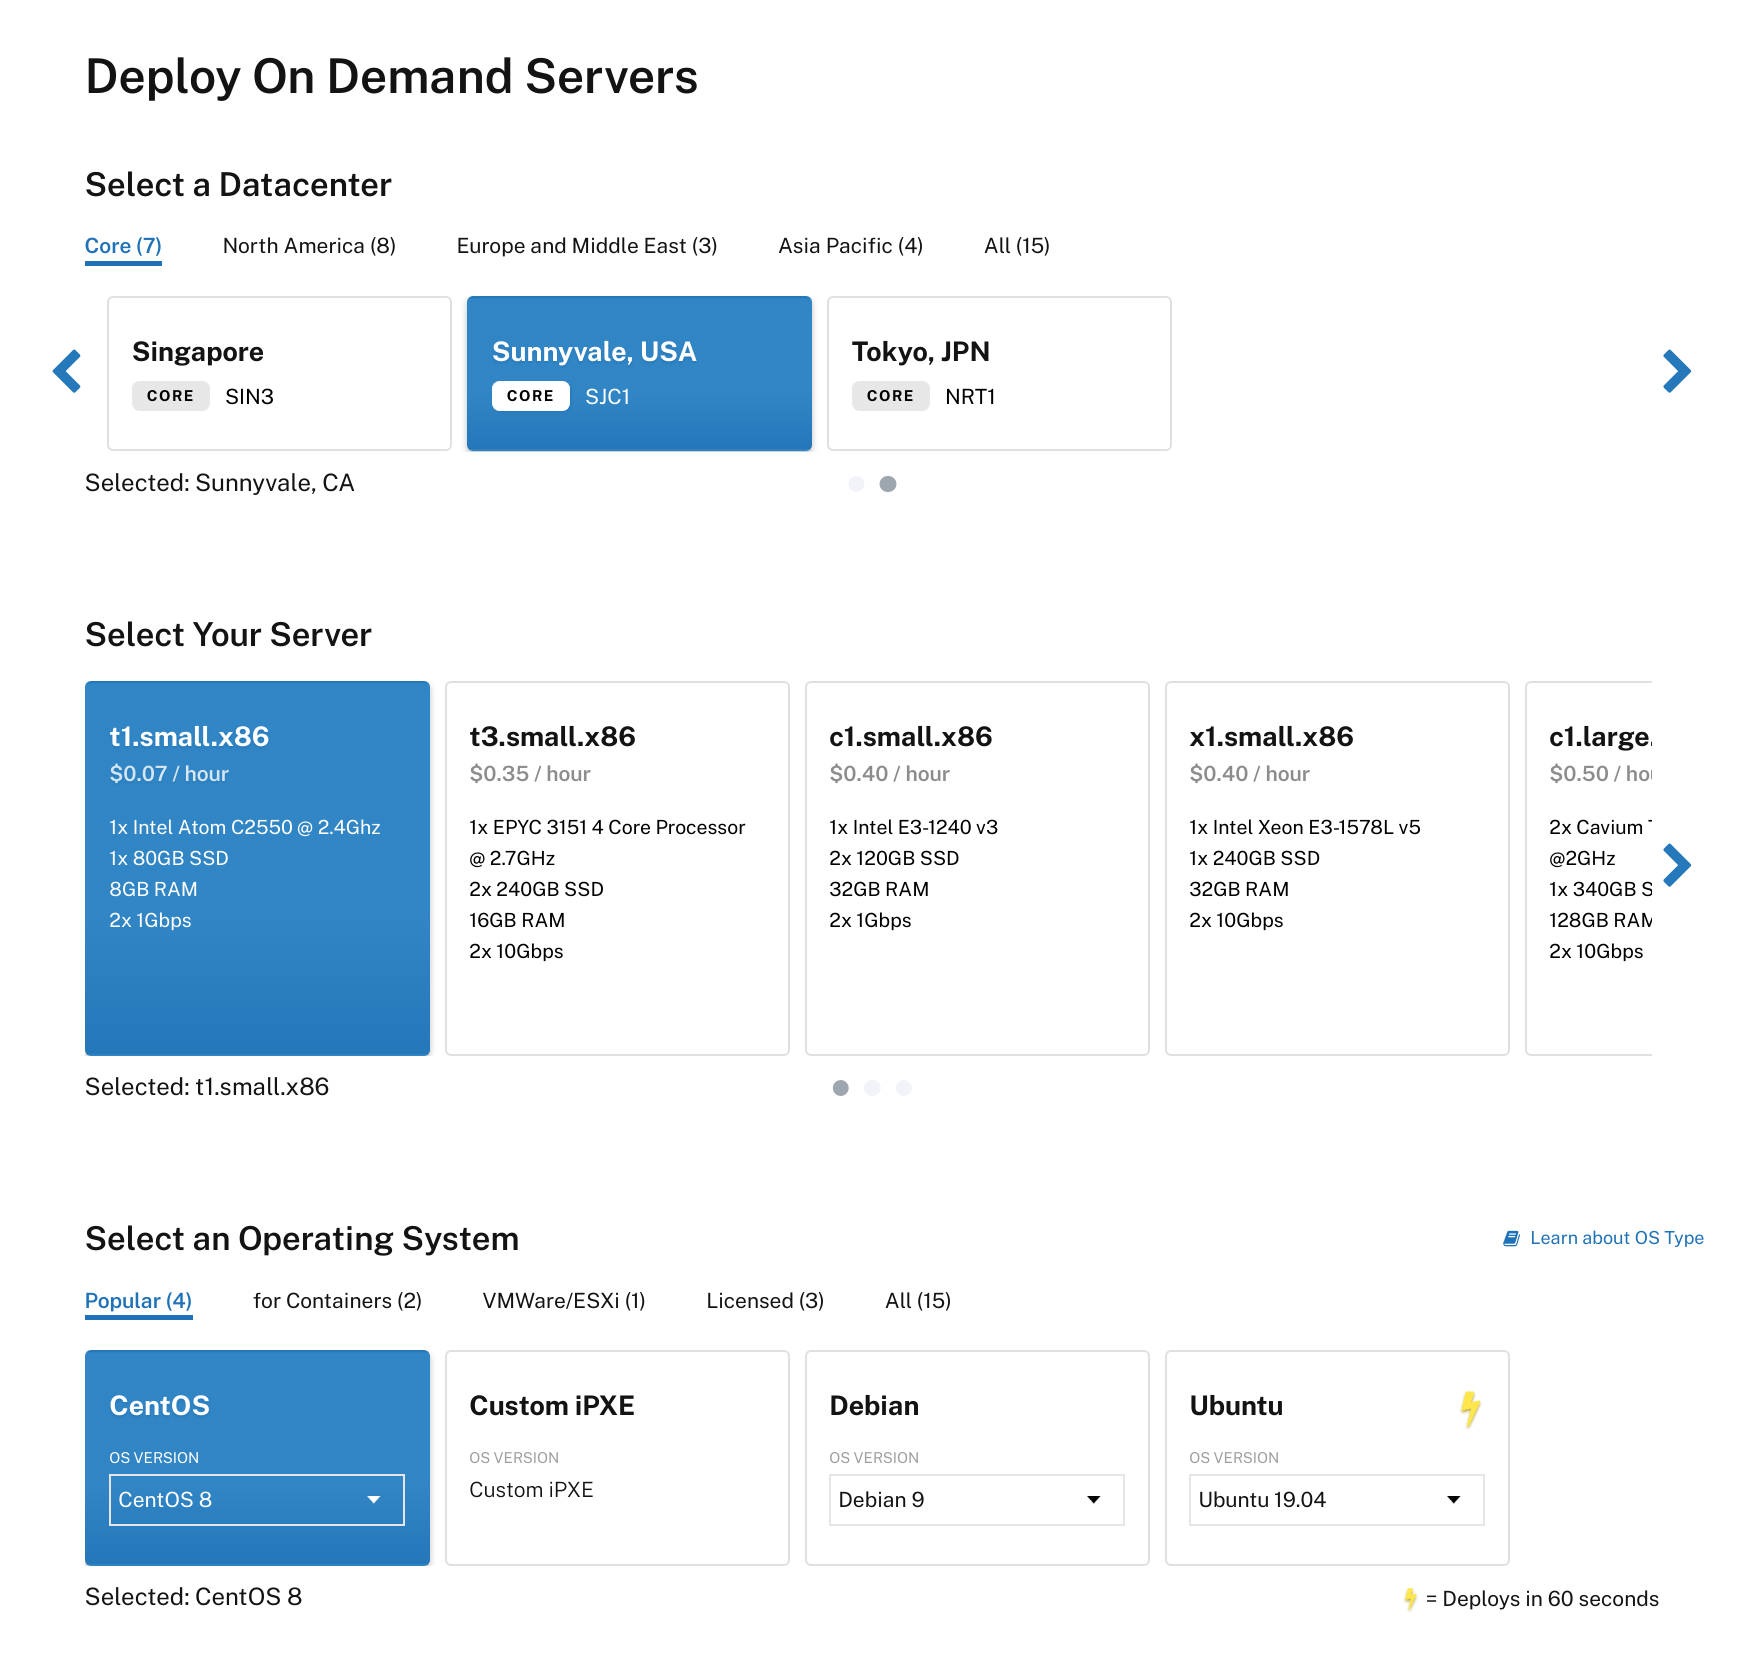
Connect to the server with SSH using the root user. Then run the commands below to optimize the server and configure the firewall.
sudo tee /etc/sysctl.d/10-dirty.conf << EOF
vm.dirty_ratio = 3
vm.dirty_background_ratio = 2
EOF

sudo tee /etc/sysctl.d/10-swappiness.conf << EOF
vm.swappiness = 10
EOF

sudo tee /etc/security/limits.conf << EOF
* hard nofile 500000
* soft nofile 500000
root hard nofile 500000
root soft nofile 500000
EOF

sudo tee /etc/systemd/system/disable-transparent-huge-pages.service << EOF
[Unit]
Description=Disable Transparent Huge Pages
DefaultDependencies=no
After=sysinit.target local-fs.target
Before=basic.target

[Service]
Type=oneshot
ExecStart=/bin/sh -c '/usr/bin/echo never > /sys/kernel/mm/transparent_hugepage/enabled'
ExecStart=/bin/sh -c '/usr/bin/echo never > /sys/kernel/mm/transparent_hugepage/defrag'

[Install]
WantedBy=basic.target
EOF
sudo systemctl daemon-reload
sudo systemctl enable disable-transparent-huge-pages

sudo yum -y update
sudo yum -y remove cockpit-ws

sudo yum -y install chrony
sudo systemctl start chronyd
sudo systemctl enable chronyd

sudo sed -i '/^PasswordAuthentication/d' /etc/ssh/sshd_config

sudo yum -y install firewalld
sudo systemctl enable firewalld
sudo systemctl start firewalld

sudo firewall-cmd --permanent --new-zone=cloud
sudo firewall-cmd --permanent --zone=cloud --add-source=10.0.0.0/8
sudo firewall-cmd --permanent --zone=cloud --add-service=ssh
sudo firewall-cmd --permanent --zone=cloud --add-service=mongodb
sudo firewall-cmd --permanent --zone=public --remove-service=cockpit
sudo firewall-cmd --permanent --zone=public --remove-service=dhcpv6-client
sudo firewall-cmd --reload
sudo firewall-cmd --get-active-zones
sudo firewall-cmd --zone=public --list-all
sudo firewall-cmd --zone=cloud --list-all
Run the commands below to enable automatic updates.
sudo dnf -y install dnf-automatic
sudo sed -i 's/^upgrade_type =.*/upgrade_type = default/g' /etc/dnf/automatic.conf
sudo sed -i 's/^download_updates =.*/download_updates = yes/g' /etc/dnf/automatic.conf
sudo sed -i 's/^apply_updates =.*/apply_updates = yes/g' /etc/dnf/automatic.conf
sudo systemctl enable --now dnf-automatic.timer
Run the commands below to install MongoDB.
sudo tee /etc/yum.repos.d/mongodb-org-4.2.repo << EOF
[mongodb-org-4.2]
name=MongoDB Repository
baseurl=https://repo.mongodb.org/yum/redhat/8/mongodb-org/4.2/x86_64/
gpgcheck=1
enabled=1
gpgkey=https://www.mongodb.org/static/pgp/server-4.2.asc
EOF

sudo yum -y install mongodb-org
sudo systemctl enable mongod
sudo systemctl start mongod
Run the first two commands to generate random passwords. Then open the MongoDB shell and create users. Replace <PASSWORD1> and <PASSWORD2> with the random passwords. Run ip addr to get the private IPv4 address and replace <PRIVATE_IPV4>. Then add the authorization option to the configuration and restart MongoDB.
head /dev/urandom | tr -dc A-Za-z0-9 | head -c 32 ; echo ''
head /dev/urandom | tr -dc A-Za-z0-9 | head -c 32 ; echo ''

mongo
use admin;
db.createUser({
  user: "admin",
  pwd: "<PASSWORD1>",
  roles: ["root"]
});
db.createUser({
  user: "pritunl-cloud",
  pwd: "<PASSWORD2>",
  roles: [{role: "dbOwner", db: "pritunl-cloud"}]
});
exit;

ip addr

sudo sed -i 's/bindIp: 127.0.0.1/bindIp: <PRIVATE_IPV4>/g' /etc/mongod.conf
sudo tee -a /etc/mongod.conf << EOF
security:
  authorization: "enabled"
EOF

sudo systemctl restart mongod
Run sudo reboot to restart the server to apply optimizations.
Create Pritunl Cloud Host
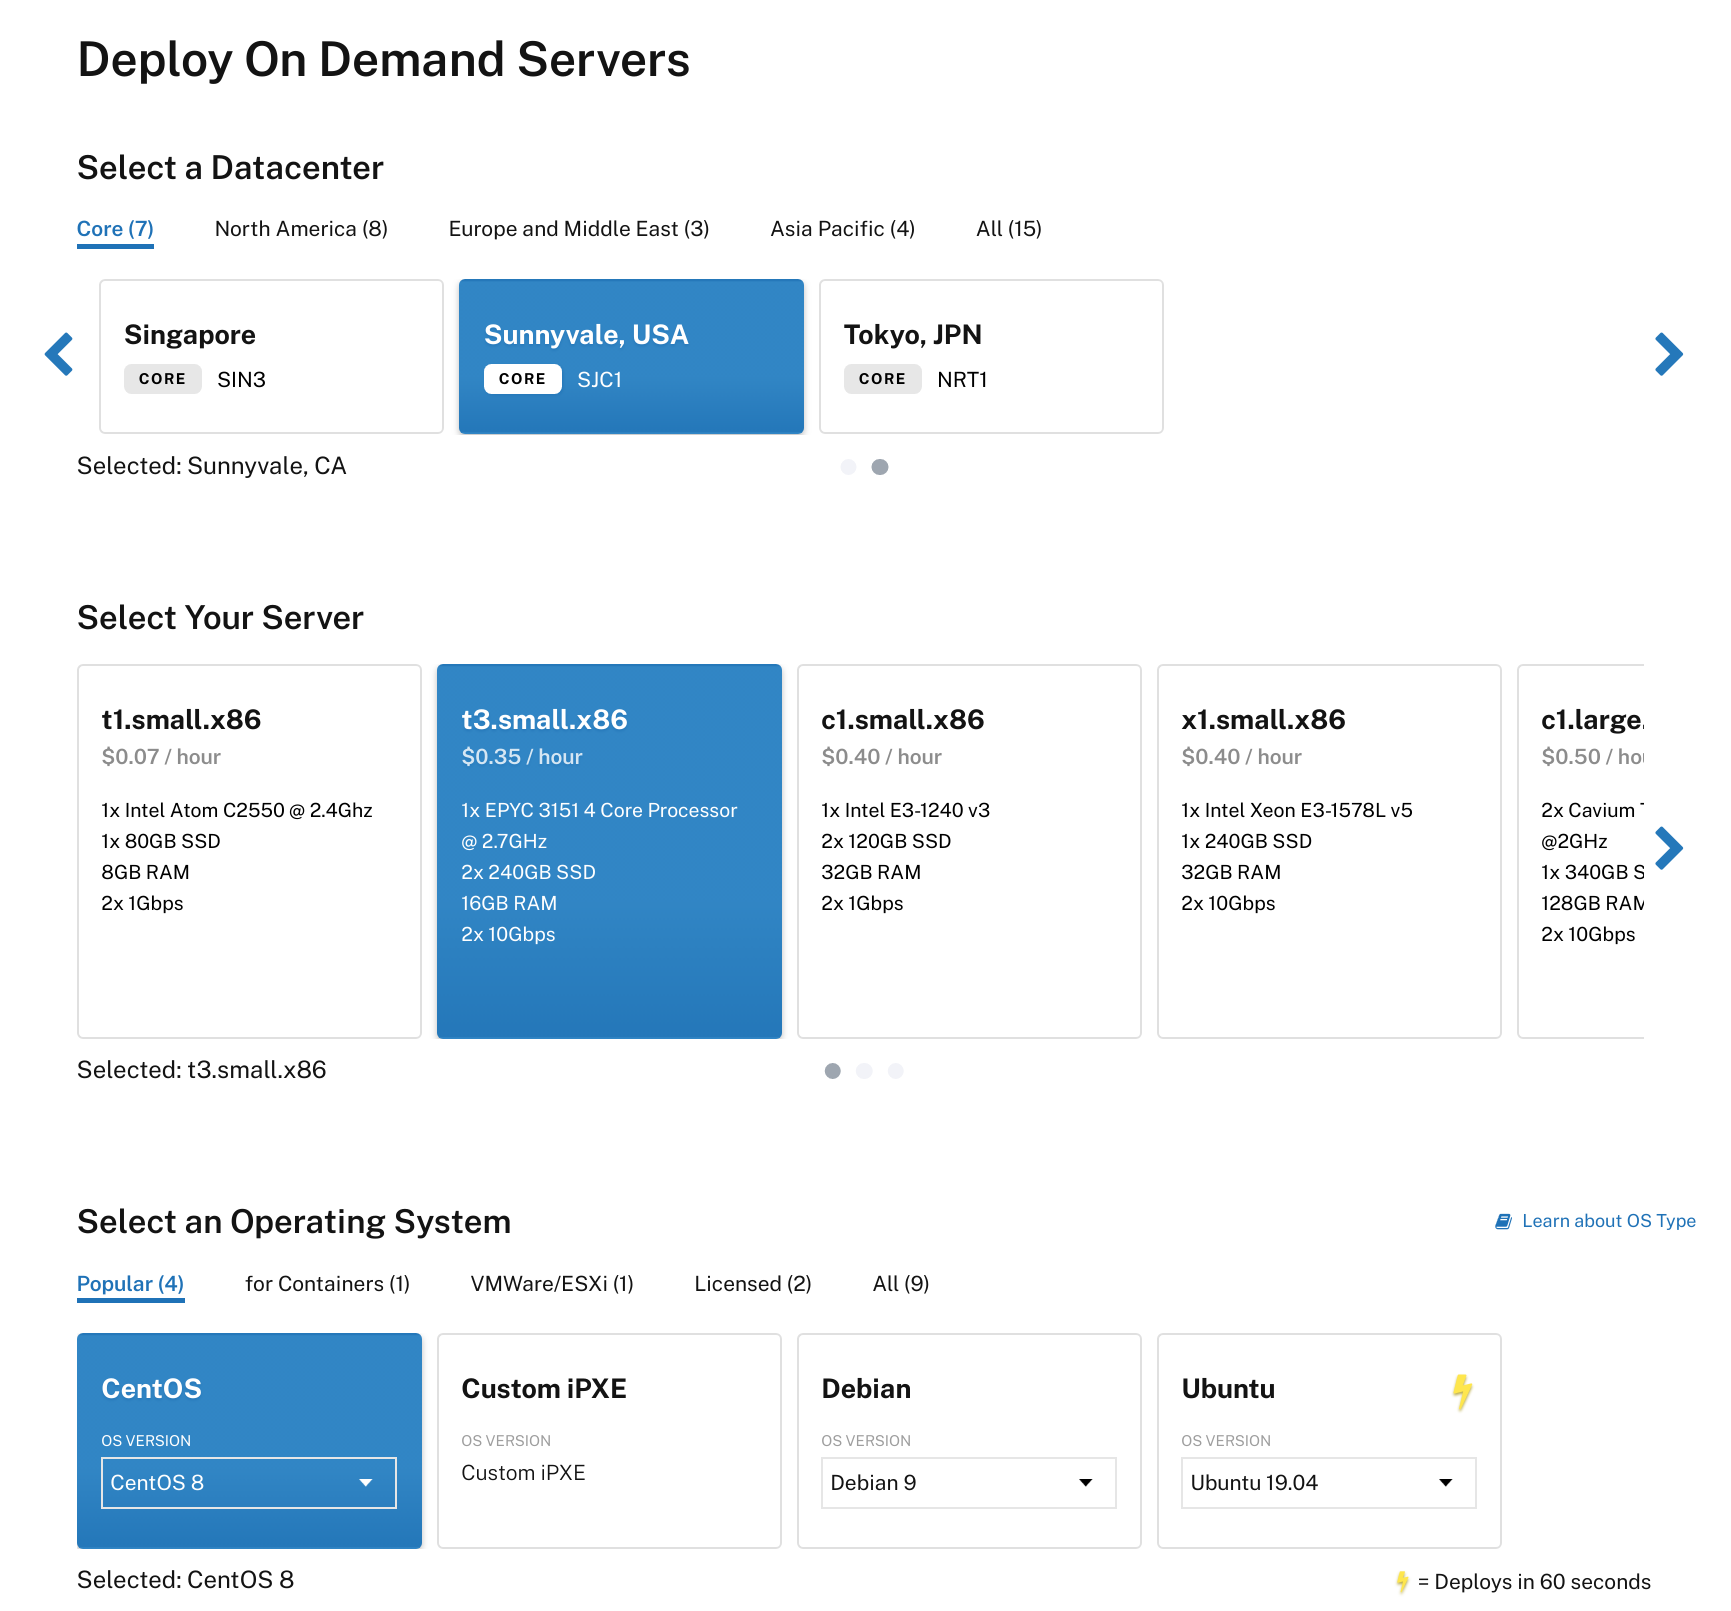
Create multiple servers to host Pritunl Cloud, select CentOS 8 as the Operating System. Then add SSH keys and click Deploy Now.
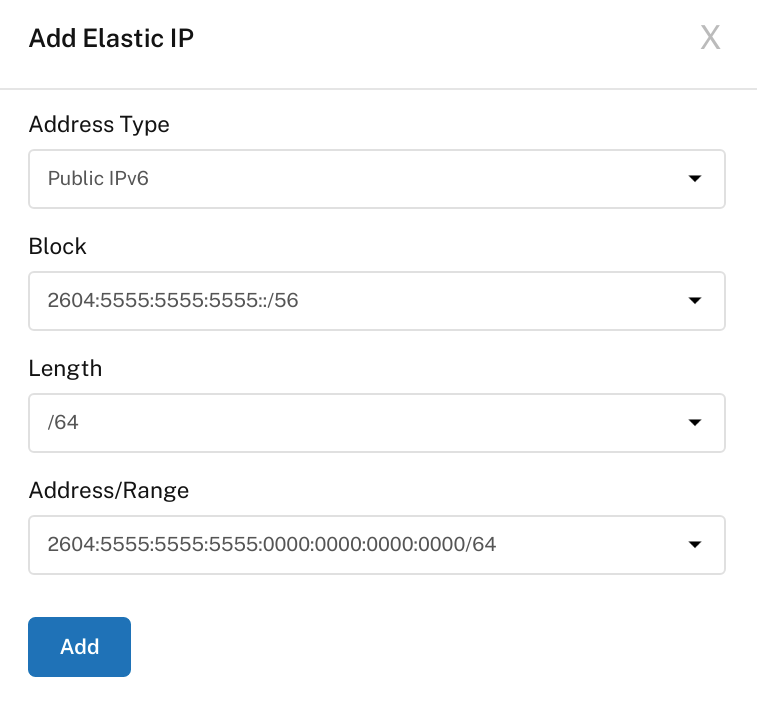
After the server has been created open the server panel and select the Network tab. Then click Assign New Elastic. Select Public IPv6 and then choose a /64 block to assign to the server.
Connect to the server with SSH using the root user. Then run the commands below to optimize the server.
sudo tee /etc/sysctl.d/10-dirty.conf << EOF
vm.dirty_ratio = 3
vm.dirty_background_ratio = 2
EOF

sudo tee /etc/sysctl.d/10-swappiness.conf << EOF
vm.swappiness = 10
EOF

sudo tee /etc/security/limits.conf << EOF
* hard nofile 500000
* soft nofile 500000
root hard nofile 500000
root soft nofile 500000
EOF

sudo yum -y update
sudo yum -y remove cockpit-ws

sudo systemctl disable firewalld
sudo systemctl stop firewalld

sudo sed -i 's/^SELINUX=.*/SELINUX=disabled/g' /etc/selinux/config
sudo sed -i 's/^SELINUX=.*/SELINUX=disabled/g' /etc/sysconfig/selinux
sudo setenforce 0

sudo sed -i '/^PasswordAuthentication/d' /etc/ssh/sshd_config
Run the commands below to enable automatic updates.
sudo dnf -y install dnf-automatic
sudo sed -i 's/^upgrade_type =.*/upgrade_type = default/g' /etc/dnf/automatic.conf
sudo sed -i 's/^download_updates =.*/download_updates = yes/g' /etc/dnf/automatic.conf
sudo sed -i 's/^apply_updates =.*/apply_updates = yes/g' /etc/dnf/automatic.conf
sudo systemctl enable --now dnf-automatic.timer
Run the commands below to install Pritunl and QEMU from the Pritunl KVM repository. The directory /var/lib/pritunl-cloud will be used to store virtual disks, optionally a different partition can be mounted at this directory. If you have disks that will be dedicated to the virtual machines these should be mounted at the /var/lib/pritunl-cloud directory.
sudo tee /etc/yum.repos.d/pritunl-kvm.repo << EOF
[pritunl-kvm]
name=Pritunl KVM Repository
baseurl=https://repo.pritunl.com/kvm/
gpgcheck=1
enabled=1
EOF

gpg --keyserver hkp://keyserver.ubuntu.com --recv-keys 1BB6FBB8D641BD9C6C0398D74D55437EC0508F5F
gpg --armor --export 1BB6FBB8D641BD9C6C0398D74D55437EC0508F5F > key.tmp; sudo rpm --import key.tmp; rm -f key.tmp

sudo yum -y remove qemu-kvm qemu-img qemu-system-x86
sudo yum -y install edk2-ovmf pritunl-qemu-kvm pritunl-qemu-img pritunl-qemu-system-x86

sudo tee /etc/yum.repos.d/pritunl.repo << EOF
[pritunl]
name=Pritunl Repository
baseurl=https://repo.pritunl.com/stable/yum/oraclelinux/8/
gpgcheck=1
enabled=1
EOF

gpg --keyserver hkp://keyserver.ubuntu.com --recv-keys 7568D9BB55FF9E5287D586017AE645C0CF8E292A
gpg --armor --export 7568D9BB55FF9E5287D586017AE645C0CF8E292A > key.tmp; sudo rpm --import key.tmp; rm -f key.tmp

sudo yum -y install pritunl-cloud
Get the bond0 configuration on the server using the command below.
cat /etc/sysconfig/network-scripts/ifcfg-bond0
DEVICE=bond0
NAME=bond0
IPADDR=128.128.128.128
NETMASK=255.255.255.254
GATEWAY=128.128.128.129
BOOTPROTO=none
ONBOOT=yes
USERCTL=no
TYPE=Bond
BONDING_OPTS="mode=4 miimon=100 downdelay=200 updelay=200"

IPV6INIT=yes
IPV6ADDR=2604:5555:5555:5555::3/127
IPV6_DEFAULTGW=2604:5555:5555:5555::2
DNS1=147.75.207.207
DNS2=147.75.207.208
Copy the IP range from the host Elastic IPs in the Network tab. Add a 1 to the end of the address such as 2604:5555:5555:5555::1/64. This address will be used below.

From the configuration above copy the IPADDR, NETMASK, GATEWAY, IPV6ADDR, IPV6_DEFAULTGW, DNS1 and DNS2 to the configuration below. Replace <IPV6ADDR_ELASTIC> with the elastic address above.
sudo tee /etc/sysconfig/network-scripts/ifcfg-bond0 << EOF
TYPE="Bond"
BOOTPROTO="none"
NAME="bond0"
DEVICE="bond0"
ONBOOT="yes"
BONDING_MASTER="yes"
BONDING_OPTS="mode=4 miimon=100 downdelay=200 updelay=200"
BRIDGE="pritunlbr0"
EOF

sudo tee /etc/sysconfig/network-scripts/ifcfg-pritunlbr0 << EOF
TYPE="Bridge"
PROXY_METHOD="none"
BROWSER_ONLY="no"
IPADDR="<IPADDR>"
NETMASK="<NETMASK>"
GATEWAY="<GATEWAY>"
BOOTPROTO="none"
USERCTL="no"
IPV4_FAILURE_FATAL="no"
IPV6INIT="yes"
IPV6ADDR="<IPV6ADDR>"
IPV6_DEFAULTGW="<IPV6_DEFAULTGW>"
IPV6ADDR_SECONDARIES="<IPV6ADDR_ELASTIC>"
DNS1="<DNS1>"
DNS2="<DNS2>"
NAME="pritunlbr0"
UUID="`uuidgen`"
DEVICE="pritunlbr0"
ONBOOT="yes"
EOF

sudo mv /etc/sysconfig/network-scripts/ifcfg-bond0:0 /etc/sysconfig/network-scripts/ifcfg-pritunlbr0:0
sudo mv /etc/sysconfig/network-scripts/route-bond0 /etc/sysconfig/network-scripts/route-pritunlbr0

sudo sed -i 's/bond0/pritunlbr0/g' /etc/sysconfig/network
sudo sed -i 's/bond0/pritunlbr0/g' /etc/sysconfig/network-scripts/ifcfg-pritunlbr0:0
sudo sed -i 's/bond0/pritunlbr0/g' /etc/sysconfig/network-scripts/route-pritunlbr0
Reboot the server to apply the network changes.
sudo reboot
Replace the <PASSWORD> with the password generated above and replace <PRIVATE_IPV4> with the private IPv4 address of the MongoDB server. Repeat this on each host.
sudo pritunl-cloud mongo "mongodb://pritunl-cloud:<PASSWORD>@<PRIVATE_IPV4>:27017/pritunl-cloud?authSource=admin"
sudo systemctl restart pritunl-cloud
Run the command below to get the default password.
sudo pritunl-cloud default-password
Configure Pritunl Cloud
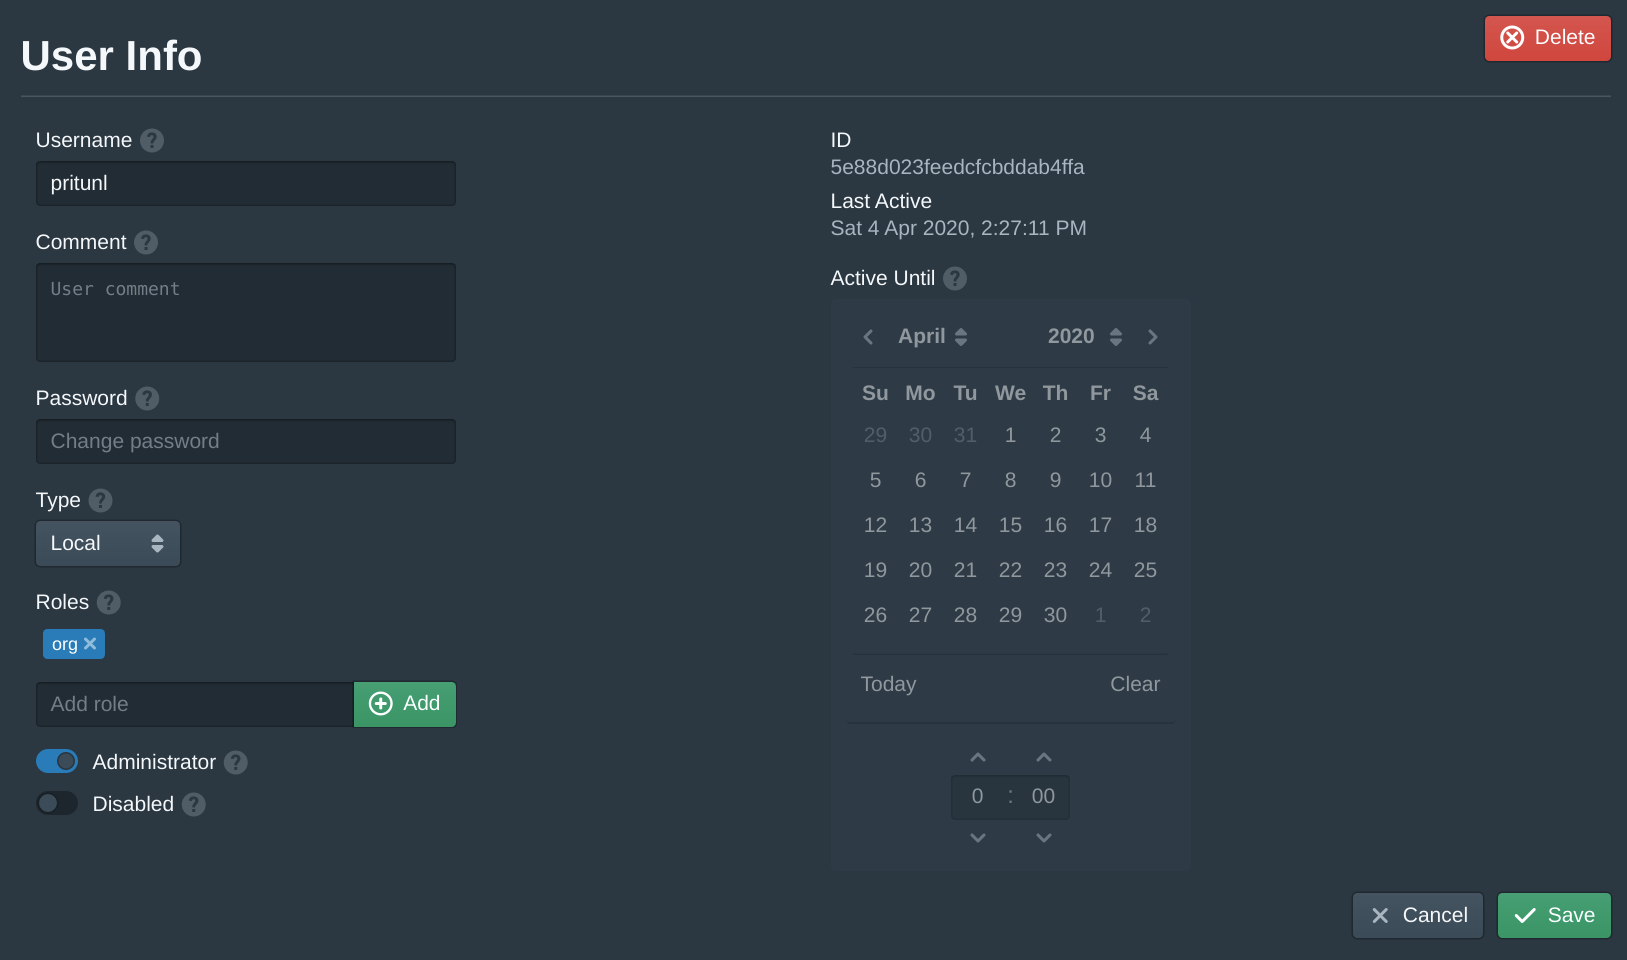
In the Users tab select the pritunl user and set a password. Then add the org role to Roles and click Save.
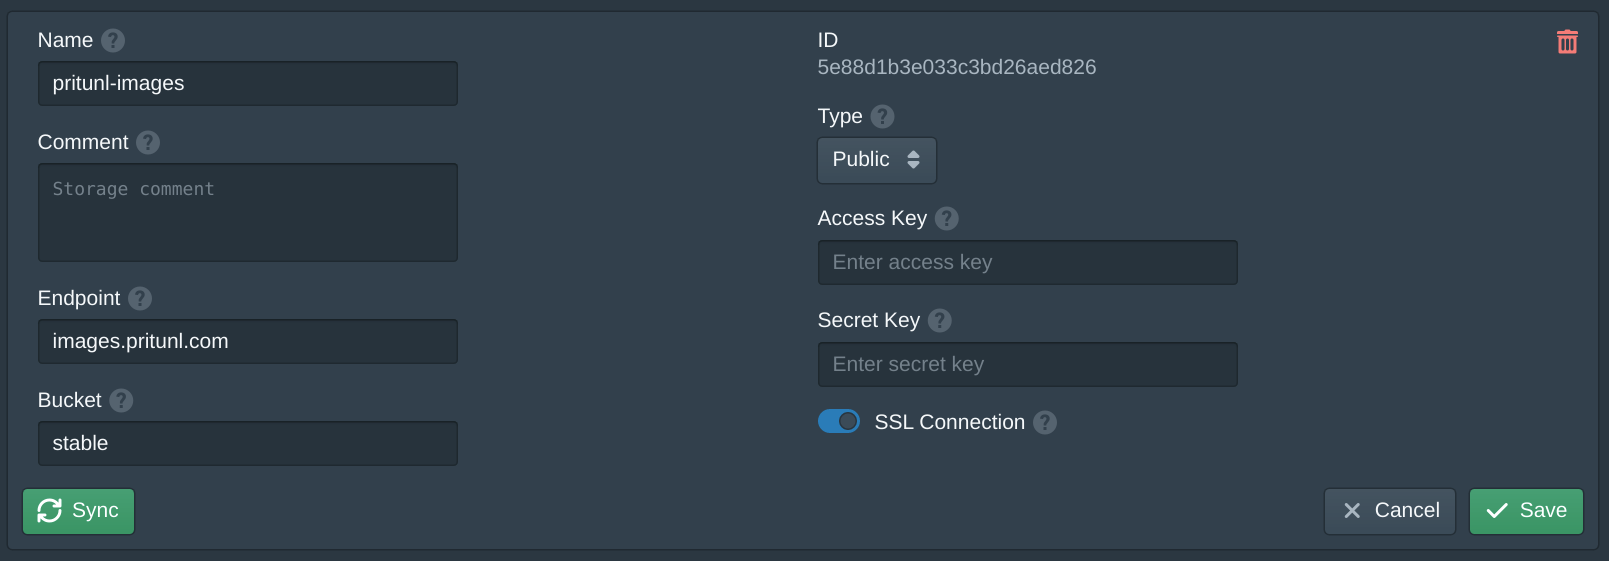
In the Storages tab click New. Set the Name to pritunl-images, the Endpoint to images.pritunl.com and the Bucket to stable. Then click Save. This will add the official Pritunl images store.
In the Organizations tab click New. Name the organization org, add org to Roles and click Save.

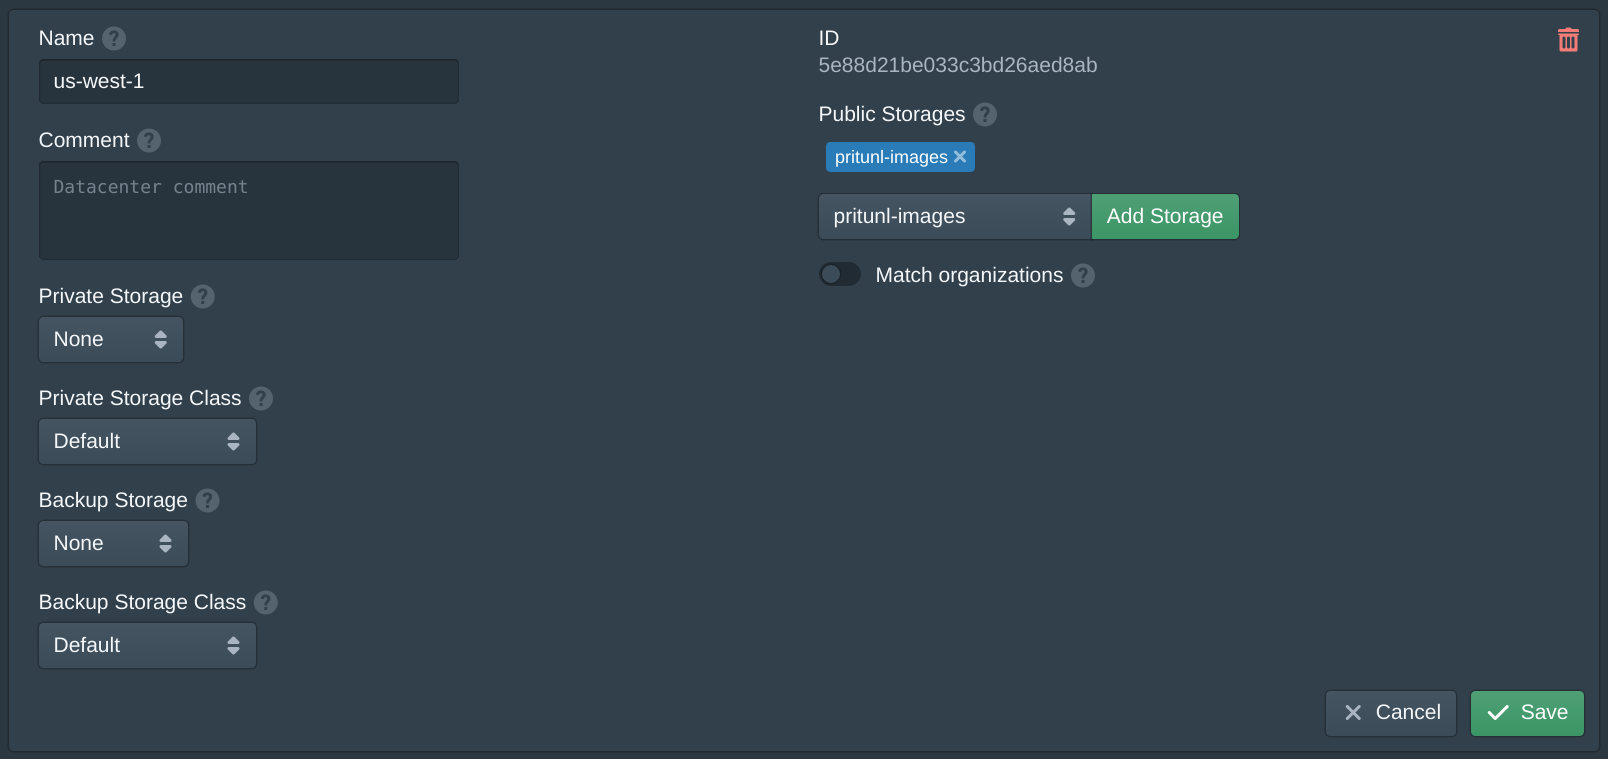
In the Datacenters tab click new and name the datacenter us-west-1 then add pritunl-images to Public Storages.
In the Zones tab click New and set the Name to us-west-1a. Set the Network Mode to VXLAN.

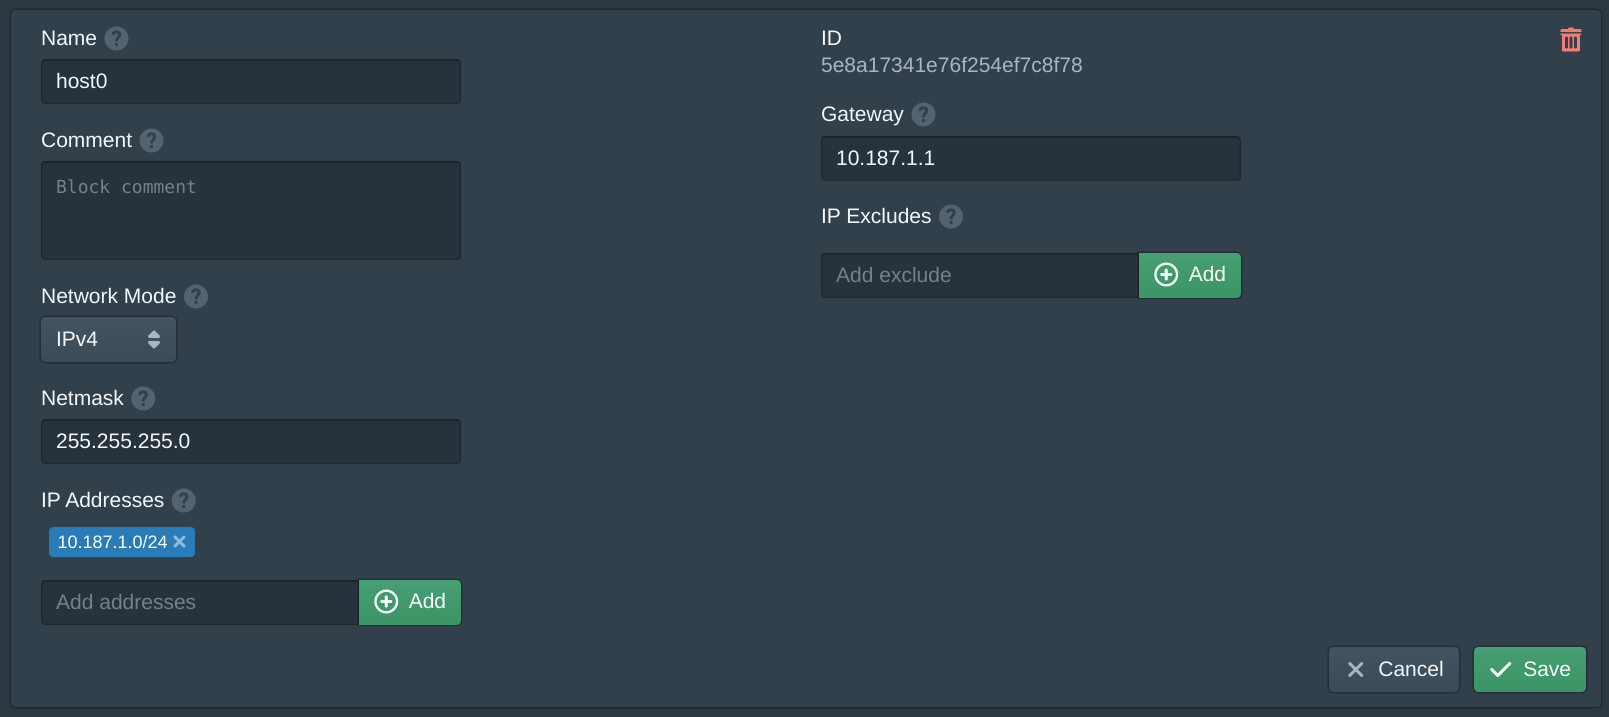
In the Blocks tab click New and set the Name to host0. These blocks will be used for the host internal network, this network allows the host to communicate with the instances and to provide NAT access to the internet. Set the Network Mode to IPv4 and Netmask to 255.255.255.0. Then add 10.187.1.0/24 to the IP Addresses. Set the Gateway to 10.187.1.1. Repeat this for each host incremental the network and gateway such as 10.187.2.0/24 and 10.187.2.1.
In the Packet management console copy the Elastic IP range from the Network tab in each of the hosts.

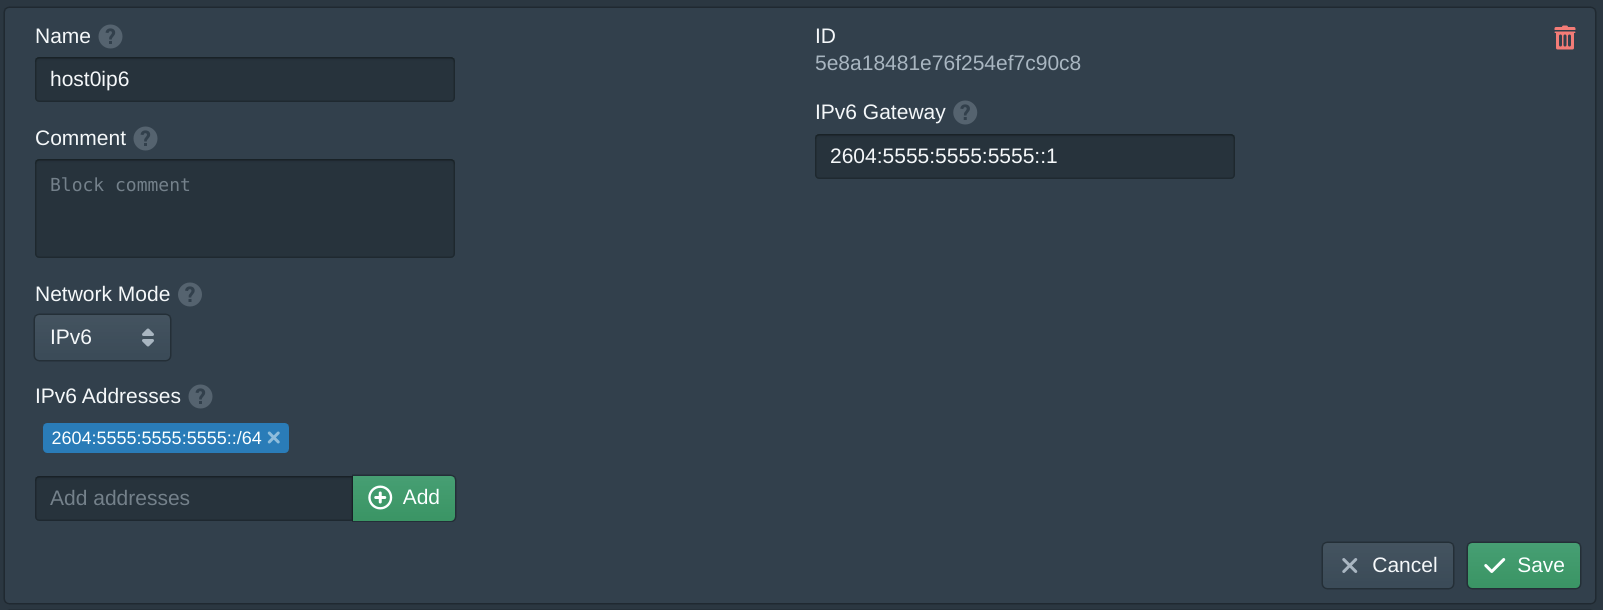
In the Blocks tab click New and set the Name to host0ip6. Set the Network Mode to IPv6 and use the IPv6 range from above. Set the Gateway to the first address in the IPv6 range, this must be same address as the IPV6ADDR_SECONDARIES address from the network configuration. Repeat this for each host.
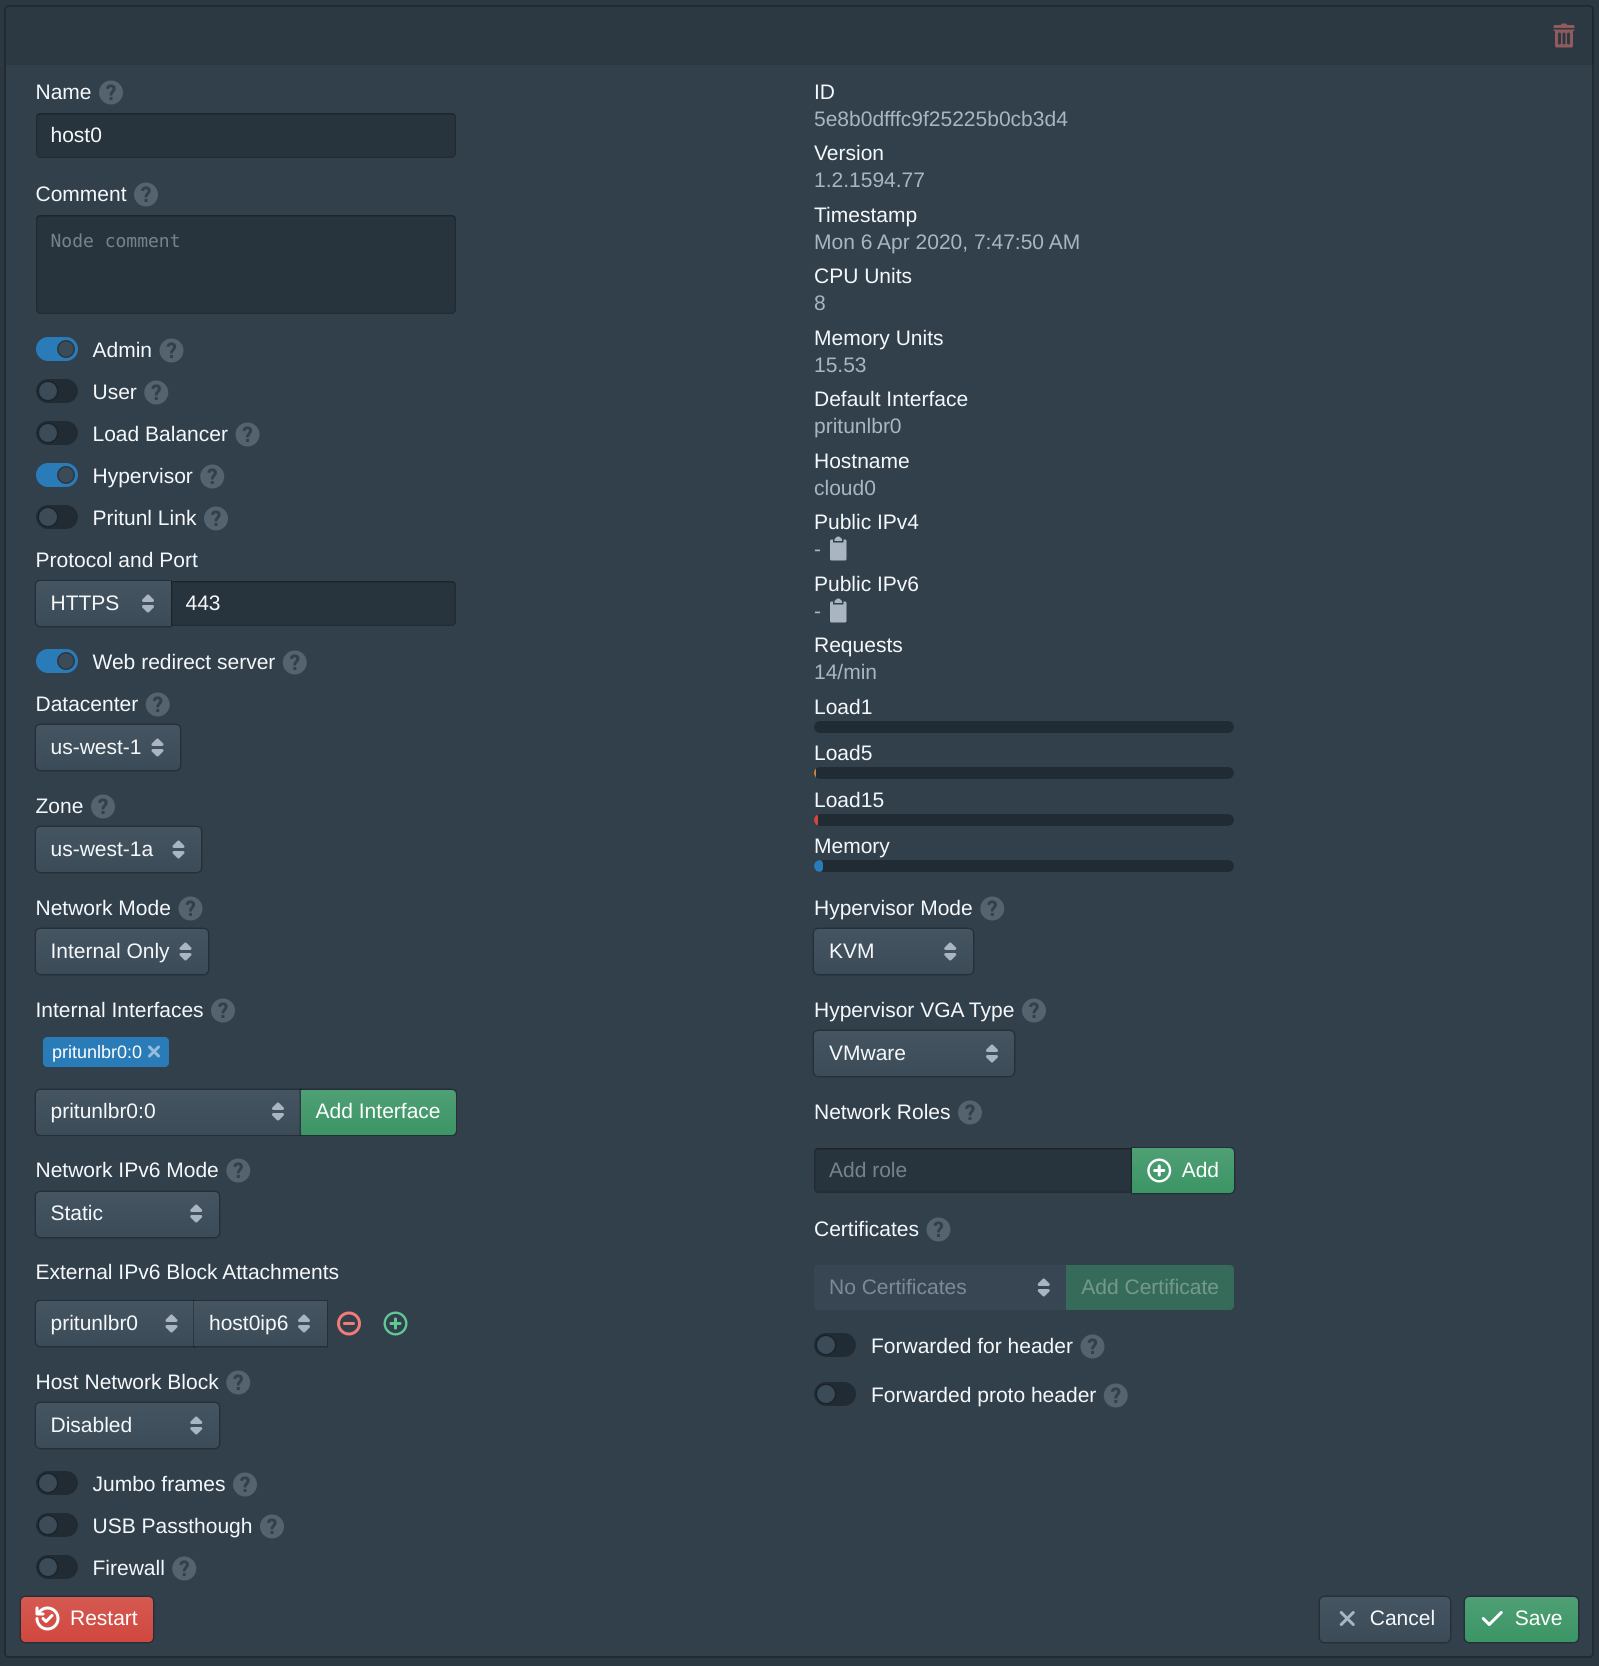
In the Nodes tab use the Hostname to match the node to the correct IP block and physical server. Set the node Zone to us-west-1a and the Network Mode to Internal Only. Add the pritunlbr0:0 to the Internal Interfaces. Set the Network IPv6 Mode to Static. Add pritunlbr0 with the matching hosts IP block such as host0ip6 to the External IPv6 Block Attachments. Set the Host Network Block to the matching host block such as host0. Enable Host Network NAT.
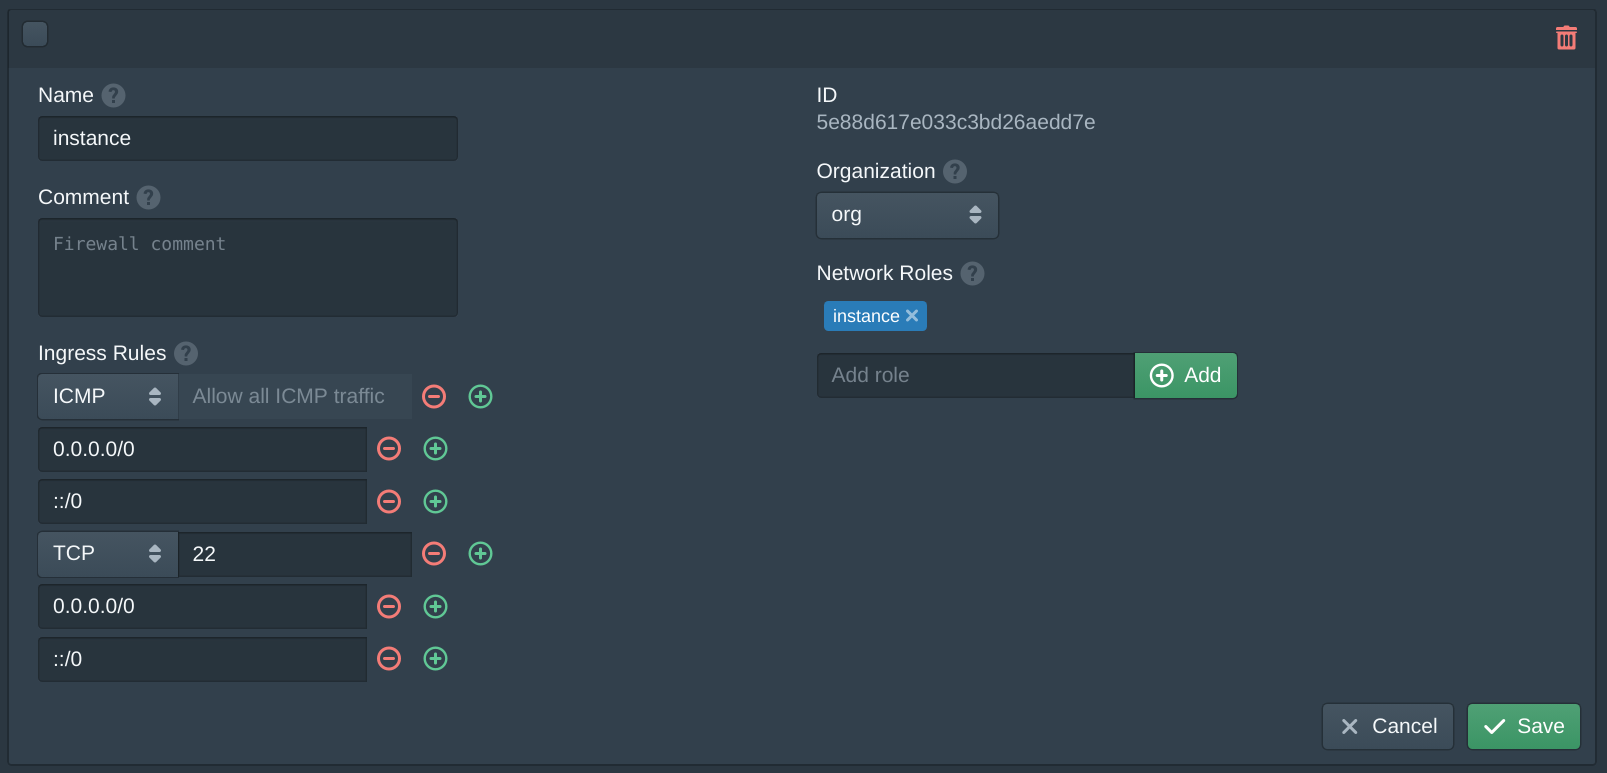
In the Firewalls tab click New. Set the Name to instance, set the Organization to org and add instance to the Network Roles.
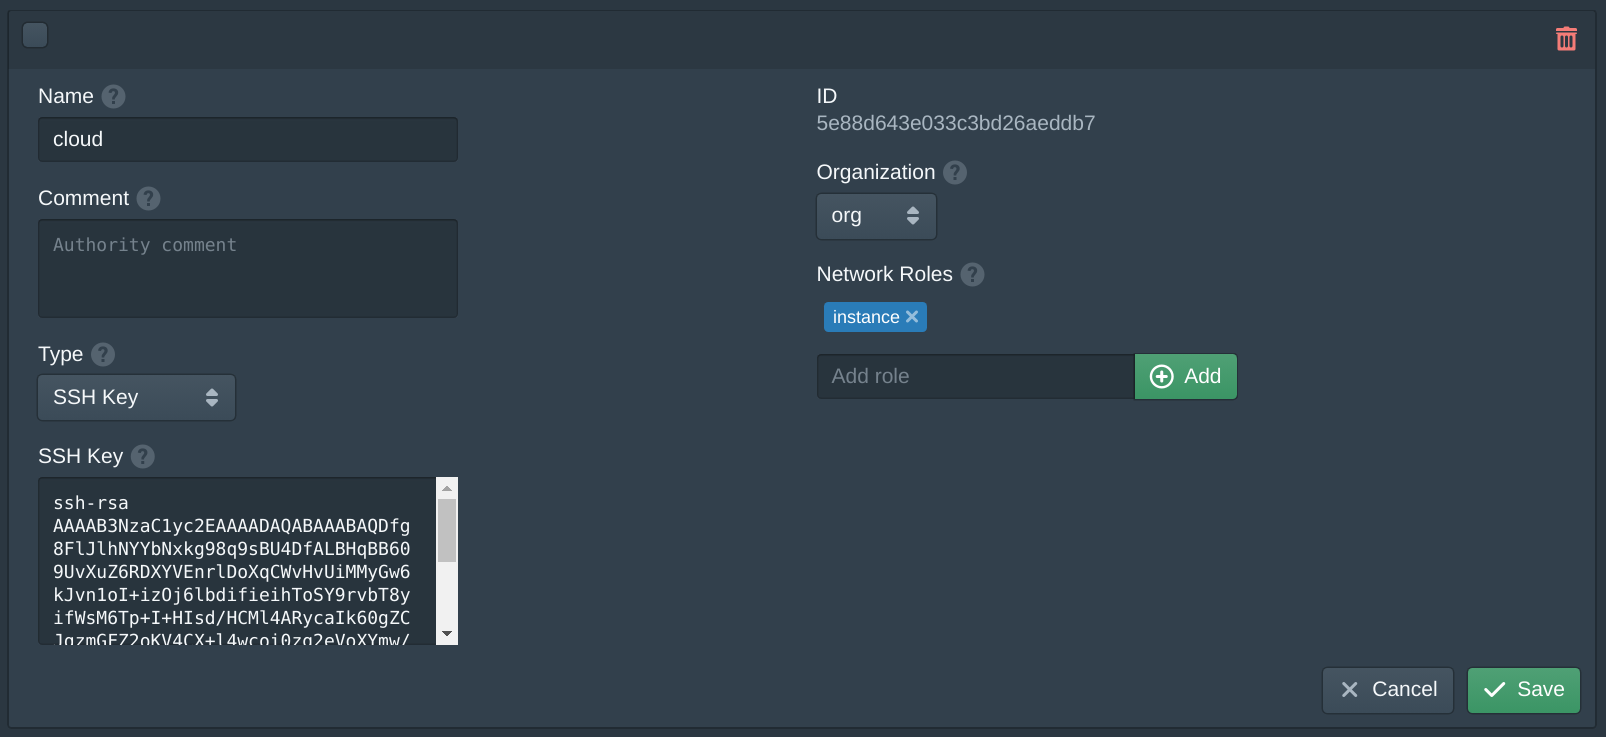
In the Authorities tab click New. Set the Name to cloud, set the Organization to org and add instance to the Network Roles. Then copy your public SSH key to the SSH Key field. If you are using Pritunl Zero or SSH certificates set the Type to SSH Certificate and copy the Public Key form the SSH authority in Pritunl Zero to the SSH Certificate field. Then add roles to control access.
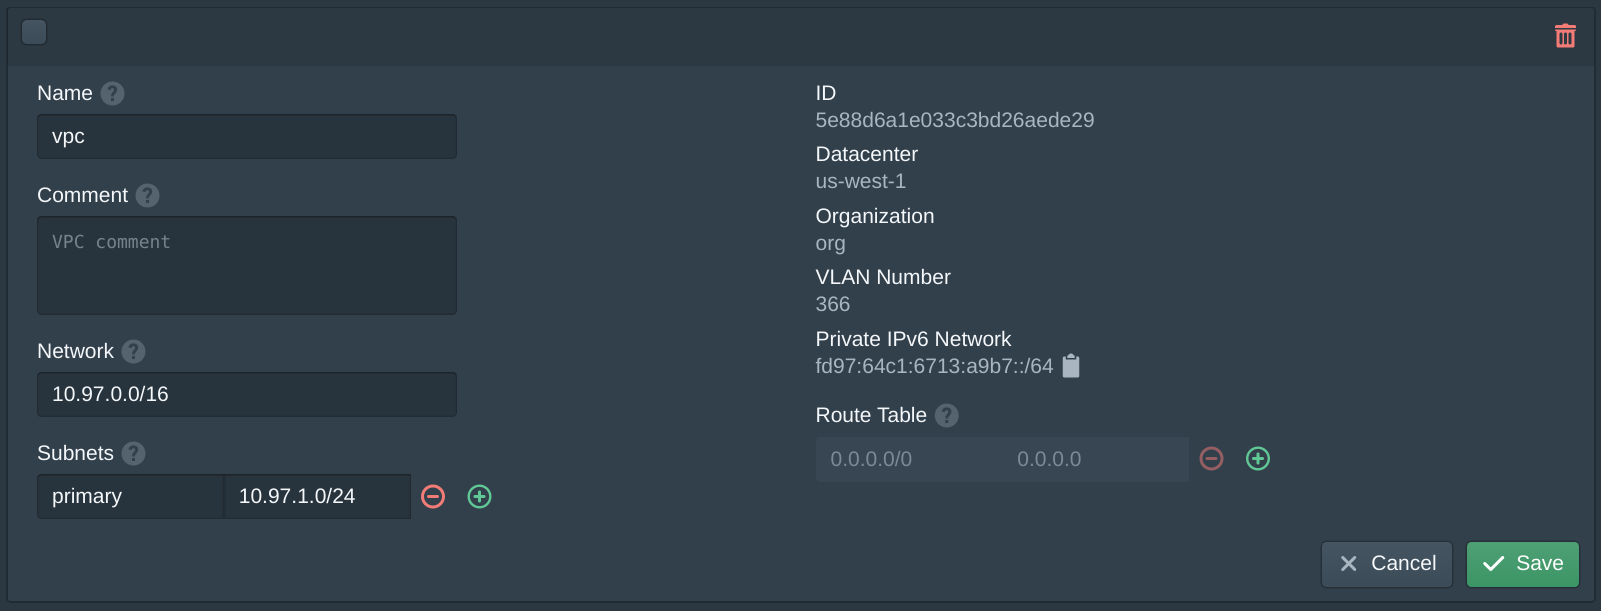
In the VPCs tab enter 10.97.0.0/16 in the network field and click New. Add 10.97.1.0/24 to the Subnets with the name primary. Then set the Name to vpc and click Save.
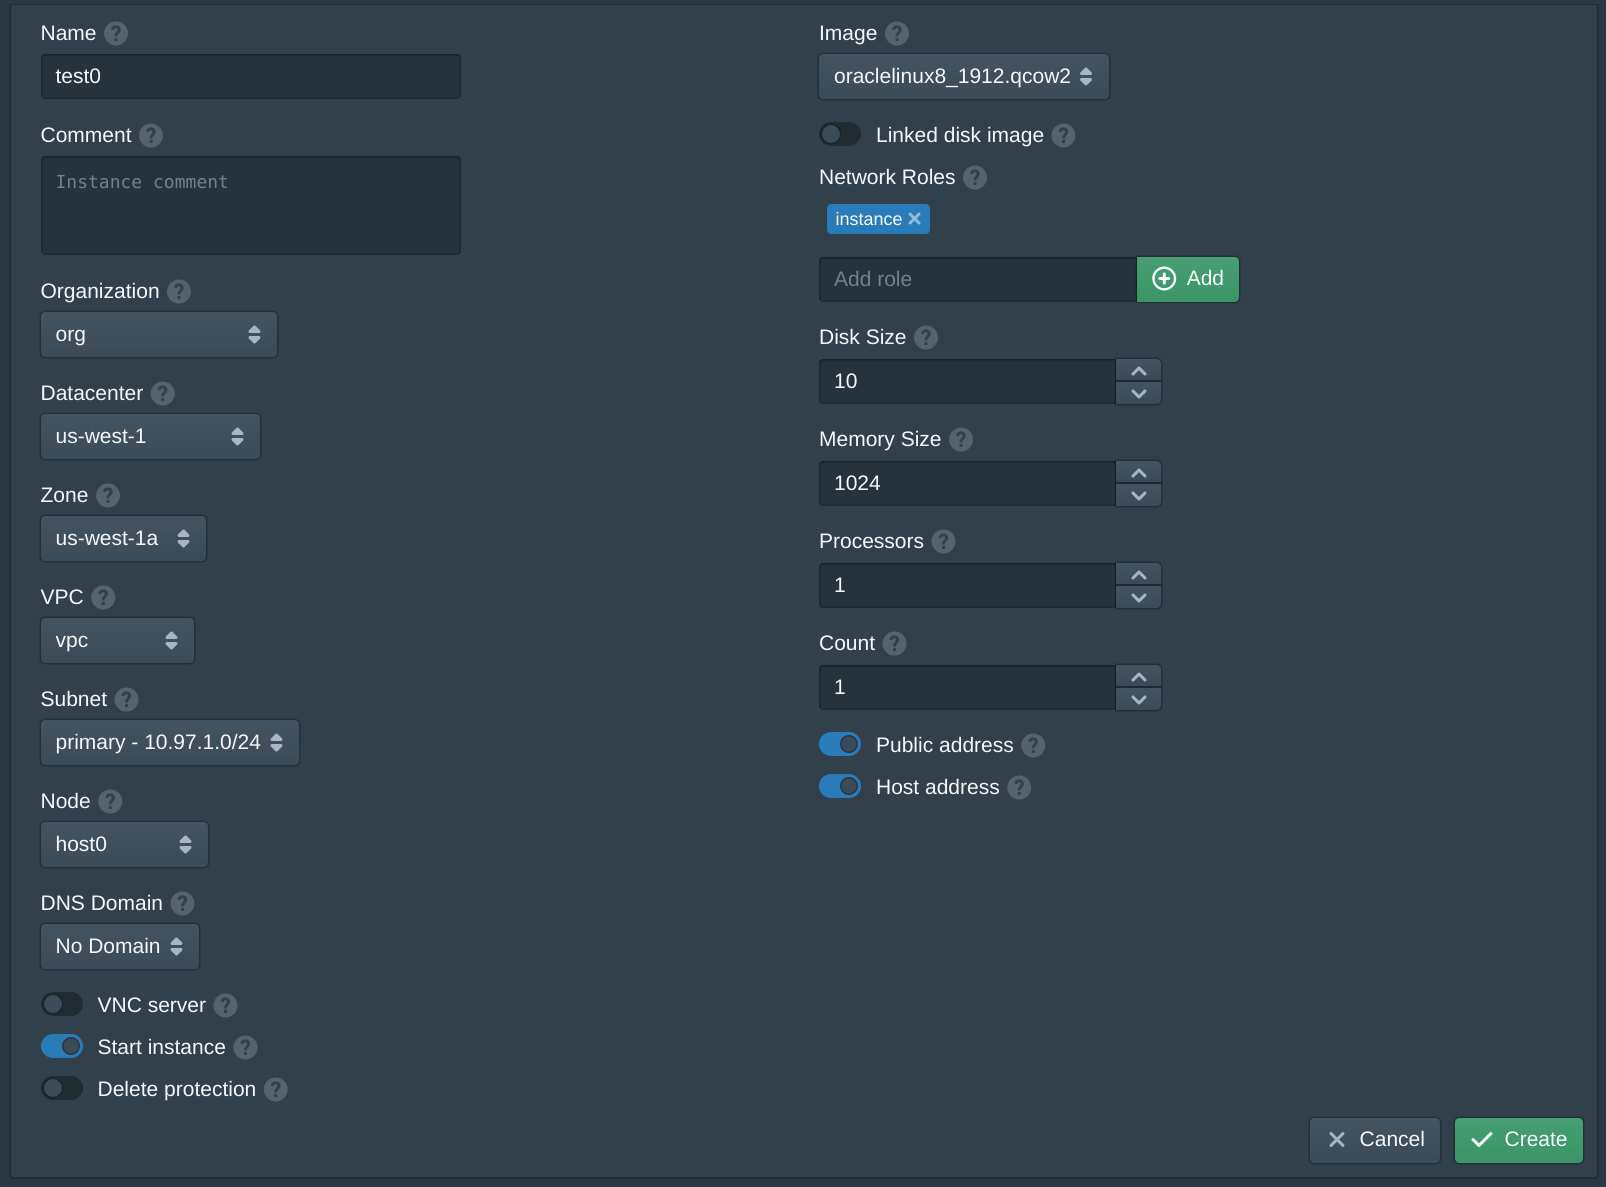
In the Instances tab click New. Set the Name to test, set the Datacenter to us-west-1, set the Zone to us-west-1a and set the Node. Set VPC to vpc and the Subnet to primary. Add instance to the Network Roles and set the Image to oraclelinux8_1912.qcow2. If no images are shown check the Storages and restart the pritunl-cloud service. Click Create twice to accept the Oracle license. Repeat this again to create instances on each node.
Once the instance has started SSH into the instance using the Public IPv6 address and SSH key configured with the username cloud. Due to a networking issue you may need to first ping the public IPv6 address before using SSH. Verify that VPC traffic works between instances using ping to the Private IPv4 address of each instance.
Updated over 3 years ago
