Hivelocity
Configure Pritunl Cloud on Hivelocity
Outdated Documentation - This documentation has not yet been updated for the latest release, refer to theVultr documentation for updated information.
This tutorial will create a single host Pritunl Cloud server on Hivelocity with public IP addresses for each instance.
Configure Hivelocity Server
Create a server with CentOS then SSH to the server and run the commands below to configure an SSH key and a non-root user. Replace the SSH key in /home/cloud/.ssh/authorized_keys below with your SSH key.
#!/bin/bash
set -e

sed -i 's/^SELINUX=.*/SELINUX=disabled/g' /etc/selinux/config || true
sed -i 's/^SELINUX=.*/SELINUX=disabled/g' /etc/sysconfig/selinux || true
setenforce 0
sed -i '/^PermitRootLogin/d' /etc/ssh/sshd_config
sed -i '/^PasswordAuthentication/d' /etc/ssh/sshd_config
sed -i '/^TrustedUserCAKeys/d' /etc/ssh/sshd_config
sed -i '/^AuthorizedPrincipalsFile/d' /etc/ssh/sshd_config
tee -a /etc/ssh/sshd_config << EOF

PermitRootLogin no
PasswordAuthentication no
EOF
useradd -G adm,video,wheel,systemd-journal cloud
sed -i '/^%wheel/d' /etc/sudoers
tee -a /etc/sudoers << EOF
%wheel ALL=(ALL) NOPASSWD:ALL
EOF

mkdir /home/cloud/.ssh
chown cloud:cloud /home/cloud/.ssh
chmod 700 /home/cloud/.ssh
tee -a /home/cloud/.ssh/authorized_keys << EOF
ssh-rsa AAAAB3NzaC1yc2EAAAADAQABAAABAQC/x14X6jWFr/ZDkpt8AsomumKmekGm2Jbk/eP6g/pdAnvEGD1zB2+llmmcSYaZdtle4o0/QSURYYNA2wEXClxXWymrNAic/HNkSC069gKF8C52NK+STRuK4VYQNHAH8MG6dLvFO2dhUDke7DGcO8nWr8tGSribLJX1qqhmBocBtHC38bSYklD40sOqy2YDChI08kEv9PhOVcQAdkG8qoxqG3AoapeUQKc2Rvqqvd9NxsGAJygsT5SHPQDR69e0Me9AhaclRVhRRjrCwkad8/rc3ZG/Q22m72i9HT2GJTsMG0ZC3Le00H2PB1KRlqJlFli1fu8+ycSilYP8Rvkqvk0b cloud
EOF
chown cloud:cloud /home/cloud/.ssh/authorized_keys
chmod 600 /home/cloud/.ssh/authorized_keys

systemctl enable sshd
systemctl restart sshd
systemctl disable firewalld
systemctl stop firewalld

yum -y install yum-utils
yum -y install epel-release
yum-config-manager --enable epel
yum-config-manager --enable extras
yum -y update

yum -y install ntp bridge-utils
systemctl start ntpd
systemctl enable ntpd
Install Docker MongoDB (Optional)
This tutorial will run MongoDB in a Docker container with host networking. This will provide isolation and limit the memory usage of the MongoDB server. Running Docker with the default bridged networking will break the Pritunl Cloud networking. To avoid this set the Docker bridge option to none and use host networking as shown below. When using host networking by default the container will run the MongoDB server on the public IP address this is avoided by adding --bind_ip 127.0.0.1 to the Docker command. The commands below will install Docker and start a MongoDB service that will run on localhost:27017 with a 1024m memory limit. The MongoDB database data will be stored in the /cloud directory where all the other Pritunl Cloud data will be stored. This Docker configuration will only work with containers using --network host.
sudo yum install -y yum-utils device-mapper-persistent-data lvm2
sudo yum-config-manager --add-repo https://download.docker.com/linux/centos/docker-ce.repo
sudo yum install -y docker-ce

sudo mkdir -p /etc/docker
sudo tee /etc/docker/daemon.json << EOF
{
    "bridge": "none",
    "iptables": false
}
EOF

sudo systemctl start docker.service
sudo systemctl enable docker.service

sudo mkdir -p /cloud/mongo

sudo docker run -d --restart=unless-stopped --name mongo --network host --cpus 1 --memory 1024m --volume /cloud/mongo:/data/db mongo --bind_ip 127.0.0.1
Configure Bridge Interfaces
Pritunl Cloud requires bridge interfaces for instance networking. First run cat /etc/sysconfig/network-scripts/ifcfg-eno1 to get the current network configuration.
sudo cat /etc/sysconfig/network-scripts/ifcfg-eno1
DEVICE=eno1
BOOTPROTO=static
IPADDR=66.206.8.226
NETMASK=255.255.255.248
GATEWAY=66.206.8.225
ONBOOT=yes
HWADDR=ac:1f:6b:82:88:f6
Copy the IPADDR, NETMASK and GATEWAY values to the script below. Ensure the values are entered correctly, if misconfigured access to the server will be lost.
sudo tee /etc/sysconfig/network-scripts/ifcfg-eno1 << EOF
TYPE="Ethernet"
BOOTPROTO="none"
NAME="eno1"
DEVICE="eno1"
ONBOOT="yes"
HWADDR=ac:1f:6b:82:88:f6
BRIDGE="pritunlbr0"
EOF
sudo tee /etc/sysconfig/network-scripts/ifcfg-pritunlbr0 << EOF
TYPE="Bridge"
PROXY_METHOD="none"
BROWSER_ONLY="no"
BOOTPROTO="static"
IPADDR=66.206.8.226
NETMASK=255.255.255.248
GATEWAY=66.206.8.225
DEFROUTE="yes"
NAME="pritunlbr0"
DEVICE="pritunlbr0"
ONBOOT="yes"
EOF
Next configure a pritunlbr1 interface that will not be attached to a physical interface. This bridge will only be used for instance VPC traffic. Use the link local IP address shown below.
sudo tee /etc/sysconfig/network-scripts/ifcfg-pritunlbr1 << EOF
TYPE="Bridge"
PROXY_METHOD="none"
BROWSER_ONLY="no"
BOOTPROTO="static"
IPADDR=169.254.243.1
NETMASK=255.255.255.0
DEFROUTE="no"
NAME="pritunlbr1"
DEVICE="pritunlbr1"
ONBOOT="yes"
EOF
Once done restart the server by running sudo restart. After restarting ip addr should show two bridge interfaces.
Install Pritunl Cloud
Run the commands below to install and start Pritunl Cloud. This will not enable Pritunl Cloud to start on boot, it must be manually started after boot with systemctl. This is recommended to avoid losing access to the server if the node firewall is misconfigured in Pritunl Cloud.
sudo tee /etc/yum.repos.d/pritunl-kvm.repo << EOF
[pritunl-kvm]
name=Pritunl KVM Repository
baseurl=https://repo.pritunl.com/kvm/
gpgcheck=1
enabled=1
EOF

gpg --keyserver hkp://keyserver.ubuntu.com --recv-keys 1BB6FBB8D641BD9C6C0398D74D55437EC0508F5F
gpg --armor --export 1BB6FBB8D641BD9C6C0398D74D55437EC0508F5F > key.tmp; sudo rpm --import key.tmp; rm -f key.tmp

sudo yum -y remove qemu-kvm qemu-img qemu-system-x86
sudo yum -y install edk2-ovmf pritunl-qemu-kvm pritunl-qemu-img pritunl-qemu-system-x86

sudo tee /etc/yum.repos.d/pritunl.repo << EOF
[pritunl]
name=Pritunl Repository
baseurl=https://repo.pritunl.com/stable/yum/oraclelinux/8/
gpgcheck=1
enabled=1
EOF

gpg --keyserver hkp://keyserver.ubuntu.com --recv-keys 7568D9BB55FF9E5287D586017AE645C0CF8E292A
gpg --armor --export 7568D9BB55FF9E5287D586017AE645C0CF8E292A > key.tmp; sudo rpm --import key.tmp; rm -f key.tmp
sudo yum -y install pritunl-cloud

sudo pritunl-cloud mongo "mongodb://localhost:27017/pritunl-cloud"
sudo systemctl start pritunl-cloud
Configure Pritunl Cloud
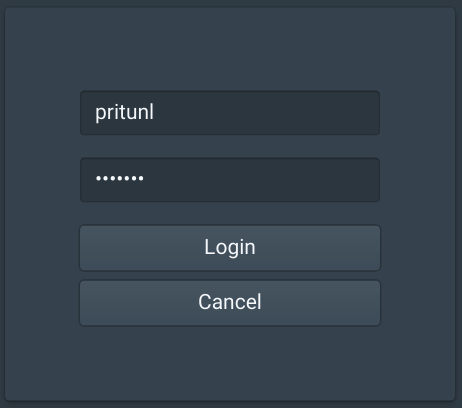
Open the IP address of the server in a web browser and login with the default username and password pritunl
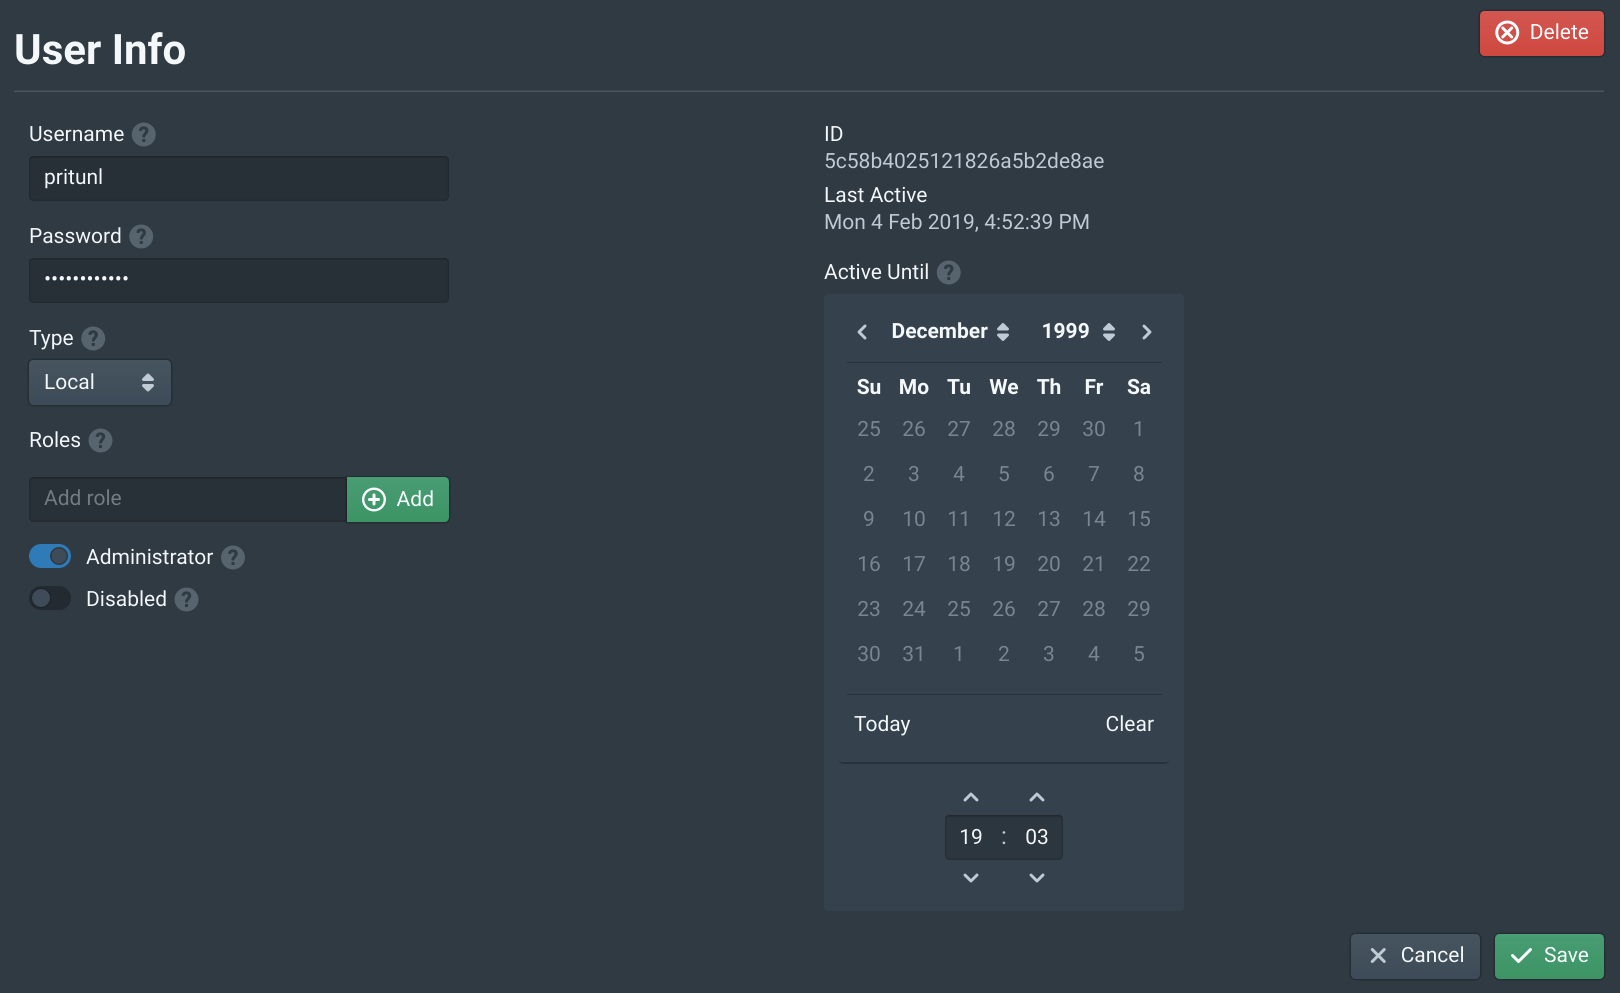
In the Users tab open the pritunl user and set a password. Then click Save.
In the Storages tab click New. Set the Name to pritunl-images, the Endpoint to images.pritunl.com and the Bucket to stable. Then click Save. This will add the official Pritunl images store.

In the Organizations tab click New. Name the organization org, add org to Roles and click Save.

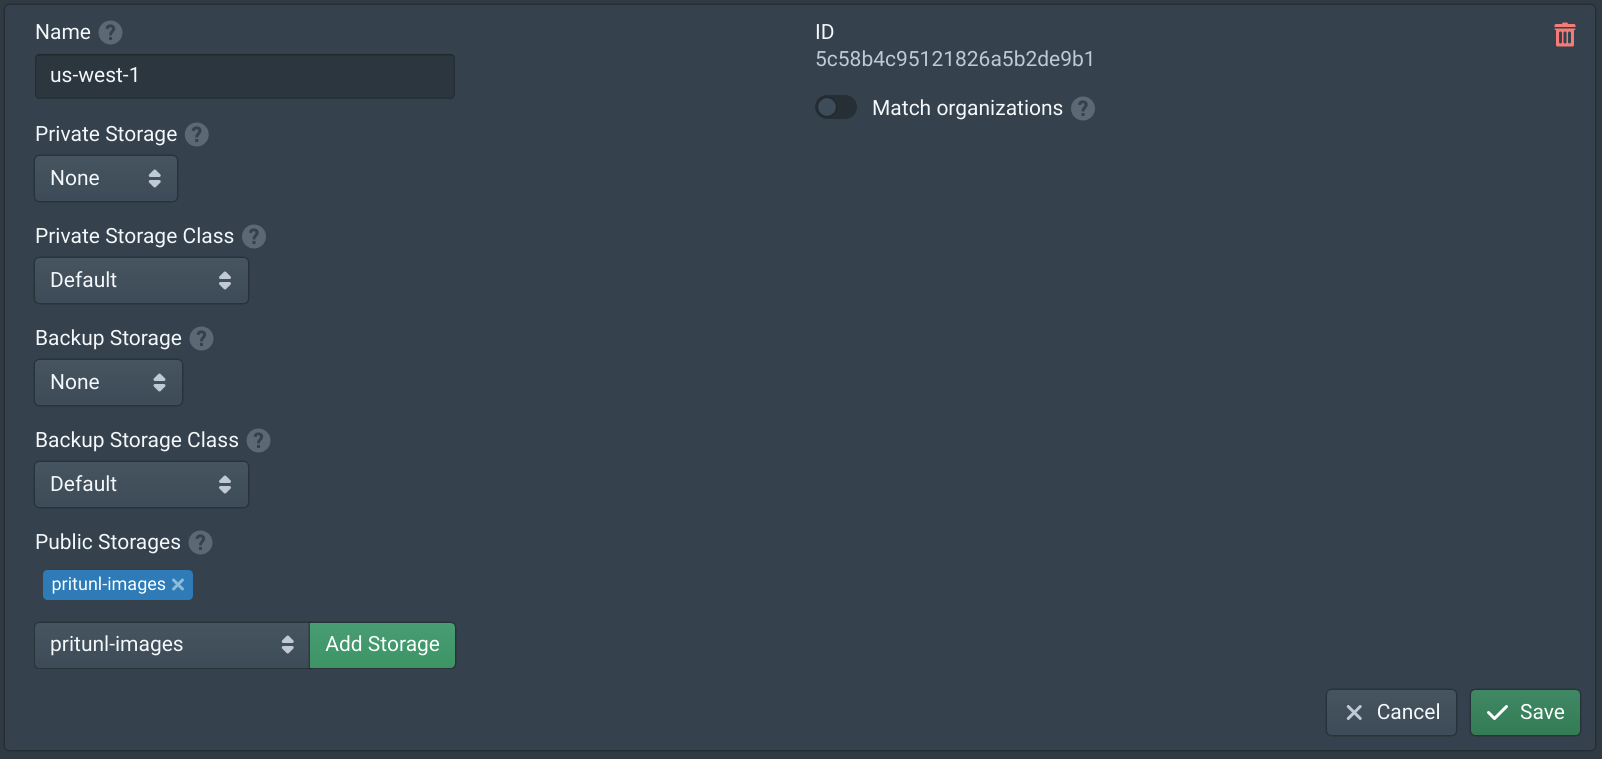
In the Datacenters tab click new and name the datacenter us-west-1 then add pritunl-images to Public Storages.
In the Zones tab click New and set the Name to us-west-1a. Then set Network Mode to VXLAN and click Save.

In the Hivelocity control panel for the server click View IPs.
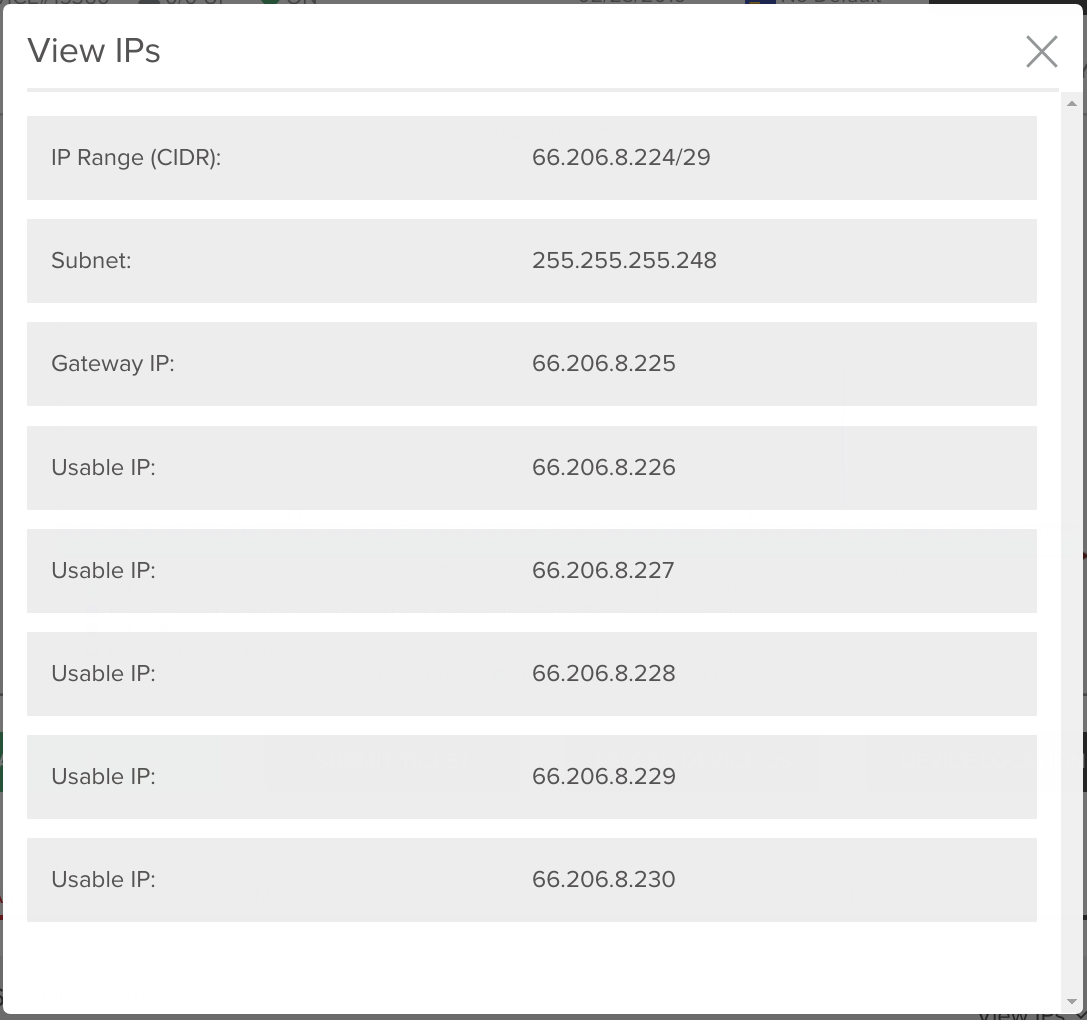
In the IP Blocks tab click New and set the Name to node0. Then copy the Subnet from above and add it to IP Addresses. Copy the Subnet to Netmask and Gateway IP to Gateway. Then add the first IP address that is used for the Hivelocity server to the IP Excludes. If the correct node IP address is not excluded access to the server will be lost, this IP address should match the one used in the bridge configuration above. Once done click Save.

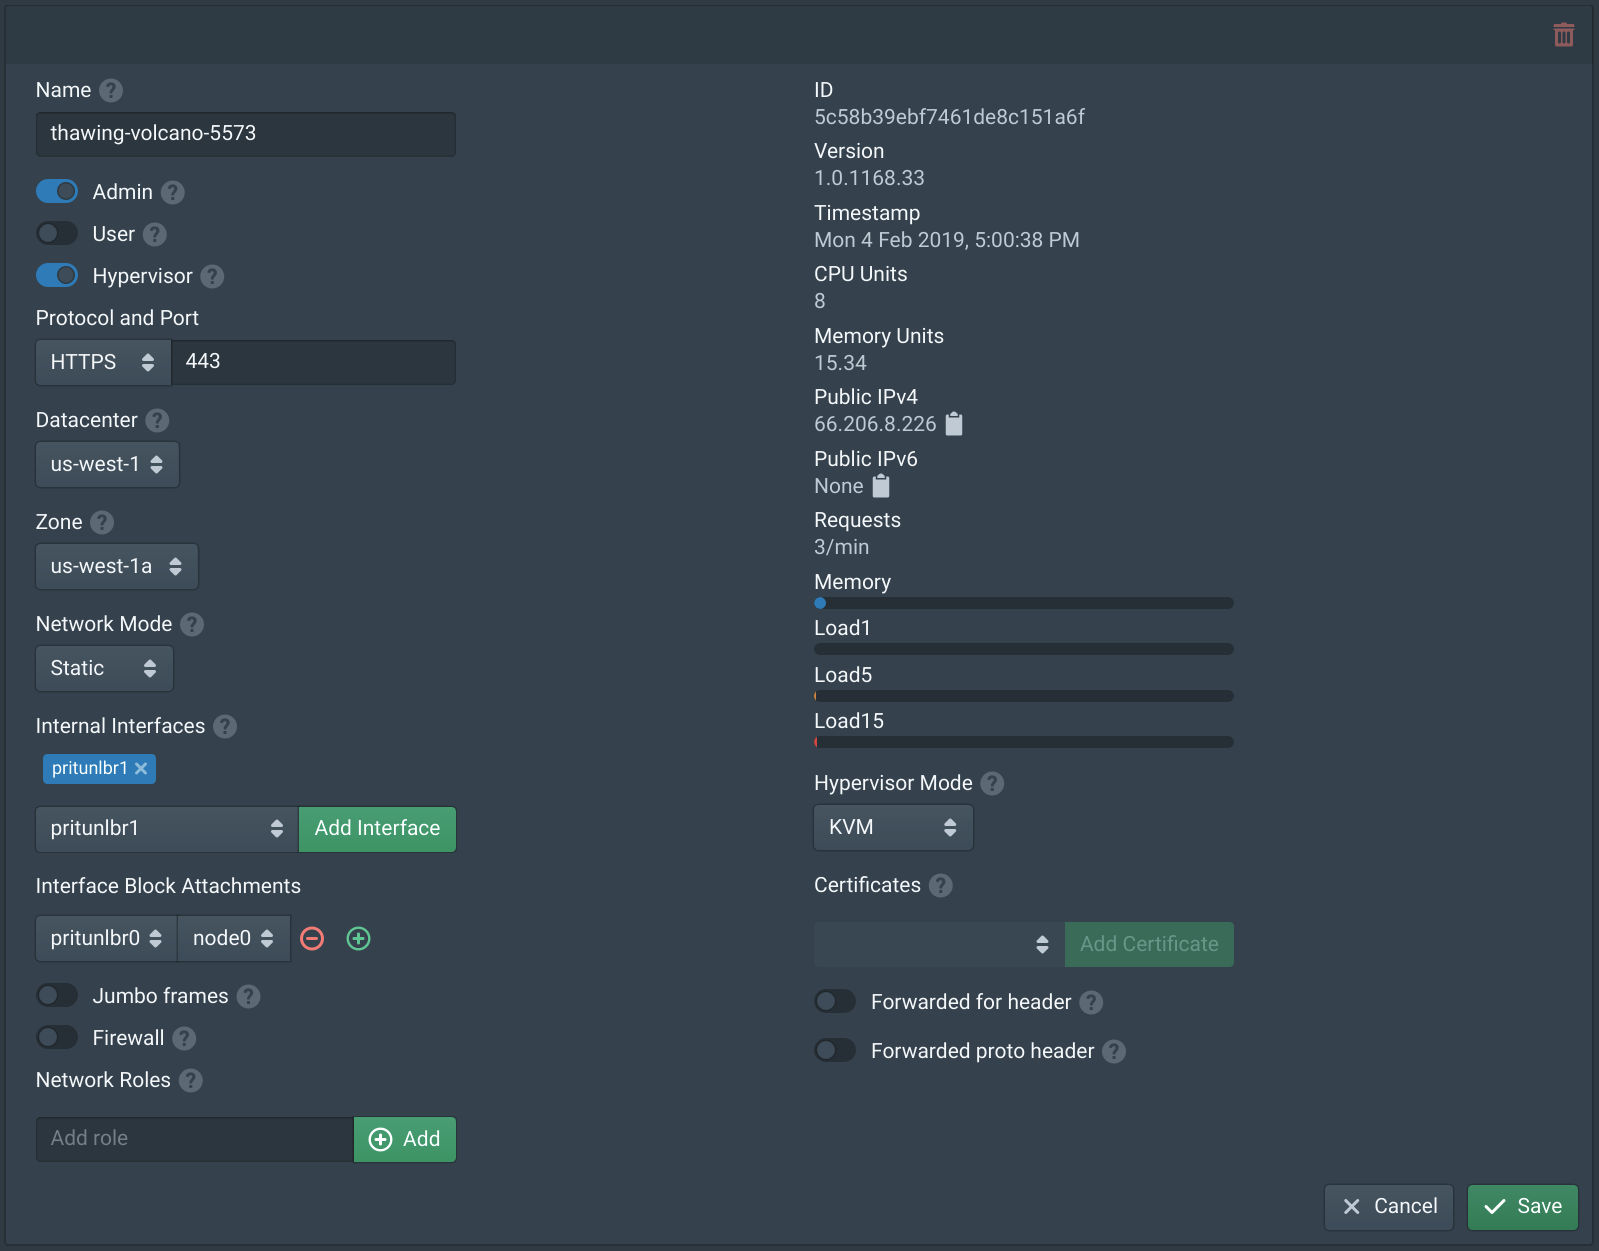
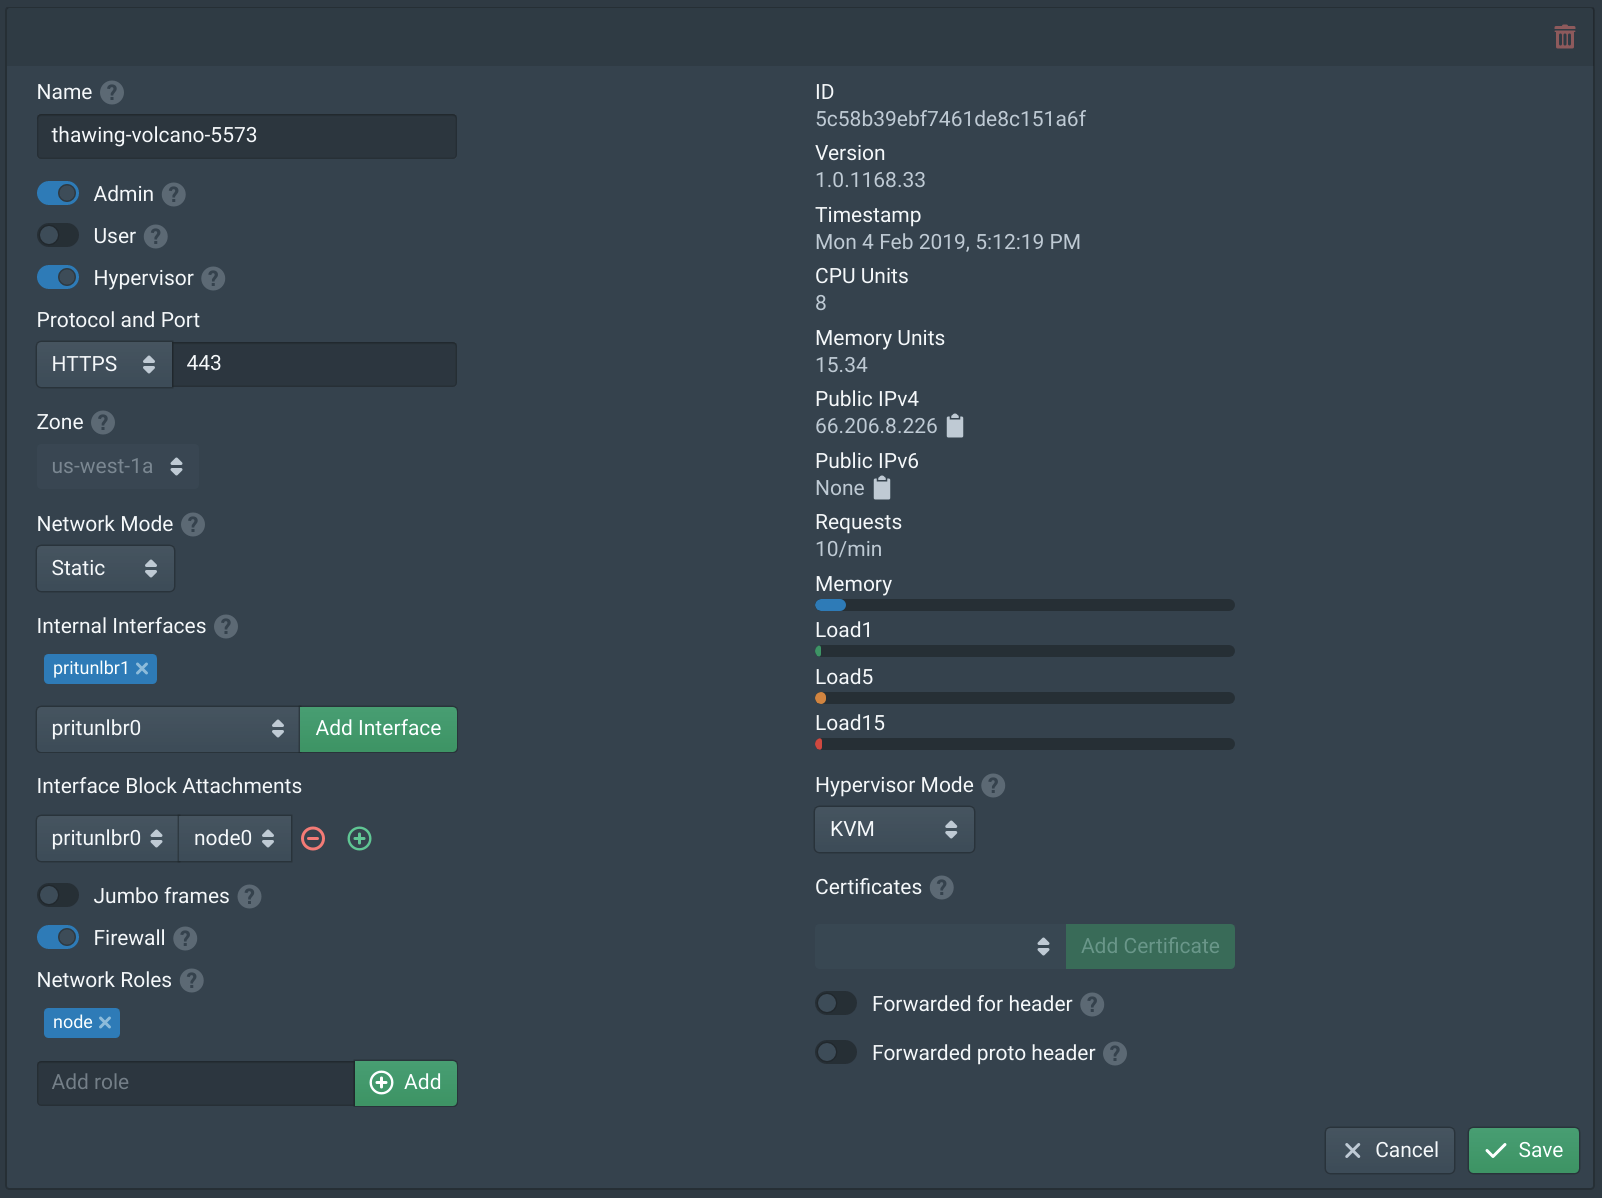
In the Nodes tab set the node Zone to us-west-1a and Network Mode to Static. Add the pritunlbr1 interface to Internal Interfaces. Then set Interface Block Attachments to pritunlbr0 and node0.
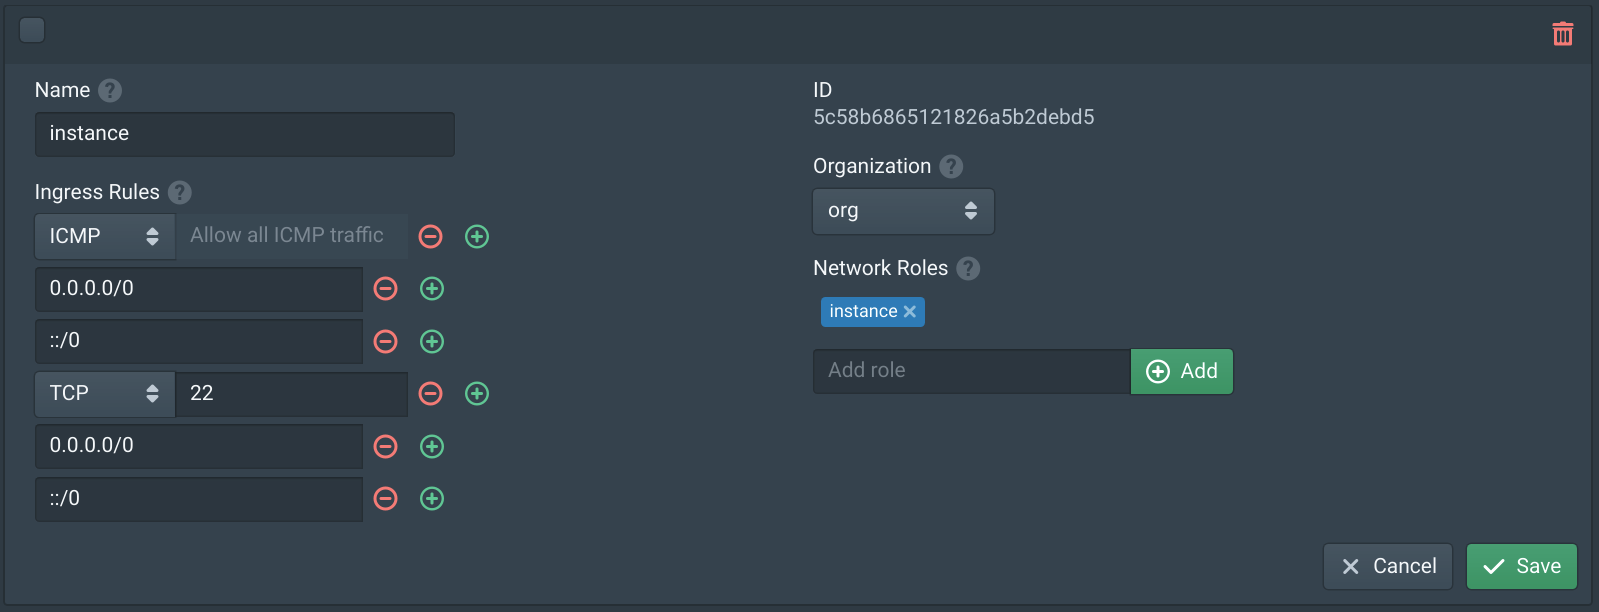
In the Firewalls tab click New. Set the Name to instance, set the Organization to org and add instance to the Network Roles.
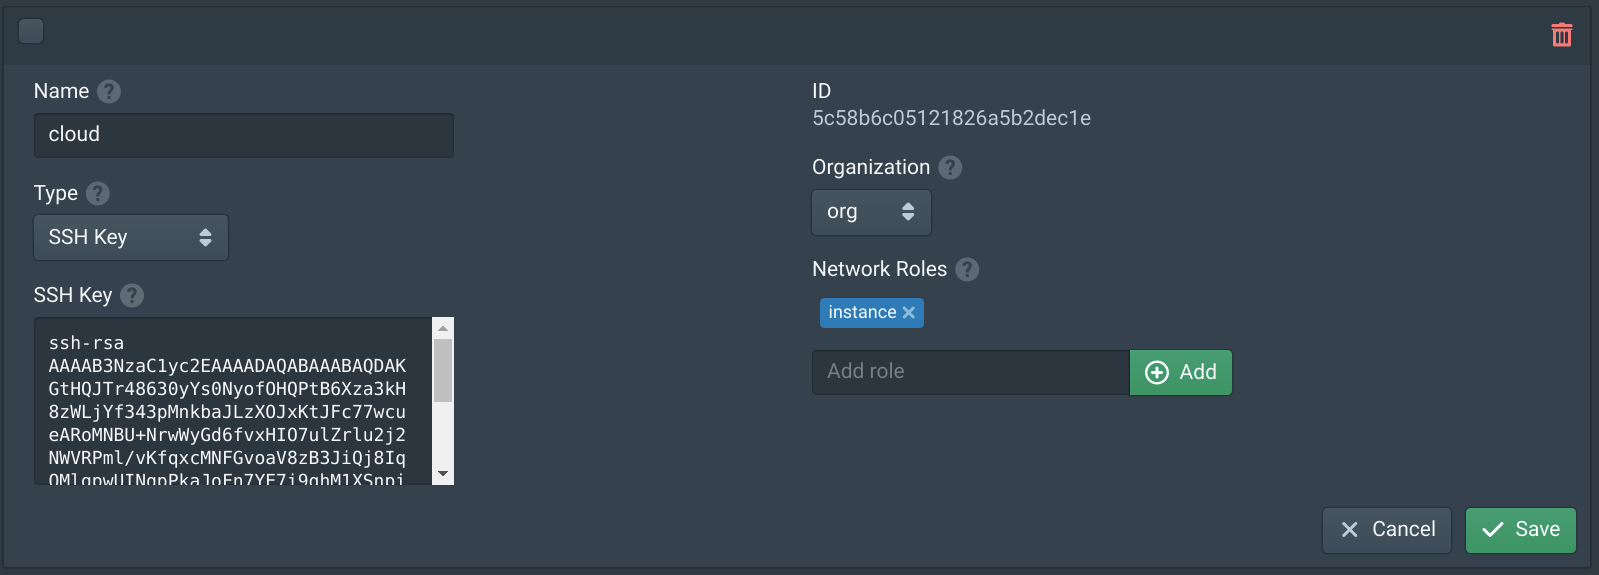
In the Authorities tab click New. Set the Name to cloud, set the Organization to org and add instance to the Network Roles. Then copy your public SSH key to the SSH Key field.
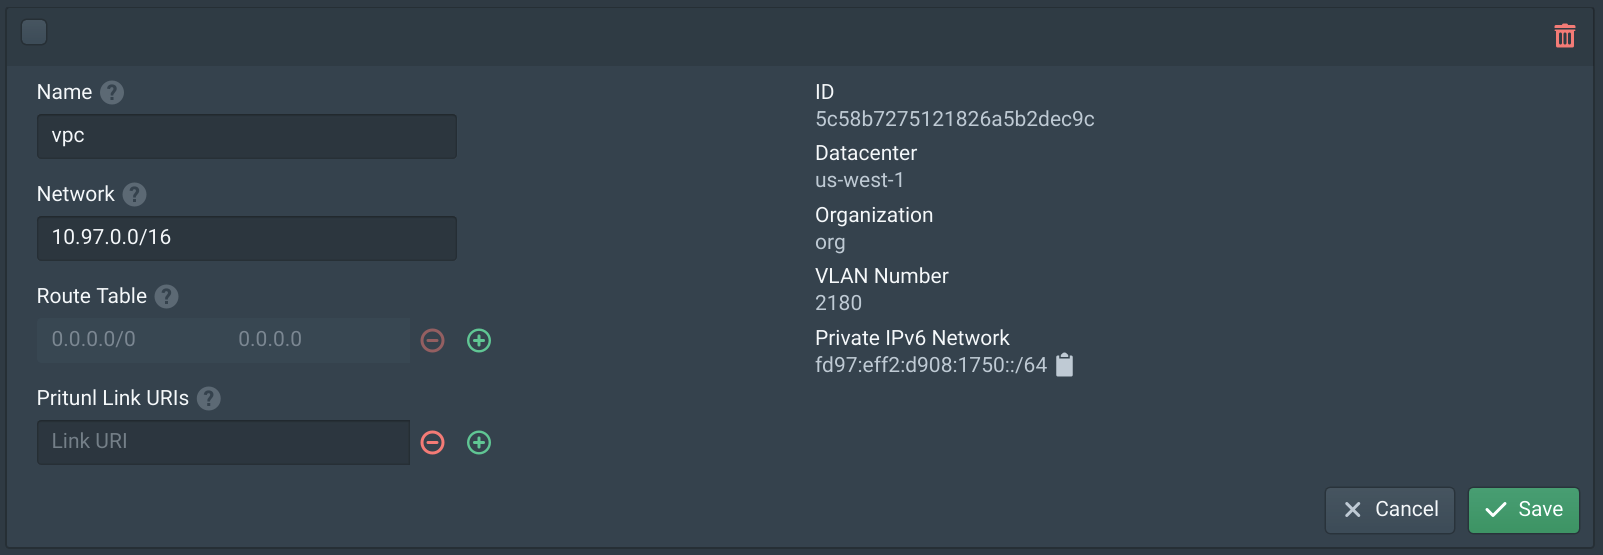
In the VPCs tab enter 10.97.0.0/16 in the network field and click New. Then set the Name to vpc and click Save.
In the Instances tab click New. Set the Name to test, set the Datacenter to us-west-1, set the Zone to us-west-1a and set the Node. Set VPC to vpc. Add instance to the Network Roles and set the Image to oraclelinux7_1901.qcow2. If no images are shown click the Sync button on the Storages tab.
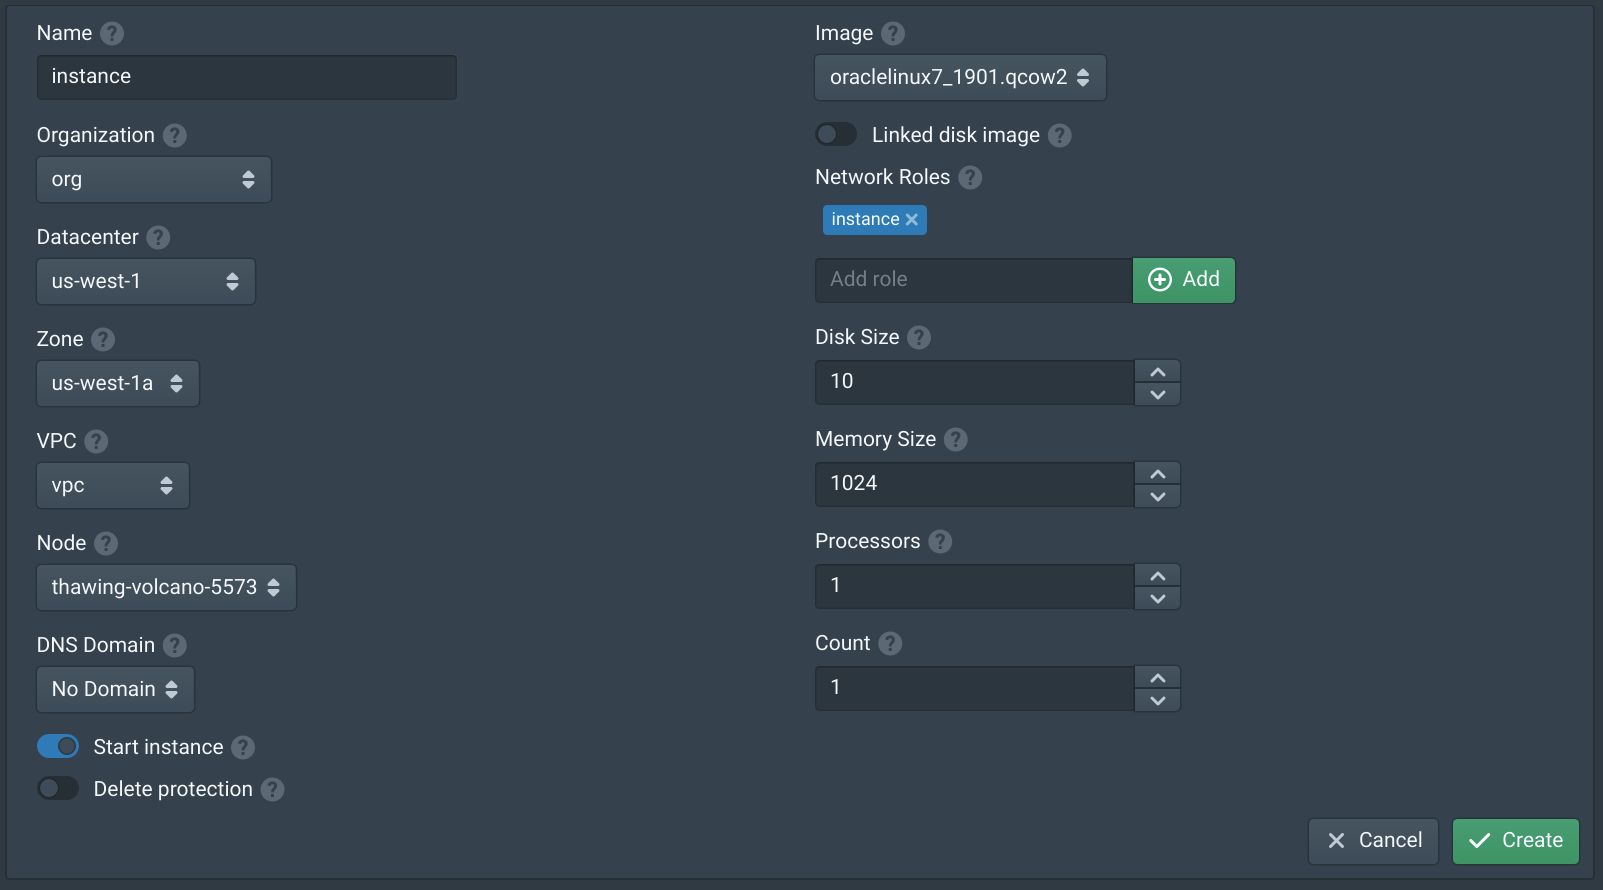
Once the instance has started SSH into the instance using the SSH key configured with the username cloud.
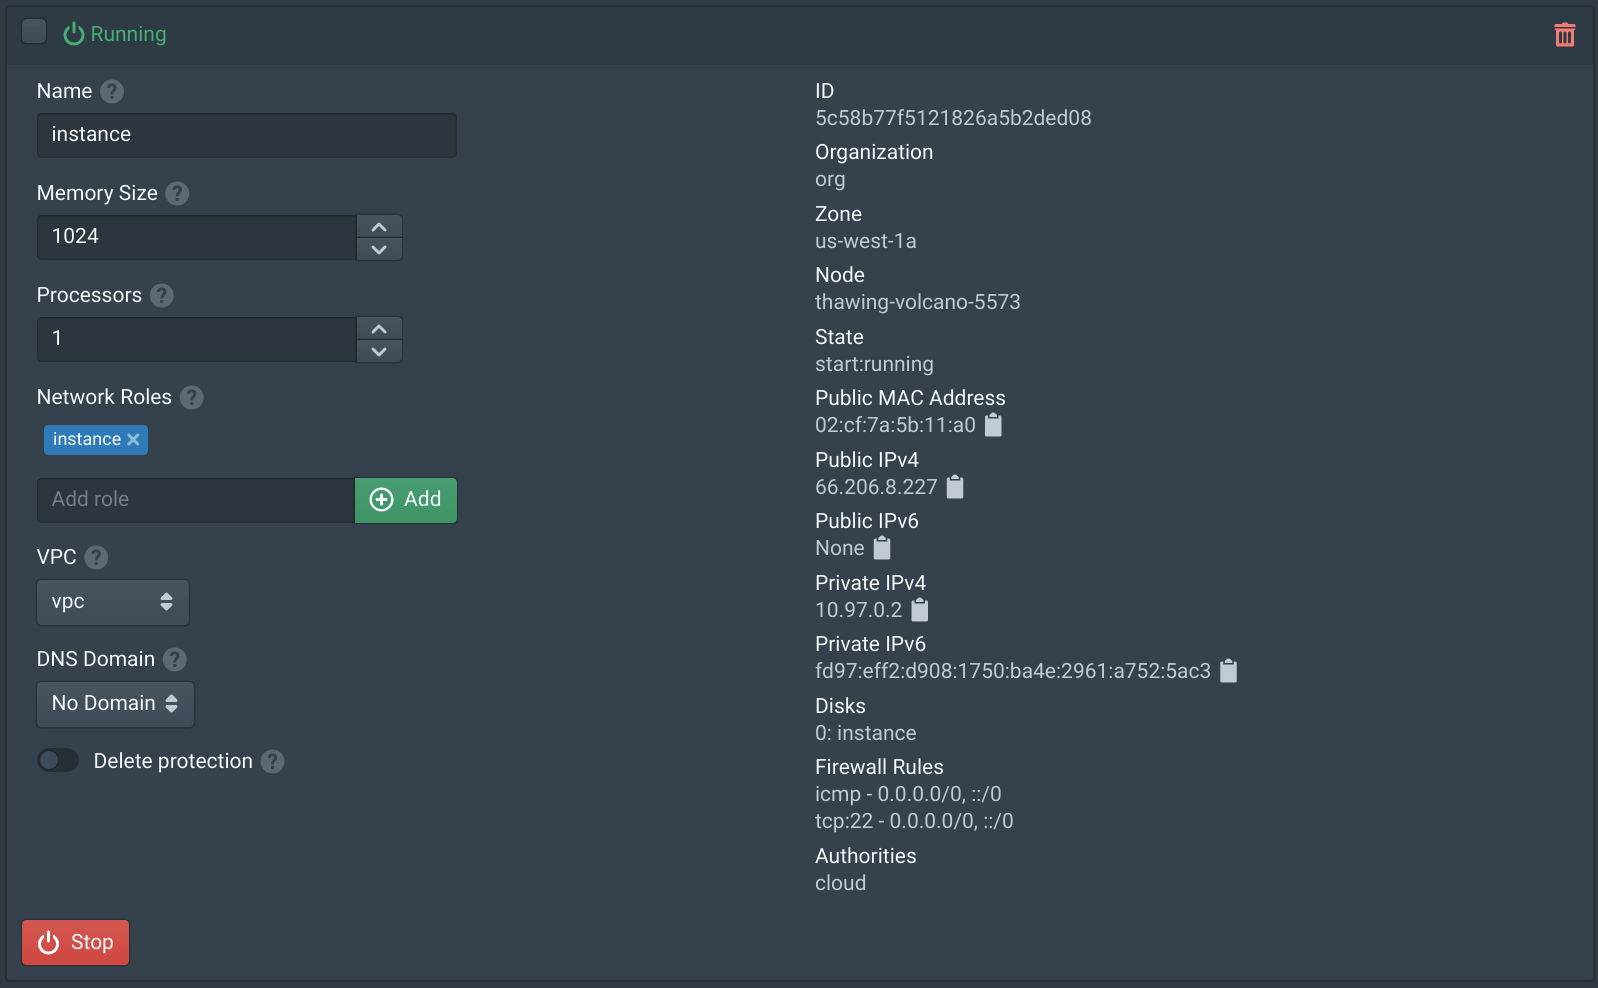
This configuration will only support the number of public IP addresses available on the Hivelocity server. Support for starting instances with private VPC only networking is coming soon.
Node Firewall (Optional)
Pritunl Cloud can also control the firewall of the host server. To do this create a firewall in the Firewalls tab. Set the name to Node and the Organization to Node Firewall. Then add node to the Network Roles. Add ports TCP 80 and 443 to allow access to the Pritunl Cloud web console. Then click Save.
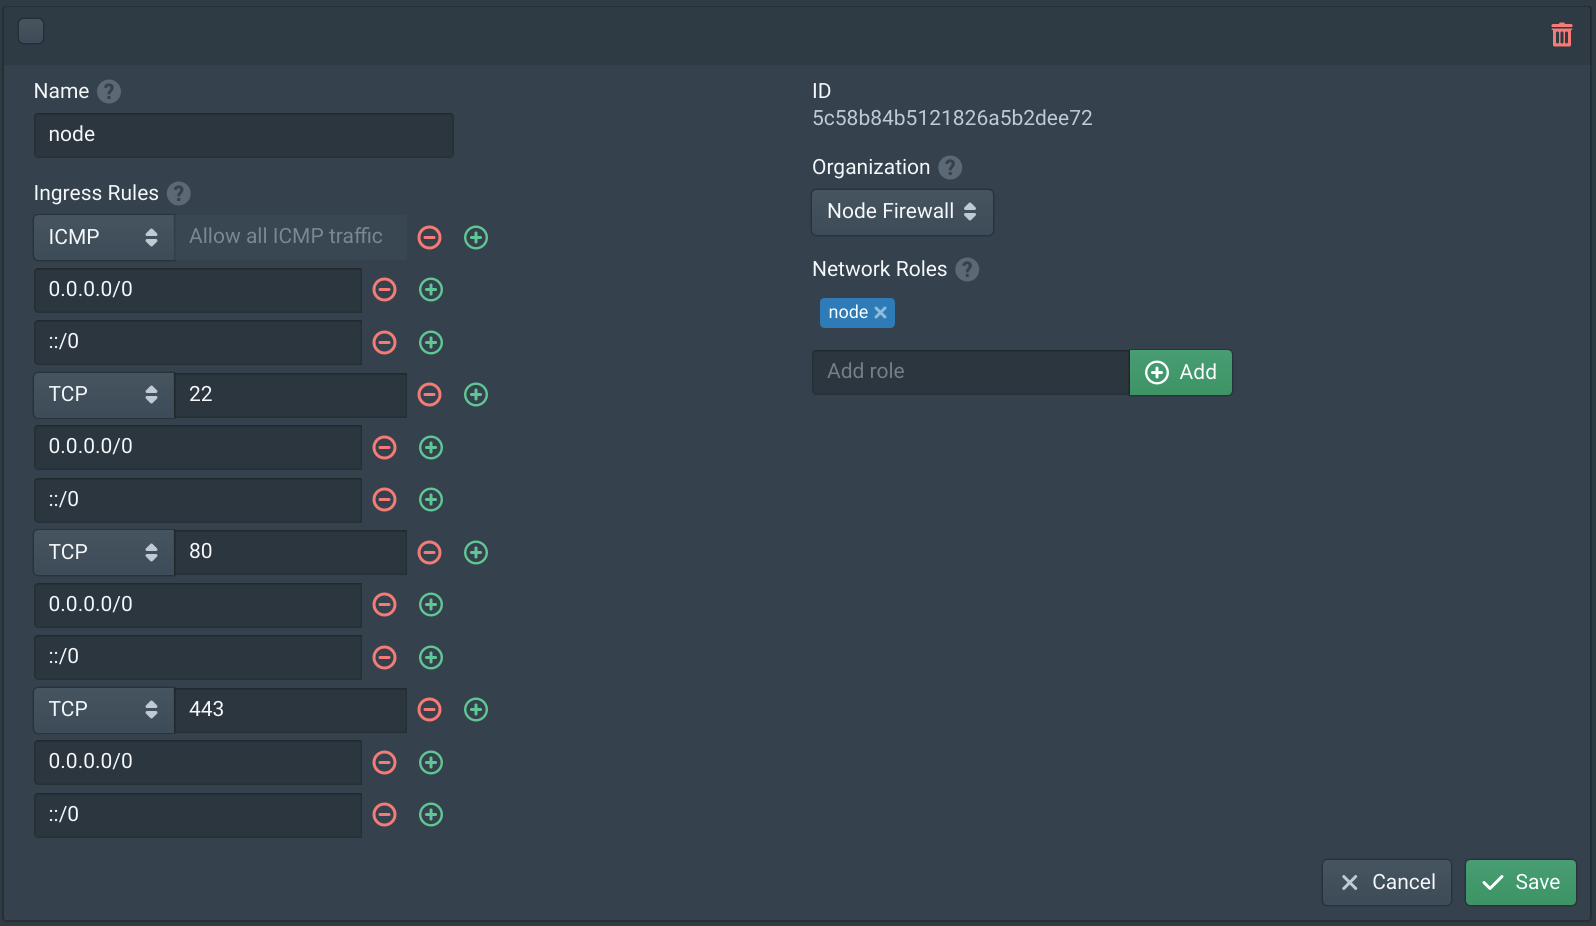
In the Nodes tab enable Firewall and add node to the Network Roles. Keep and SSH session open while configuring this to allow resetting the firewall without losing access. Then click Save.
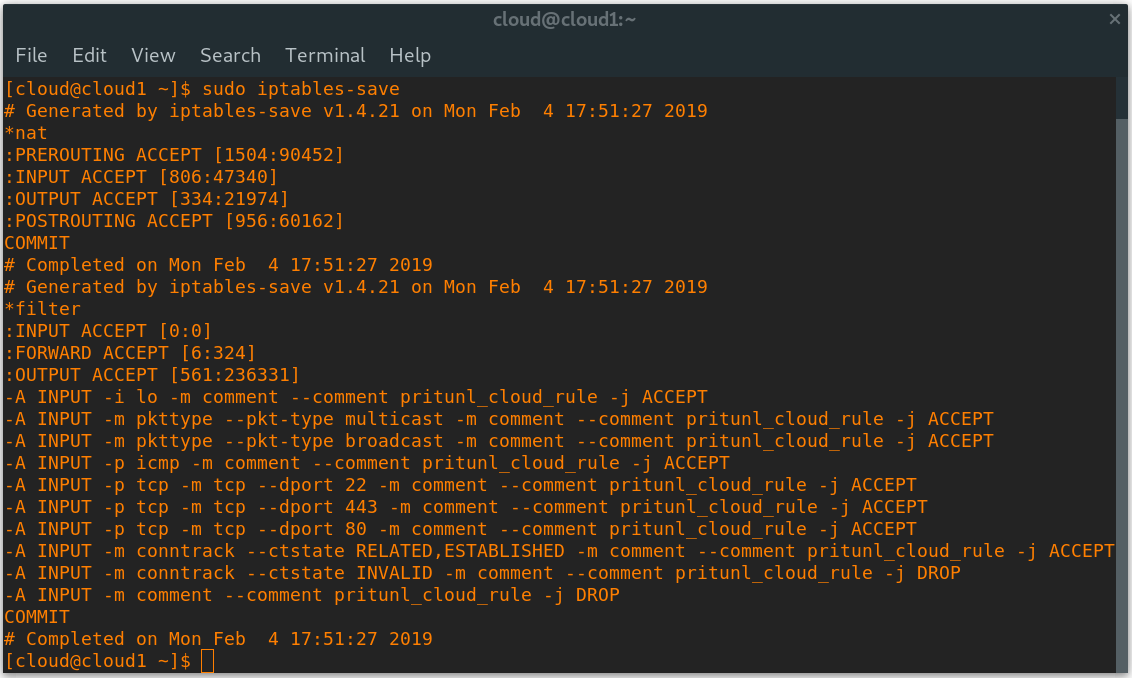
Once done running sudo iptables-save on the host should show the iptables rules. If access is lost run the command sudo iptables -F INPUT and sudo ip6tables -F INPUT to clear the rules. These will stay cleared until the Pritunl Cloud service is restart. Restarting the pritunl-cloud service
Updated about 1 month ago
